https://github.com/davidhalter/davidhalter.github.com/tree/dev (其他人修改的源码,这个源码才是最好的修改版)
https://github.com/davidhalter/davidhalter.github.com
http://jedidjah.ch/code/
demo site: http://as3.brite.biz:34284/ ,
搭建方法:
wget https://github.com/davidhalter/davidhalter.github.com/archive/dev.zip
unzip dev.zip
cd davidhalter.github.com-dev
pip install -r requirements.txt (这样rstblog就装好了)
cd _code
as3:~/rstblog/davidhalter.github.com-dev/_code# ls
2006 2007 2010 2013 2014 config.yml _templates
as3:~/rstblog/davidhalter.github.com-dev/_code# cp -r ../static/ .
as3:~/rstblog/davidhalter.github.com-dev/_code# ls
2006 2007 2010 2013 2014 config.yml static _templates
as3:~/rstblog/davidhalter.github.com-dev/_code# run-rstblog build
(这是生成静态网站的命令)
as3:~/rstblog/davidhalter.github.com-dev/_code# ls
2006 2007 2010 2013 2014 _build config.yml static _templates
(新出现了_build目录)
as3:~/rstblog/davidhalter.github.com-dev/_code# cd _build
as3:~/rstblog/davidhalter.github.com-dev/_code/_build# ls
code static
as3:~/rstblog/davidhalter.github.com-dev/_code/_build# rm -rf static
as3:~/rstblog/davidhalter.github.com-dev/_code/_build# mv code/* .
as3:~/rstblog/davidhalter.github.com-dev/_code/_build# rm -rf code
as3:~/rstblog/davidhalter.github.com-dev/_code/_build# ls
2006 2010 2014 feed.atom page tags
2007 2013 archive index.html static
as3:~/rstblog/davidhalter.github.com-dev/_code/_build#
可见~/rstblog/davidhalter.github.com-dev/_code/_build/就是静态网站的根目录。
as3:~/rstblog/davidhalter.github.com-dev/_code/_build# cd ..
as3:~/rstblog/davidhalter.github.com-dev/_code# run-rstblog build
(需要重新生成静态网站,否则文章的链接有问题)
发贴方法:
as3:~/rstblog/davidhalter.github.com-dev/_code/_build# cd ..
as3:~/rstblog/davidhalter.github.com-dev/_code#
as3:~/rstblog/davidhalter.github.com-dev/_code# ls
2006 2007 2010 2013 _build config.yml static _templates
as3:~/rstblog/davidhalter.github.com-dev/_code# mkdir -p 2014/02/25
as3:~/rstblog/davidhalter.github.com-dev/_code# nano 2014/02/25/test3.rst
格式为:
public: yes
tags: [whatever, ever]
summary: 点击标题看全文
测试3
======== (注:“等号线”的长度最好是标题长度的2倍)
这是测试3.
然后,
as3:~/rstblog/davidhalter.github.com-dev/_code# run-rstblog build
(这是生成/更新静态网站的命令)
演示站点: http://as3.brite.biz:34284/ , http://rst.brite.biz.st
项目地址: https://github.com/davidhalter/davidhalter.github.com/tree/dev
~/rstblog/davidhalter.github.com-dev/里面还有个_music目录,也可类似如上操作,
演示站点:http://as3.brite.biz:34287/, http://rst2.brite.biz.st
http://as3.brite.biz:34287/music/2013/2/5/passenger_manchester/
相应的,~/rstblog/davidhalter.github.com-dev/_music/_build/就是静态网站的根目录.
--------------------------------------------------------------------------------------
git clone https://github.com/Tukki/develop-notes rstblog-develop-notes
cd rstblog-develop-notes
as3:~/rstblog-develop-notes# ls
2011 2013 dotcloud.yml README.md _templates
2012 config.yml Makefile static
as3:~/rstblog-develop-notes# rm dotcloud.yml Makefile (此2文件是多余的)
as3:~/rstblog-develop-notes# ls
2011 2012 2013 config.yml README.md static _templates
as3:~/rstblog-develop-notes# run-rstblog build
as3:~/rstblog-develop-notes# ls
2011 2012 2013 _build config.yml README.md static _templates
(新出现了_build目录)
as3:~/rstblog-develop-notes# cd _build
as3:~/rstblog-develop-notes/_build# ls
develop-notes static
as3:~/rstblog-develop-notes/_build# rm -rf static
as3:~/rstblog-develop-notes/_build# ls
develop-notes
as3:~/rstblog-develop-notes/_build# mv develop-notes/* .
as3:~/rstblog-develop-notes/_build# ls develop-notes
as3:~/rstblog-develop-notes/_build# rm -rf develop-notes
as3:~/rstblog-develop-notes/_build# ls
2011 2012 2013 archive feed.atom index.html page README.md static tags
as3:~/rstblog-develop-notes/_build#
可见 ~/rstblog-develop-notes/_build/就是静态网站的根目录。
as3:~/rstblog-develop-notes/_build# cd ..
as3:~/rstblog-develop-notes# ls
2011 2012 2013 _build config.yml README.md static _templates
as3:~/rstblog-develop-notes# run-rstblog build
(需要重新生成静态网站,否则文章的链接有问题)
as3:~/rstblog-develop-notes# cd _build
as3:~/rstblog-develop-notes/_build# nohup Rwebserver 34670 > /dev/null &
访问http://as3.brite.biz:34670/即可看到网站效果。
发贴方法:
as3:~/rstblog-develop-notes/_build# cd ..
as3:~/rstblog-develop-notes# mkdir -p 2014/02/25/
as3:~/rstblog-develop-notes# nano 2014/02/25/test1.rst
格式为:
public: yes
tags: [misc1, misc2]
summary: 点击标题看全文
测试1
======== (注:“等号线”的长度最好是标题长度的2倍)
这是测试1.
as3:~/rstblog-develop-notes# run-rstblog build
演示站点:
http://as3.brite.biz:34670,http://as3.brite.biz:34670/develop-notes/,
http://rst-tukki.brite.biz.st ,博客实际上是装在子目录develop-notes里;访问http://rst-tukki.brite.biz.st并不能看到新发布的帖子,需访问http://rst-tukki.brite.biz.st/develop-notes/才能看到。但是
这个程序有个特点,发布新帖后,只是更新新帖,而不是覆盖/更新整个目标目录(即静态网站的根目录), 这样我们就可在静态网站的根目录里放一个起跳转作用的index.html文件,内容为:
<html>
<head>
<center>welcome to visit my blog
</center>
<meta HTTP-EQUIV=REFRESH CONTENT="1;URL=/develop-notes/">
</head>
</html>
或者内容只写<meta HTTP-EQUIV=REFRESH CONTENT="0;URL=/develop-notes/">也可。
当然得先删除原来的index.html或重命名。
修改者的演示站点:http://tukki.github.io/develop-notes
项目地址:https://github.com/Tukki/develop-notes (注意看其config.yml文件和static目录里的style.css文件)
----------------------------------
git clone https://github.com/Pasanpr/blog rstblog-pasanpr
cd rstblog-pasanpr
as3:~/rstblog-pasanpr# ls
2013 _build fabfile.py README.md talks.rst
2014 config.yml gensitemap.py requirements.txt _templates
about.rst contact.rst reading.rst static
as3:~/rstblog-pasanpr# cd 2014
as3:~/rstblog-pasanpr/2014# mkdir -p 04/19/
as3:~/rstblog-pasanpr/2014# cd 04/19/
as3:~/rstblog-pasanpr/2014/04/19# nano mountain-song.rst
格式为:
public: yes
tags: [whatever, ever]
summary: 点击标题看全文
山歌好比春江水
====================
.. raw:: html
(这里还要空一行)
<embed ...></embed>
上面的<embed 要往右空3格才写!
然后,
as3:~/rstblog-pasanpr/2014/04/19# cd ~/rstblog-pasanpr
as3:~/rstblog-pasanpr# ls
2013 _build fabfile.py README.md talks.rst
2014 config.yml gensitemap.py requirements.txt _templates
about.rst contact.rst reading.rst static
as3:~/rstblog-pasanpr# run-rstblog build
http://as3.brite.biz:34283/
from http://www.pasanpremaratne.com/2013/12/26/setting-up-my-static-blog/
-------------------------------------------------------------
git clone https://github.com/mitsuhiko/rstblog.git
cd rstblog
pip install .
pip install pygments
mkdir static _templates 2013
nano config.yml
(Create a new config.yml file and fill it like this:
active_modules: [pygments, tags, blog]
author: ym
canonical_url: http://rst.brite.biz/
feed:
name: My Blog or whatever
subtitle: whatever you want
modules:
pygments:
style: tango
注意:Pay attention to the indentation: no tabs and every level MUST be indented by 2 spaces.)
cp -r rstblog/templates/* _templates/
nano _templates/layout.html (内容如下)
<html>
<head>
<meta charset=utf-8>
{% block htmlhead %}
<title>{% block title %}Home{% endblock %} | Your Name or Whatever</title>
<link rel="stylesheet" href="/static/style.css" type="text/css">
<link href="/feed.atom" rel="alternate"
title="Your atom feed title" type="application/atom+xml">
{%- for link in links %}
<link rel="{{ link.rel }}" href="{{ link.href }}"{%
if link.media %} media="{{ link.media }}"{% endif %} type="{{ link.type }}">
{%- endfor %}
{% endblock %}
</head>
<body>
<div class=container>
<div class=header>
<a href="/about/">YM</a>'s Blog
</div>
<div class=navigation>
<ul>
<li><a href="/">blog</a>
<li><a href="/archive/">archive</a>
<li><a href="/tags/">tags</a>
<li><a href="/about/">about</a>
</ul>
</div>
<div class=body>
{% block body %}{% endblock %}
</div>
<div class=footer>
<p>© Copyright {{ format_date(format='YYYY') }} by YM.
<p>
Content licensed under the Creative Commons
attribution-noncommercial-sharealike License.
<p>
Contact me via <a href="mailto:ME@example.com">mail</a>,
<a href="http://twitter.com/username">twitter</a>,
<a href="http://github.com/username">github</a> or
<a href="http://bitbucket.org/username">bitbucket</a>.
(<a href="/feed.atom" rel="alternate" title="YM'S BLOG feed">feed</a>)
</div>
</div>
</body>
</html>
mkdir -p 2013/12/16
(Create and edit your first blog post 2013/12/16/my_first_post.rst using restructured text syntax:)
nano 2013/12/16/my_first_post.rst
格式为:
public: yes
tags: [whatever, ever]
summary: This is my first blog post
My First Blog post (这是标题)
==================
这是测试1.
nano about.rst
(内容为:
public: yes
tags: [whatever, ever]
about this blog
===============
这是ym's blog. )
as3:~/rstblog/rstblog# run-rstblog build (这是生成静态网站的命令)
as3:~/rstblog/rstblog# ls
2013 _build config.yml MANIFEST.in rstblog static
bootstrap.py buildout.cfg LICENSE README setup.py _templates
as3:~/rstblog/rstblog# ls _build
2013 bootstrap.py feed.atom LICENSE rstblog static
archive buildout.cfg index.html MANIFEST.in setup.py tags
as3:~/rstblog/rstblog# cd _build
as3:~/rstblog/rstblog/_build# nohup Rwebserver 4528 > /dev/null &
访问http://as3.brite.biz:4528/,即可看到网站效果。~/rstblog/rstblog/_build/就是静态网站的根目录。
网站不太漂亮。你可在static/目录下创建一个style.css以美化你的网站。
demo site: http://rst2.brite.biz/
项目地址:https://github.com/mitsuhiko/rstblog,
fork 版本:https://github.com/Tukki/rstblog,
https://github.com/Tukki/develop-notes (注意看其config.yml文件和static目录里的style.css文件)
(演示:http://tukki.github.io/develop-notes)
注:复制了https://github.com/Tukki/develop-notes/blob/master/static/style.css页面的style.css文件的内容到static/目录下我新建的style.css文件里,然后访问
http://rst2.brite.biz,网站果然漂亮多了。
----------------------------------
rstblog的另外一种更省事的搭建方法
git clone git://github.com/cpdean/rstblog-skeleton.git
cd rstblog-skeleton
make install
mkdir -p 2013/12/30/
nano 2013/12/30/test1.rst
格式为:
public: yes
tags: [firstpost, python]
summary: |
点击标题看全文
test1
===
这是测试1.
然后:
as3:~/rstblog-skeleton# make build
as3:~/rstblog-skeleton# ls
2012 blog-host _drafts Makefile rstblog
2013 _build _e output static
about.rst config.yml _install.sh README.markdown _templates
(新出现了_build目录)
as3:~/rstblog-skeleton# cd _build
as3:~/rstblog-skeleton/_build# ls
2012 about blog-host index.html static
2013 archive feed.atom README.markdown tags
as3:~/rstblog-skeleton/_build#
可见~/rstblog-skeleton/_build/就是你静态网站的根目录。
as3:~/rstblog-skeleton/_build# nohup Rwebserver 34258 > /dev/null &
访问http://as3.brite.biz:34258/,即可看到网站效果。
项目地址:https://github.com/cpdean/rstblog-skeleton
--------------------------------------------------------------------
Hi, and welcome on my site. First off, I want to tell you something about the static blogging engine I use. It's called rstblog and it has been written by Armin Ronacher. I discovered this fine piece of software when I stumbled over Armins's blog entry Python and the Principle of Least Astonishment.
These are my key points for choosing rstblog:
First off, adjust the config file (config.yml) to suit your needs.
The special folder _templates contains the Jinja2 template(s) that rstblog
uses to create your blog. Just create the file layout.html, which is the most
important building block for producing your blog.
Now point your browser to http://127.0.0.1:5000 to view the results of your
work. The about entry should work as well: http://127.0.0.1:5000/about.
This might also help you to setup your own rstblog site.
FROM http://nblock.org/2011/08/31/1st-blogpost/
------------------------------------------------------------------
For about six months now I've been using Armin Ronacher's minimalist blog "platform", rstblog. For static blogs like this one, it's great. However, it is definitely not a plug-and-play blog solution. It has definitely had a learning curve, but nothing too intimidating. This post will describe some of my experiences with rstblog over the past six months, and some of the optimizations I've made to the publishing process.
Before I go any further, I want to thank Morten Siebuhr, whose excellent blog post on rstblog helped me both configure and maintain my blog. He illuminated some of the general points of rstblog, and before you go any further, please read it.
For example, if use vim and you're working on an entry titled "Matt's birthday" for June 3, 2011, you'll do:
If vim does an auto-save/backup of your file mid-edit, you may wind
up with a matts-birthday.rst~ file in the directory along with
matts-birthday.rst. rstblog's build process will create a blog entry for
each. So make sure you somehow curate your directories and remove
extraneous files. (For emacs, I added the following to my .emacs file:
If you use anything else, you're on your own).
A word about CSS: Use Blueprint for organizing and maintaining your CSS files. It makes things a million times easier once you get the hang of it. The finer points of Blueprint are beyond the scope of this post, but here is my bash alias I use to roll any CSS changes into my build:
I am 100% sure I'm doing it wrong with Pygments. I have the styles
hard-coded in my stylesheet, which I don't think I need to do. rstblog
has support for Pygments, so it doesn't make sense that I'd need to put
them in my stylesheet. However, it's done, it works, it looks how I
want, so fixing it is an extremely low priority. If you've got insight
on how this actually works, I'm all ears!
FROM http://mattdeboard.net/2011/05/09/more-tips-on-rstblog/
https://github.com/davidhalter/davidhalter.github.com
http://jedidjah.ch/code/
demo site: http://as3.brite.biz:34284/ ,
搭建方法:
wget https://github.com/davidhalter/davidhalter.github.com/archive/dev.zip
unzip dev.zip
cd davidhalter.github.com-dev
pip install -r requirements.txt (这样rstblog就装好了)
cd _code
as3:~/rstblog/davidhalter.github.com-dev/_code# ls
2006 2007 2010 2013 2014 config.yml _templates
as3:~/rstblog/davidhalter.github.com-dev/_code# cp -r ../static/ .
as3:~/rstblog/davidhalter.github.com-dev/_code# ls
2006 2007 2010 2013 2014 config.yml static _templates
as3:~/rstblog/davidhalter.github.com-dev/_code# run-rstblog build
(这是生成静态网站的命令)
as3:~/rstblog/davidhalter.github.com-dev/_code# ls
2006 2007 2010 2013 2014 _build config.yml static _templates
(新出现了_build目录)
as3:~/rstblog/davidhalter.github.com-dev/_code# cd _build
as3:~/rstblog/davidhalter.github.com-dev/_code/_build# ls
code static
as3:~/rstblog/davidhalter.github.com-dev/_code/_build# rm -rf static
as3:~/rstblog/davidhalter.github.com-dev/_code/_build# mv code/* .
as3:~/rstblog/davidhalter.github.com-dev/_code/_build# rm -rf code
as3:~/rstblog/davidhalter.github.com-dev/_code/_build# ls
2006 2010 2014 feed.atom page tags
2007 2013 archive index.html static
as3:~/rstblog/davidhalter.github.com-dev/_code/_build#
可见~/rstblog/davidhalter.github.com-dev/_code/_build/就是静态网站的根目录。
as3:~/rstblog/davidhalter.github.com-dev/_code/_build# cd ..
as3:~/rstblog/davidhalter.github.com-dev/_code# run-rstblog build
(需要重新生成静态网站,否则文章的链接有问题)
发贴方法:
as3:~/rstblog/davidhalter.github.com-dev/_code/_build# cd ..
as3:~/rstblog/davidhalter.github.com-dev/_code#
as3:~/rstblog/davidhalter.github.com-dev/_code# ls
2006 2007 2010 2013 _build config.yml static _templates
as3:~/rstblog/davidhalter.github.com-dev/_code# mkdir -p 2014/02/25
as3:~/rstblog/davidhalter.github.com-dev/_code# nano 2014/02/25/test3.rst
格式为:
public: yes
tags: [whatever, ever]
summary: 点击标题看全文
测试3
======== (注:“等号线”的长度最好是标题长度的2倍)
这是测试3.
然后,
as3:~/rstblog/davidhalter.github.com-dev/_code# run-rstblog build
(这是生成/更新静态网站的命令)
演示站点: http://as3.brite.biz:34284/ , http://rst.brite.biz.st
项目地址: https://github.com/davidhalter/davidhalter.github.com/tree/dev
~/rstblog/davidhalter.github.com-dev/里面还有个_music目录,也可类似如上操作,
演示站点:http://as3.brite.biz:34287/, http://rst2.brite.biz.st
http://as3.brite.biz:34287/music/2013/2/5/passenger_manchester/
相应的,~/rstblog/davidhalter.github.com-dev/_music/_build/就是静态网站的根目录.
--------------------------------------------------------------------------------------
git clone https://github.com/Tukki/develop-notes rstblog-develop-notes
cd rstblog-develop-notes
as3:~/rstblog-develop-notes# ls
2011 2013 dotcloud.yml README.md _templates
2012 config.yml Makefile static
as3:~/rstblog-develop-notes# rm dotcloud.yml Makefile (此2文件是多余的)
as3:~/rstblog-develop-notes# ls
2011 2012 2013 config.yml README.md static _templates
as3:~/rstblog-develop-notes# run-rstblog build
as3:~/rstblog-develop-notes# ls
2011 2012 2013 _build config.yml README.md static _templates
(新出现了_build目录)
as3:~/rstblog-develop-notes# cd _build
as3:~/rstblog-develop-notes/_build# ls
develop-notes static
as3:~/rstblog-develop-notes/_build# rm -rf static
as3:~/rstblog-develop-notes/_build# ls
develop-notes
as3:~/rstblog-develop-notes/_build# mv develop-notes/* .
as3:~/rstblog-develop-notes/_build# ls develop-notes
as3:~/rstblog-develop-notes/_build# rm -rf develop-notes
as3:~/rstblog-develop-notes/_build# ls
2011 2012 2013 archive feed.atom index.html page README.md static tags
as3:~/rstblog-develop-notes/_build#
可见 ~/rstblog-develop-notes/_build/就是静态网站的根目录。
as3:~/rstblog-develop-notes/_build# cd ..
as3:~/rstblog-develop-notes# ls
2011 2012 2013 _build config.yml README.md static _templates
as3:~/rstblog-develop-notes# run-rstblog build
(需要重新生成静态网站,否则文章的链接有问题)
as3:~/rstblog-develop-notes# cd _build
as3:~/rstblog-develop-notes/_build# nohup Rwebserver 34670 > /dev/null &
访问http://as3.brite.biz:34670/即可看到网站效果。
发贴方法:
as3:~/rstblog-develop-notes/_build# cd ..
as3:~/rstblog-develop-notes# mkdir -p 2014/02/25/
as3:~/rstblog-develop-notes# nano 2014/02/25/test1.rst
格式为:
public: yes
tags: [misc1, misc2]
summary: 点击标题看全文
测试1
======== (注:“等号线”的长度最好是标题长度的2倍)
这是测试1.
as3:~/rstblog-develop-notes# run-rstblog build
演示站点:
http://as3.brite.biz:34670,http://as3.brite.biz:34670/develop-notes/,
http://rst-tukki.brite.biz.st ,博客实际上是装在子目录develop-notes里;访问http://rst-tukki.brite.biz.st并不能看到新发布的帖子,需访问http://rst-tukki.brite.biz.st/develop-notes/才能看到。但是
这个程序有个特点,发布新帖后,只是更新新帖,而不是覆盖/更新整个目标目录(即静态网站的根目录), 这样我们就可在静态网站的根目录里放一个起跳转作用的index.html文件,内容为:
<html>
<head>
<center>welcome to visit my blog
</center>
<meta HTTP-EQUIV=REFRESH CONTENT="1;URL=/develop-notes/">
</head>
</html>
或者内容只写<meta HTTP-EQUIV=REFRESH CONTENT="0;URL=/develop-notes/">也可。
当然得先删除原来的index.html或重命名。
修改者的演示站点:http://tukki.github.io/develop-notes
项目地址:https://github.com/Tukki/develop-notes (注意看其config.yml文件和static目录里的style.css文件)
----------------------------------
git clone https://github.com/Pasanpr/blog rstblog-pasanpr
cd rstblog-pasanpr
as3:~/rstblog-pasanpr# ls
2013 _build fabfile.py README.md talks.rst
2014 config.yml gensitemap.py requirements.txt _templates
about.rst contact.rst reading.rst static
as3:~/rstblog-pasanpr# cd 2014
as3:~/rstblog-pasanpr/2014# mkdir -p 04/19/
as3:~/rstblog-pasanpr/2014# cd 04/19/
as3:~/rstblog-pasanpr/2014/04/19# nano mountain-song.rst
格式为:
public: yes
tags: [whatever, ever]
summary: 点击标题看全文
山歌好比春江水
====================
.. raw:: html
(这里还要空一行)
<embed ...></embed>
上面的<embed 要往右空3格才写!
然后,
as3:~/rstblog-pasanpr/2014/04/19# cd ~/rstblog-pasanpr
as3:~/rstblog-pasanpr# ls
2013 _build fabfile.py README.md talks.rst
2014 config.yml gensitemap.py requirements.txt _templates
about.rst contact.rst reading.rst static
as3:~/rstblog-pasanpr# run-rstblog build
http://as3.brite.biz:34283/
from http://www.pasanpremaratne.com/2013/12/26/setting-up-my-static-blog/
-------------------------------------------------------------
git clone https://github.com/mitsuhiko/rstblog.git
cd rstblog
pip install .
pip install pygments
mkdir static _templates 2013
nano config.yml
(Create a new config.yml file and fill it like this:
active_modules: [pygments, tags, blog]
author: ym
canonical_url: http://rst.brite.biz/
feed:
name: My Blog or whatever
subtitle: whatever you want
modules:
pygments:
style: tango
注意:Pay attention to the indentation: no tabs and every level MUST be indented by 2 spaces.)
cp -r rstblog/templates/* _templates/
nano _templates/layout.html (内容如下)
<html>
<head>
<meta charset=utf-8>
{% block htmlhead %}
<title>{% block title %}Home{% endblock %} | Your Name or Whatever</title>
<link rel="stylesheet" href="/static/style.css" type="text/css">
<link href="/feed.atom" rel="alternate"
title="Your atom feed title" type="application/atom+xml">
{%- for link in links %}
<link rel="{{ link.rel }}" href="{{ link.href }}"{%
if link.media %} media="{{ link.media }}"{% endif %} type="{{ link.type }}">
{%- endfor %}
{% endblock %}
</head>
<body>
<div class=container>
<div class=header>
<a href="/about/">YM</a>'s Blog
</div>
<div class=navigation>
<ul>
<li><a href="/">blog</a>
<li><a href="/archive/">archive</a>
<li><a href="/tags/">tags</a>
<li><a href="/about/">about</a>
</ul>
</div>
<div class=body>
{% block body %}{% endblock %}
</div>
<div class=footer>
<p>© Copyright {{ format_date(format='YYYY') }} by YM.
<p>
Content licensed under the Creative Commons
attribution-noncommercial-sharealike License.
<p>
Contact me via <a href="mailto:ME@example.com">mail</a>,
<a href="http://twitter.com/username">twitter</a>,
<a href="http://github.com/username">github</a> or
<a href="http://bitbucket.org/username">bitbucket</a>.
(<a href="/feed.atom" rel="alternate" title="YM'S BLOG feed">feed</a>)
</div>
</div>
</body>
</html>
mkdir -p 2013/12/16
(Create and edit your first blog post 2013/12/16/my_first_post.rst using restructured text syntax:)
nano 2013/12/16/my_first_post.rst
格式为:
public: yes
tags: [whatever, ever]
summary: This is my first blog post
My First Blog post (这是标题)
==================
这是测试1.
nano about.rst
(内容为:
public: yes
tags: [whatever, ever]
about this blog
===============
这是ym's blog. )
as3:~/rstblog/rstblog# run-rstblog build (这是生成静态网站的命令)
as3:~/rstblog/rstblog# ls
2013 _build config.yml MANIFEST.in rstblog static
bootstrap.py buildout.cfg LICENSE README setup.py _templates
as3:~/rstblog/rstblog# ls _build
2013 bootstrap.py feed.atom LICENSE rstblog static
archive buildout.cfg index.html MANIFEST.in setup.py tags
as3:~/rstblog/rstblog# cd _build
as3:~/rstblog/rstblog/_build# nohup Rwebserver 4528 > /dev/null &
访问http://as3.brite.biz:4528/,即可看到网站效果。~/rstblog/rstblog/_build/就是静态网站的根目录。
网站不太漂亮。你可在static/目录下创建一个style.css以美化你的网站。
demo site: http://rst2.brite.biz/
项目地址:https://github.com/mitsuhiko/rstblog,
fork 版本:https://github.com/Tukki/rstblog,
https://github.com/Tukki/develop-notes (注意看其config.yml文件和static目录里的style.css文件)
(演示:http://tukki.github.io/develop-notes)
注:复制了https://github.com/Tukki/develop-notes/blob/master/static/style.css页面的style.css文件的内容到static/目录下我新建的style.css文件里,然后访问
http://rst2.brite.biz,网站果然漂亮多了。
----------------------------------
rstblog的另外一种更省事的搭建方法
git clone git://github.com/cpdean/rstblog-skeleton.git
cd rstblog-skeleton
make install
mkdir -p 2013/12/30/
nano 2013/12/30/test1.rst
格式为:
public: yes
tags: [firstpost, python]
summary: |
点击标题看全文
test1
===
这是测试1.
然后:
as3:~/rstblog-skeleton# make build
as3:~/rstblog-skeleton# ls
2012 blog-host _drafts Makefile rstblog
2013 _build _e output static
about.rst config.yml _install.sh README.markdown _templates
(新出现了_build目录)
as3:~/rstblog-skeleton# cd _build
as3:~/rstblog-skeleton/_build# ls
2012 about blog-host index.html static
2013 archive feed.atom README.markdown tags
as3:~/rstblog-skeleton/_build#
可见~/rstblog-skeleton/_build/就是你静态网站的根目录。
as3:~/rstblog-skeleton/_build# nohup Rwebserver 34258 > /dev/null &
访问http://as3.brite.biz:34258/,即可看到网站效果。
项目地址:https://github.com/cpdean/rstblog-skeleton
--------------------------------------------------------------------
About using the static blogging engine rstblog
Hi, and welcome on my site. First off, I want to tell you something about the static blogging engine I use. It's called rstblog and it has been written by Armin Ronacher. I discovered this fine piece of software when I stumbled over Armins's blog entry Python and the Principle of Least Astonishment.
These are my key points for choosing rstblog:
- Free software (BSD)
- Simple
- Produces static output
- Written in Python
- Write blog entries with vim
- Manage blog entries with git
- Does the trick for me
Installation
You can either checkout and build rstblog from source or use my PKGBUILD file in case you are an Arch Linux user.Getting started
rstblog requires a certain directory structure to produce your blog. Here is the layout of example.org, a simple blog:example.org
├── 2011
│ ├── 08
│ │ └── 31
│ │ └── 1st-blogpost.rst
│ └── 09
│ └── 15
│ ├── nice.rst
│ └── story.rst
├── about.rst
├── config.yml
└── _templates
└── layout.html
To get started, just download the example above.First off, adjust the config file (config.yml) to suit your needs.
---
active_modules: [pygments, tags, blog, latex]
author: your name
canonical_url: http://example.org
modules:
  pygments:
    style: friendly
<!doctype html>
<html>
  <head>
    <meta charset=utf-8>
    <title>{% block title %}{% endblock %}</title>
    <link href="/feed.atom" rel="alternate" title="Feed" type="application/atom+xml">
  </head>
  <body>
    <ul>
      <li><a href="/">home</a></li>
      <li><a href="/archive/">archive</a></li>
      <li><a href="/tags/">tags</a></li>
    </ul>
    {% block body %}{% endblock %}
  </body>
</html>
Blog entries
rstblog distinguishes (sort of) between two different blog entries:
- Regular blog entries
- Static blog entries
Regular blog entries
Regular blog entries should be put in a directory structure that looks like this: year/month/day. Create such a structure and put your first blog entry (my-first-blog-entry.rst) in there.public: yes
tags: [rstblog, firsttry]
summary: |
This is my first blog entry
My first blog entry
===================
Hello World!
Static blog entries
rstblog also allows you to create static blog entries such as an about page. Simply put a rst formatted file in the root directory of your blog.public: yes
About me
========
This is me.
Building the blog
Finally, build and view the result:$ run-rstblog build
$ run-rstblog serve
Serving on http://127.0.0.1:5000/
Additional stuff
Static content
Static content (css files, js files, …) should be placed in the directory static. During the build process the content of this folder will be copied to the directory _build/static. You can easily link to them from your blog entries using `target </static/target>`_.Design
Your layout.html file contains Jinja2 templating code. What's missing is a css file that nicely formats your content. Just create one and put it into the directory static. Don't forget to link to it in your layout.html!Tagging
Tagging is a nice feature that helps classifying blog entries. The first blog entry (Regular blog entries) already uses two tags, rstblog and firsttry. These tags will be used to create a tag overview page, viewable at http://127.0.0.1:5000/tags. Use as many tags as you like to classify your content.Customize blog generation
In the default setting rstblog will build archive and tag pages for you. This is of course also template based. If you wish to modify some of the templates, copy the affected files from rstblog/rstblog/templates to your _templates folder and adjust them accordingly.Publish your blog
This is really simple. Just copy your _build folder to your public html folder and you are done.Further information
This cheat sheet might be interesting if you need some hints for writing content in reStructuredText.This might also help you to setup your own rstblog site.
FROM http://nblock.org/2011/08/31/1st-blogpost/
------------------------------------------------------------------
My guide to rstblog
For about six months now I've been using Armin Ronacher's minimalist blog "platform", rstblog. For static blogs like this one, it's great. However, it is definitely not a plug-and-play blog solution. It has definitely had a learning curve, but nothing too intimidating. This post will describe some of my experiences with rstblog over the past six months, and some of the optimizations I've made to the publishing process.
Before I go any further, I want to thank Morten Siebuhr, whose excellent blog post on rstblog helped me both configure and maintain my blog. He illuminated some of the general points of rstblog, and before you go any further, please read it.
Some background
First, rstblog is so called because it is powered by reStructuredText, a very powerful, easy-to-grok markup syntax. (It's right up there with Fabric on my "Idiot-Proof/Time-Saving" graph.) I never realized how pervasive rst is, until I decided to move to rstblog from Tumblr. Using Armin's blog platform (which he calls a "Not-invented-here site generator") has paid dividends just in terms of the knowledge of rst I've been forced to acquire.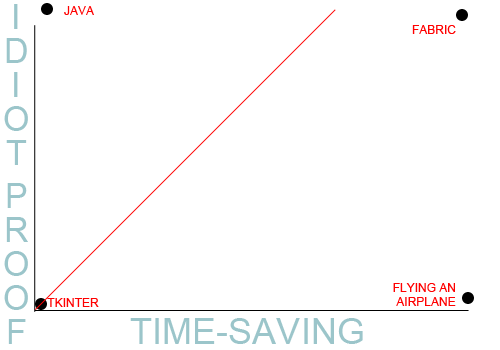
- Some other concepts & tech with which I've had to get familiar in support of rstblog:
- YAML - Specifically, getting a grip on how finicky it can be about whitespace.
- Makefiles - I knew make is how Linux compiles or otherwise builds software. But I was not aware of how to put Makefiles into play to control this behavior. (I'm really getting sick of mentioning this guy here, but Brett Hoerner has a simple Makefile here that I incorporated into my own workflow.)
- virtualenv - Though virtualenv is now so pervasive in my dev work that I don't really remember a time when I wasn't using it, I know I first used it for my blog. I consider this to be a canonical explanation of why virtualenv is great. (Not that I'm a keeper of canon or anything.)
- RVM - I use Blueprint to manage CSS files for each of my websites. Blueprint requires Ruby. I'm an idiot, so I need Ruby Version Manager to help me be not stupid.
Workflow
The big, tough nut to crack for rstblog, from my perspective, has been workflow. Nowadays, mine looks like this:Pretty fast. It's nearly instant. However, there were some confusing spots when I first started.
- Fire up emacs on my local machine and create blog post.
- Tab over to terminal, cd to my blog's root directory (still on local machine).
- $ make clean
- $ make build
- $ make upload
- ???
- Publish
Stay local
First, note that I did no work on the server hosting my blog, excepting the initial directory creation. Everything was created locally, and my Makefile took care of pushing data to my live server, courtesy of scp. Don't make the mistake I did last December/January in doing all the work on the remote end. Make a single /blog/ directory on your local machine and use that as your staging area.Beware extraneous files
The second thing to be aware of is that the build process for rstblog is a big vacuum. It does not discern between .rst, .rst~, #foo.rst#, overmyhead.jpg, asco.png, etc., files. It will create a blog entry for every file that is in either a <yyyy>/<mm>/<dd>/ format directory or in the blog's root directory (mine is /a/mattdeboard.net/blog on my local machine). Before you make build, ensure that there's nothing but entry.rst in that day's directory.For example, if use vim and you're working on an entry titled "Matt's birthday" for June 3, 2011, you'll do:
matt@Ubuntu:/a/mattdeboard.net/blog$ mkdir -p 2011/06/03
matt@Ubuntu:/a/mattdeboard.net/blog$ vim 2011/06/03/matts-birthday.rst
(setq backup-directory-alist '(("." . "~/.emacs_backups")))
index.html wonkiness
I found that when I accidentally created unwanted blog entries as described above, they were really persistent about sticking around my root index.html file. Finally I figured out that I had to delete the remote blog/index.html file and re-make upload. That fixes it.CSS & syntax highlighting
As you may be able to tell, I'm as excited as a puppy who just found his penis about syntax highlighting in my blog posts. That's because I recently figured out how to get it working using Pygments and CSS.A word about CSS: Use Blueprint for organizing and maintaining your CSS files. It makes things a million times easier once you get the hang of it. The finer points of Blueprint are beyond the scope of this post, but here is my bash alias I use to roll any CSS changes into my build:
alias er="cd /a/mattdeboard.net; . bin/activate; cd /home/matt/blueprint/lib/; ruby compress.rb -p blog; cd /a/mattdeboard.net/blog; make clean; make build"
Conclusion
I like having this much control over the under-the-hood components of my blog. If you don't see the need, it's probably not worth the time investment. However, if you're a relative newcomer to Linux and/or Python, and you have the desire to learn more about both while simultaneously wanting to stab yourself in the face occasionally, I strongly recommend checking out rstblog. It is a great vehicle for self-education.FROM http://mattdeboard.net/2011/05/09/more-tips-on-rstblog/