首先 fork这个项目https://github.com/WQhuanm/Issue_Blog,我fork后的地址是
https://github.com/briteming/Issue_Blog/
一,配置
必须执行的操作(require)
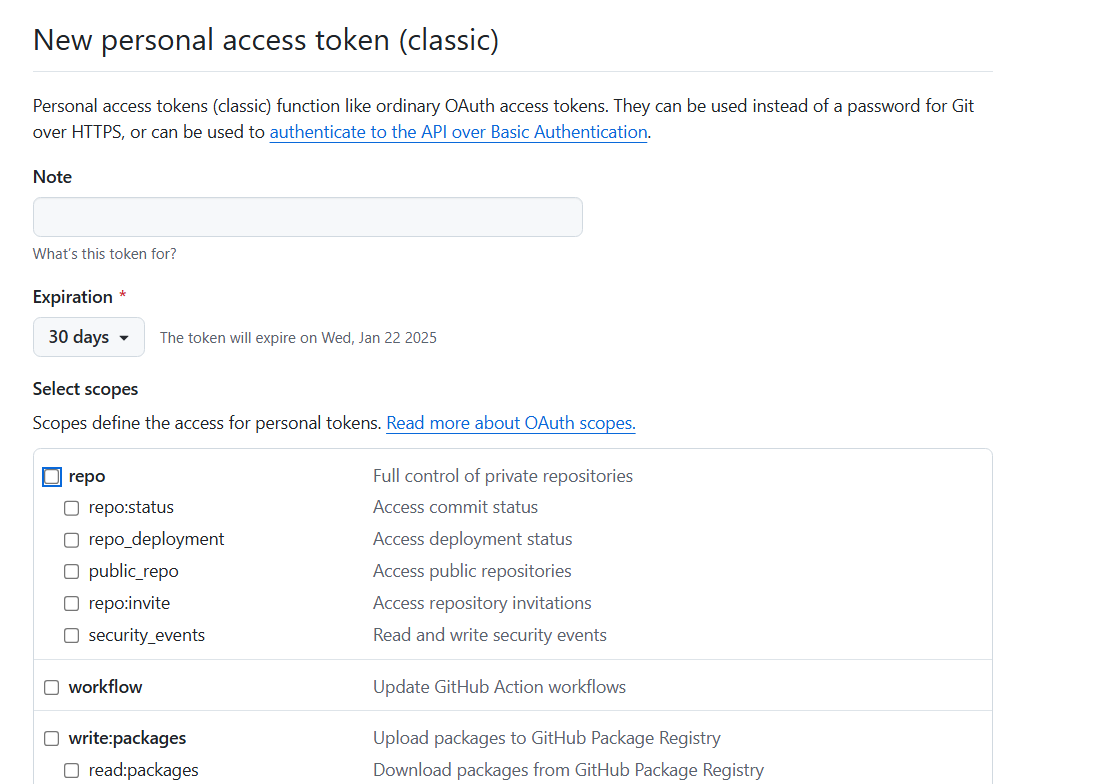
1. 获取你的access token. (点击这个网址,点击右上角的 Generate new token,起个名字)
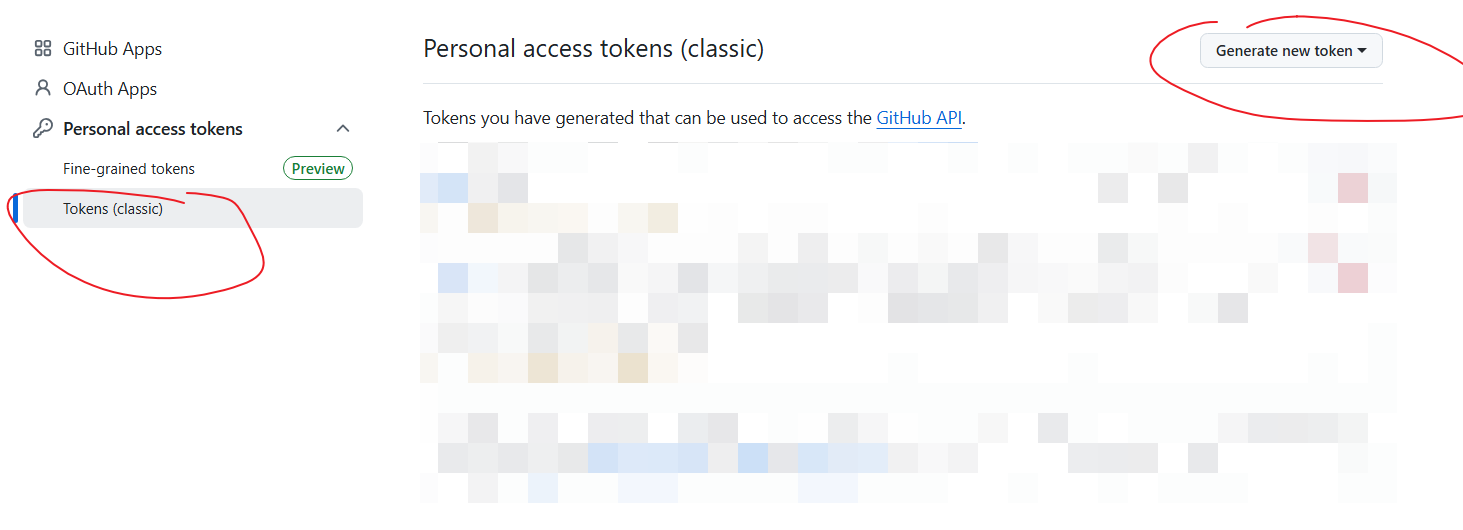
可以给你的token备注个名字(Note)。
有效期建议无限,否则每次过期你需要重新替换。
后面权限建议全部勾选,以防workflow权限不够。(我生成的是Fine-grained personal access tokens,全部的权限选择的都是 read and write.如果碰上只有 read权限的,就选择read权限)
最后Generate token便可获取,注意保存这个字符串,只会出现这一次.

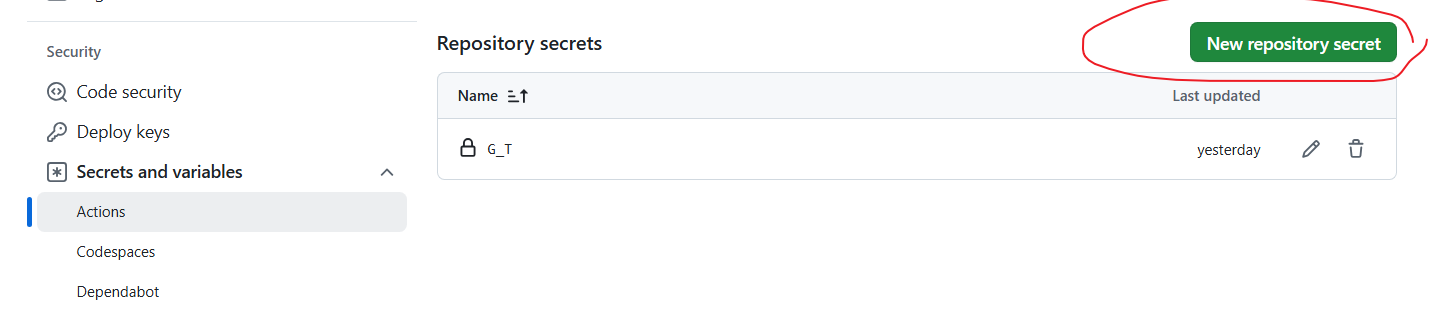
2. 在你的博客仓库的settings->secrets and variables->Actions: Add Actions secret · briteming/Issue_Blog处, 添加你刚刚获得的access token。(添加在Secret框里面)
建议命名为G_T(否则需要把2个workflow里面的G_T改为你设定的名字)
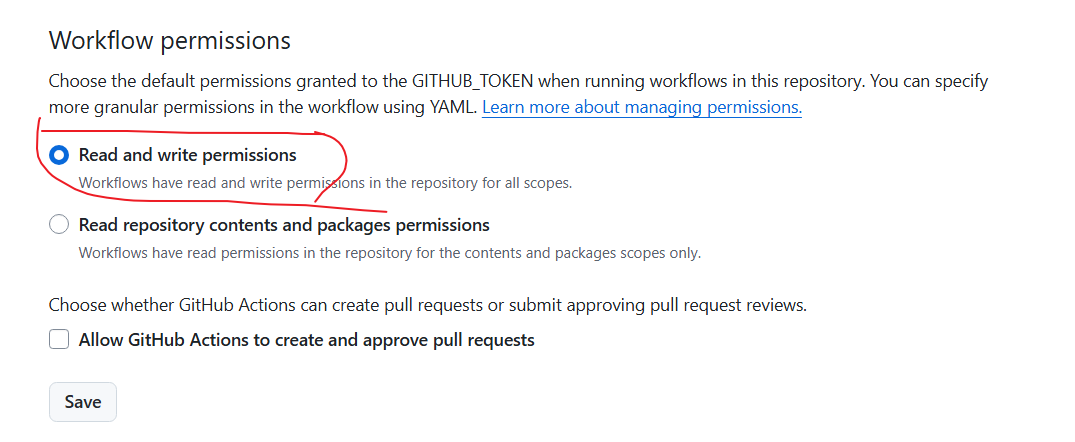
3.在你博客仓库的settings->Actions->General里, 勾选workflow的读写权限:
程序作者提供了一个公共仓库以便您进行测试,你可以先暂时使用这个:
https://github.com/WQhuanm/Test_Blog_Repo (建议fork一份。我fork后的地址是
https://github.com/briteming/Test_Blog_Repo)
修改你的博客仓库里的 .github\workflows\generate_page.yml (我的是
https://github.com/briteming/Issue_Blog/blob/main/.github/workflows/generate_page.yml,参考里面的注释
- 修改BASE_URL (我的BASE_URL的值是https://briteming.github.io/Issue_Blog)
- 修改第45行的name的值为git clone https://github.com/briteming/Test_Blog_Repo.git output
- 第48行相应的改为git clone https://github.com/briteming/Test_Blog_Repo.git output
请把博客仓库的settings的page的生成改成使用github actions生成, (Build and deployment那里的source 选择github actions)
否则GitPage的部署默认使用分支部署,呈现出来的页面是你的readme内容。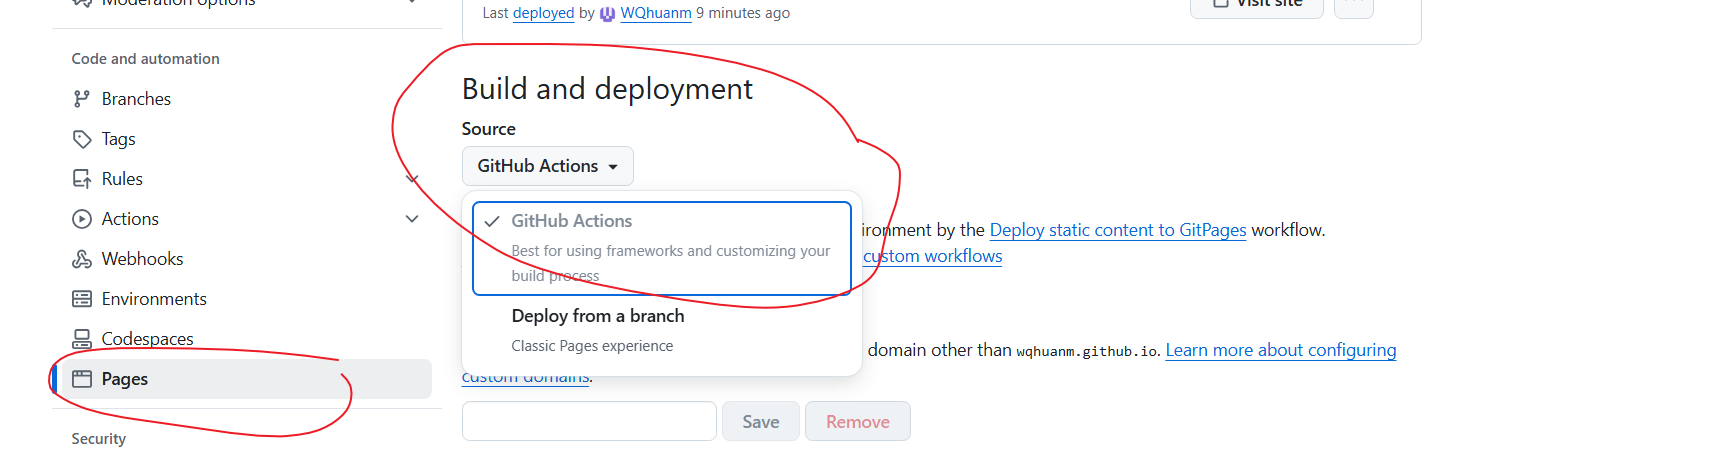
配置后,如果你的博客仓库提交过issue,点击https://{username}.github.io/{your blog repo}/ 就可以看到你的网站了。(当然你需先为your blog repo创建gh-pages分支)
(参考自:
https://wqhuanm.github.io/Issue_Blog/2024/12/22/2_%22%E8%AE%A9%E5%86%99blog%E7%9A%84%E4%BA%BA%E4%B8%93%E6%B3%A8%E4%BA%8Eblog%EF%BC%8C%E5%AE%9E%E7%8E%B0%E5%85%A8%E8%87%AA%E5%8A%A8issue_blog%EF%BC%8Cuse%EF%BC%9AIssue.+.Hexo.+.Github.Action%22/)
演示网站:https://briteming.github.io/Issue_Blog/
项目地址:
https://github.com/WQhuanm/Issue_Blog/
https://github.com/briteming/Issue_Blog/
https://github.com/WQhuanm/Issue_Blog/issues/2
不太建议使用这个静态博客程序,太花里胡哨了。而且发表的帖子并未按提交issue的时间顺序排列。
另外, 仓库
No comments:
Post a Comment