基于qt的一个简单的多文本编辑器。
from https://github.com/ihewro/qt-simple-editor
这里主要讲linux下的编译,windows下面比较简单
参考:http://qt-project.org/wiki/Building-Qt-5-from-Git
依赖
sudo apt-get install "^libxcb.*" libx11-xcb-dev libglu1-mesa-dev libxrender-dev libxi-dev
编译选项
configure -confirm-license -opensource -static -release -no-qml-debug -qt-freetype -qt-xcb -nomake tests -nomake examples -skip qtwebkit -prefix /usr/local/Qt-5.3.2-static
1.这里的-qt-freetype必须加上,另外要检查configure后的fontconfig是不是yes,如果不是,中文空白
如果fontconfig是no,执行 sudo apt-get install libfontconfig*,安装 libfontconfig1-dev等开发包,然后再configure
2.这里的-qt-xcb看起来应该是编译qt内部的xcb库,有了这个,可以少安装很多libxcb的开发包
qtcreator编译设置:
1.先通过Qt Versions 选择Qt-5.3.2-static目录下面的qmake.exe,然后qtcreator自动识别
2.接着去构建套件中复制一份配置,qt版本选择qt-5.3.2-static
3.然后就是打开.pro文件,添加上CONFIG += static
命令行编译设置
cd 工程目录,qmake生成makefile,修改makefile的cxxflag选项,加上 -static,然后直接make,感觉这样比qtcreator生成的要小,
还且可以在当前目录生成可执行程序
可能遇到的问题
1.no module found QT: Script-private, 这个原因经过测试,发现只要单独进入QtScript工程目录单独编译一次,然后再退出,全部make一次就ok了
2.中文空白,如上,是编译的时候没有选上-qt-freetype或者fontconfig开发包没安装
3.unicode/uchar.h 这个是因为编译qwebkit导致的,原因不明,skip后就可以了
ok,一切完毕!
前言
最近研究ubuntu上的Qt打包遇到了很多问题,虽然有个LinuxDeployQt,但是这货有个很大的缺点,那就是它打包的程序在运行的时候会把自己释放到一个临时目录运行,这样就导致了我们的程序设置当前运行目录有误,导致相对路径之类的东西全部扑街。所以我们需要一个新的办法。在调查了一段时间后,最终找到解决方案,并学会了deb安装包的制作
环境
系统:ubuntu 16.04
Qt程序:TestQt
Qt版本:5.12.4
分析
要实现我们最终的目的,需要解决下面几个问题:
让Qt程序运行时加载自己指定目录下的动态库,而不是系统默认的,避免和系统已有的Qt库发生冲突
自动提取所需要的依赖包到我们指定的目录,这个可以借助ldd
Qt程序指定 plugins 加载路径,这个需要用到 qt.conf 配置文件
如果制作deb包,这个设计到deb工程的目录结构和dpkg打包指令,还涉及到 linux的 desktop 文件格式(类似windows快捷方式)
方案
问题 1
我们需要指定一个LFLAGS的参数,这里是指定程序所在目录下的lib目录:
-Wl,-rpath,'$$ORIGIN/lib'
这个参数就可以指定程序运行时候的优先加载路径,如果用的是QtCreator,那么我们修改pro工程文件:
QMAKE_LFLAGS += -Wl,-rpath,\'\$$ORIGIN/lib\'
注意:这里一定要用 \ 转义,不然 QMAKE_LFLAGS 设置无效,另外两边的单引号是必须的,双$也是必须的。
问题 2
这个只需要使用ldd来查找依赖,并自动拷贝到我们app下的lib目录即可,在程序目录建了一个脚本 copylib.sh 内容如下:
#!/bin/bash
LibDir=$PWD"/lib"
Target=$1
lib_array=($(ldd $Target | grep -o "/.*" | grep -o "/.*/[^[:space:]]*"))
$(mkdir $LibDir)
for Variable in ${lib_array[@]}
do
cp "$Variable" $LibDir
done
假设我们的Qt程序为 TestQt,这样我们使用 copylib.sh ./TestQt 就直接拷贝依赖到 lib目录下了
注意:如果是打包Qt,那么要注意xcb的问题,我们需要额外拷贝两个Qt库进来,libQt5XcbQpa 和 libQt5DBus 这两个都属于 plugins/platforms 里面 libqxcb.so 所依赖的库。另外我们需要拷贝plugins目录下的 bearer ,platforms ,imageformats 。还要注意一点,那就是Qt库要带着符号链接一起拷贝过去,不然依旧会报错
问题 3
这个就是使用qt.conf文件了,内容如下:
[Paths]
Prefix=./
Libraries=lib
Plugins=plugins
问题 4
目录说明
首先我们需要建立一个目录结构,这里拿TestQt的举例,不含文件
TestQt-Package/
└── project
├── DEBIAN
└── usr
├── local
│ └── TestQt
| ├── lib
│ ├── plugins
│ │ ├── bearer
│ │ ├── imageformats
│ │ ├── platforms
└── share
├── applications
└── icons
└── hicolor
└── 64x64
└── apps
这里的project就是我们要打包成 deb 包的工程文件夹,内容主要是 usr 和 DEBIAN 两个文件夹,usr目录结构和系统保持一致。然后我们简单说明一下
DEBIAN:这个文件夹是 deb 配置信息文件夹
applications:这里是放置程序的快捷方式的,用来在 ubuntu 程序菜单中显示你的程序
icon:这里放置你的程序图标,png格式,这里是64x64的分辨率,请根据自身图标大小挑选对应分辨率文件夹放置
我们的程序位于 /usr/local/TestQt 下面,当然,你也可以放到其他地方,参考上面的目录结构即可
文件说明
首先我们了解一下 linux的快捷方式文件,linux的快捷方式 是 desktop 格式,类似windows的 lnk,示例文件(TestQt.desktop)如下
[Desktop Entry]
Categories=Utility;
Comment=a test
Exec=/usr/local/TestQt/TestQt
GenericName=TestQT project
Icon=TestQt.png
Name=TestQt
Name[zh_CN]=TestQt测试程序
Type=Application
Version=1.0.0
这里做个简单的说明
Exec:这个字段是执行路径,如果你的程序直接放到/usr/bin之类的地方,那么你可以直接写 TestQt,而不需要完整路径
Icon:这个是图标路径,默认会从 /usr/share/icons下面去找,如果你按照上面目录结构放入了 TestQt.png ,那么就可以直接写图标名字。如果没有,比如你放到了程序目录,那么就需要写上完整路径
Name:这个可以加上locale来支持多语言
接着我们熟悉一下 DEBIAN 目录下的配置文件 ,配置文件固定名字为 control , 内容如下:
package: TestQt
version: 1.0.0
architecture: amd64
maintainer: magicdmer
description: a test project
都放好后,我们就在 TestQt-Package 目录下运行下面的命令打包:
dpkg -b project/ TestQt_ubuntu_amd64.deb
终于完毕.
在使用 Qt5 进行开发的过程中遇到了一些跨平台的中文编码转换问题,然后进行了一番调查,这里做个总结,希望能帮上他人。
字符编码
首先我们认识一下 UNICODE, UNICODE 是由微软等多个知名公司发布的一种字符集标准,具体编码实现有 UTF-8, UTF-16 和 UTF-32 这三种编码格式。而GBK字符编码属于另一套字符集,类似的还有Big5字符集。
然后介绍一下 UCS ,UCS 是 ISO 组织发布的一种类似 UNICODE 的字符集标准,后来两者开始合流,编码基本一致。这里需要知道的是 UCS-2 和 UTF-16 之间的关系,UCS-2 规范相当于 UTF-16 规范的 子集,因为 UTF-16 有扩展字符为变长,而 UCS-2 是固定两个字节。
windows 字符编码
windows 自从 windows 2000 后 就开始使用 UNICODE 字符集,具体编码是 UTF-16 编码。然后从 vista 之后开始支持 UNICODE 5.0 标准,对 UTF-16 的支持也更加完善,支持 UTF-16 surrogate 扩展字符的显示。对于windows的开发人员而言,我们需要知道 windows 上具体代表 UTF-16 编码的数据类型,这里以 visual studio 系列 IDE 和所带的编译器为例,Qt这里也使用了 msvc 编译器环境
代表 UTF-16 的数据类型是 wchar_t,也就是我们工程设置选择的宽字符。可能有人会问,UTF-16 是变长编码,扩展编码会用到4个字节,wchar_t 怎么表示?遗憾的是的确没法表示,这更像是 UCS-2 标准,但是我们需要知道的是 windows 的内核的确是 UTF-16 的,只是编程接口只提供了两字节的 wchar_t。不过这些扩展字符基本用不到,所以我们不用过多考虑,如果你需要了解更多可以自行查阅资料,博主暂时未深入
visual studio 创建的源码文件默认是 ANSI 编码,此时 char 字符串是默认的 GBK 编码,微软的开发工具和编译器对 GBK 支持良好
我们当然也可以设置 visual studio 采用 UTF-8 编码,只需要使用 UTF-8 格式的源码文件,然后在源码中加入下面的预编译宏。这样 char 字符串就默认为 UTF-8 编码了,Qt + msvc 的设置也是如此
#if defined(_MSC_VER) && (_MSC_VER >= 1600)
# pragma execution_character_set("utf-8")
#endif
注意:文件格式使用 UTF-8 可能出现 "error C2001: 常量中有换行符" 的情况,这时候可以改文件格式为 UTF-8 BOM 来解决问题。实际上还有一些其他的解决方案,大家可以自行搜索。
linux 字符编码
linux系统默认使用的 UTF-8 编码,对于linux的开发人员而言,就简单多了,都用 UTF-8 就万事大吉了,这里使用 QtCreator + gcc 来做讲解。
如果我们需要完全使用 GBK 编码来开发也是可以的,需要在 Qt 工程的 main 函数加入下面的设置,并使用 GBK 格式的源文件:
QTextCodec *codec = QTextCodec::codecForName("gbk");
QTextCodec::setCodecForLocale(codec);
Qt5 字符编码
QString 是 UNICODE 编码,确切来说是 UTF-16 编码。Qt程序想正确显示中文,那么就需要把其他编码的字符串转为 UNICODE 编码。然后我们来说一下 QString 的几种构造方式
//这种是默认传入的字符串为 UTF-8
QString strTest = QString("我是");
//这个就是从 UTF-8 字符串构造,和上面一样
QString strTest = QString::fromUtf8("我是");
//这个也是默认字符串为UTF-8
QString strTest = QString::tr("我是");
//这个编码根据系统来,windows就是GBK,linux就是UTF-8
QString strTest = QString::fromlocal8Bit("我是");
//这个就是 ASCII 这种了,单字节的
QString strTest = QString::fromLatin1();
注意:
QString 是 UTF-16 ,那么 QChar 就和 WCHAR 一样是两个字节
fromLocal8Bit 是和系统相关的函数,这个函数在windows上,是从GBK 转为 unicode,但是如果是 linux,那么就是从 UTF-8 转为 unicode。所以如果我们需要固定的 GBK 转 UNICODE,那么请采用下面的方式:
QTextCodec* gbkcodec = QTextCodec::codecForName("gbk");
//下面是GBK编码的字符串
const char* bdata = "你好,世界"
//使用TextCodec库来转换gbk到unicode
QString strGBK = gbkcodec->toUnicode(bdata);
最后我们推荐使用 UTF-8 编码的方式,这样可以方便兼容 windows 和 linux 多平台
参考:https://wiki.qt.io/Strings_and_encodings_in_Qt
AirPodsDesktop是一款 Windows 桌面下增强 AirPods 用户户体验的开源项目。基于C++编写,遵守GPL3.0开源协议。人耳检测可以实现拿下/戴上 AirPods 的时候暂停/继续播放。低音频延迟模式可以解决短音频的播放问题(可能会增加耗电)。
主要功能:
电池信息显示。
自动人耳检测。
低音频延迟模式。
精美的动画。
源代码:https://github.com/SpriteOvO/AirPodsDesktop
--------
AirPods desktop user experience enhancement program, for Windows and Linux.
AirPods desktop user experience enhancement program





See the Build Instructions.
from https://github.com/SpriteOvO/AirPodsDesktop
------
git clone --recursive https://github.com/SpriteOvO/AirPodsDesktop.git
cd AirPodsDesktop
mkdir Build
cd Build
The current path will be named BuildPath in the rest of this document.
Download and install CMake (>= v3.20) if you didn't have it.
Choose a target platform to continue:
Download and install Visual Studio 2019 if you didn't have it.
Clone and bootstrap vcpkg if you didn't have it.
Download and install Qt 5.15.2. (Minimum required components are only MSVC 2019 32-bit)
Set the installed Qt directory to the PATH environment variable, or pass it to the CMake option later.
Download and install NSIS. (Optional, not required if you do not generate installer)
Open Powershell, go to BuildPath.
Modify the following arguments according to your needs and run it.
cmake -G "Visual Studio 16 2019" -A Win32 -DCMAKE_BUILD_TYPE=<Debug|RelWithDebInfo> -DCMAKE_TOOLCHAIN_FILE=path\to\vcpkg\scripts\buildsystems\vcpkg.cmake ../
cmake --build . --config <Debug|RelWithDebInfo>
ls ./Binary
PATH environment variable, you need to pass it to the CMAKE_PREFIX_PATH option in the first line this way -DCMAKE_PREFIX_PATH=path\to\Qt\5.15.2\msvc2019.Build options section for more options.from https://github.com/SpriteOvO/AirPodsDesktop/blob/main/Docs/Build.md
Some test code, as example code of my blog, mainly Qt related demo. 一些测试程序,作为博客的示例代码,主要是Qt相关的Demo。



CSDN Blog(博客地址):https://blog.csdn.net/gongjianbo1992
Github:https://github.com/gongjianbo/MyTestCode
Gitee(码云地址): https://gitee.com/gongjianbo/MyTestCode
from https://github.com/gongjianbo/MyTestCode
download some free official FLAC music.
bp stands for bilibili ported, but also bai piao.
An out-of-the-box extractor for Bilibili's official FLAC music.
It can download Bilibili-purchased music in lossless version without an account whatsoever. While downloading, it can also acquire music's metadata, including album art. It can also download the whole menu (aka album) at one time.
With metadata included:
Try running this command on your own computer.
You can download the pre-compiled x86_64 (amd64) version here, which should be running without any problem on latest Windows devices. Requests for other versions will likely be ignored due to the reason in License & Disclaimer section, so you will have to compile it by yourself: see Compilation section below.
First you'll need Qt framework; Qt Creator is highly suggested.
Next you'll need:
gumbo-query for HTML DOM parsing.
Actually I can use regex, but that just makes me an idiot.
TagLib for audio file metadata.
Then just qmake bp_audio.pro and make, as what you would do for every Qt project.
Usage: bp_audio
Get to know some free official FLAC music.

Options:
  -a, --au <au>     Audio AU number.
  --menu            Download whole menu.
  -o, --out <path>  Output folder path.
  -?, -h, --help    Displays this help.
  -v, --version     Displays version information.
from https://github.com/superfashi/bp_audio
This demo implements a C language registration / login server and a QT client。
First, we learned about the configuration of vim under
Linux, which does not fit the usage habits because vim was originally
configured without a line number and with an automatic indentation of 8
spaces. We need to be in home. . The relevant parameters, including
tabstop,smartindent, etc., are configured in the vimrc file and are
notcovered here.
The goal we're going to achieve in the first place is to implement a
registered feature, so on the service side we need to do some of the
following:
In order to complete the a function, we need to use Socket programming in C language, we first need to use sys/socket The relevant procedure in h.
In C language, there are two types of supported Sockset, one is a streaming socket, the other is a data series socket, because we know that streaming sockets, also known as TCP, need to be used three times during the handshake four waves. It is more troublesome to deal with it in C language. So we decided to use a dataser socket, or UDP, in our project. Verification is not required, so it is relatively simple to handle.
To program with Socket, the first step is to initialize The socket, bind IP, and port, and enter the listening state. We're using the IPv4 address and port 7788, which are bound and then sent to the listening state through a dead loop.
Then we need to create a database, in the face of many databases, we choose the embedded platform is relatively friendly to SQLITE3. SQLite is an in-process library that implements a self-sufficient, serverless, zero-configuration, transactional SQL database engine. It is a zero-configuration database, which means that unlike other databases, you do not need to configure it in the system. Like other databases, the SQLite engine is not a stand-alone process that can be connected statically or dynamically to the needs of the application. SQLite has direct access to its stored files. A system (serverless) that does not require a separate server process or operation. SQLite does not require configuration, which means no installation or management is required. A complete SQLite database is stored in a single cross-platform disk file. SQLite is very small, lightweight, less than 400KiB when fully configured, and less than 250KiB when optional feature configurations are omitted. SQLite is self-sufficient, which means no external dependency is required. SQLite transactions are fully ACID-compatible and allow safe access from multiple processes or threads. SQLite supports the functionality of most query languages of the SQL92 (SQL2) standard. SQLite is written using ANSI-C and provides a simple and easy-to-use API. SQLite runs in UNIX (Linux, Mac OS-X, Android, iOS) and Windows (Win32, WinCE, WinRT). So we chose SQLite3
Operating the SQLite3 database using C in Linux system requires the installation of Libsqlite3-dev, which is also introduced in C language. h Library. We use the relevant commands to create a database, that is, sqlite3_open,which successfully returns SQLITE_OK, to determine whether the database was opened successfully. At the same time, using the sqlite3_exec function to execute the sql statement, since we only need to implement a registration function, we only need two headers directly, that is, the user name and password, and finally close the database through the sqlite3_close, that is, the initialization of the database.
The data type convention between the service side and the client is required in order to communicate reasonably, so in order to realize the communication between the two ends, we must carry out the contract of the communication rules, we can intuitively feel that there are several quantities that need to be agreed upon:
After describing the initialization process above, the next step is to listen to the client, first we need to use recvfrom to receive the data returned by the client. Once we receive the information from the database, we need fork a child process, which is done to ensure that the parent process can also maintain the ability to get information in the event of a problem with the child process, and that this action also improves the concurrency of the server.
In the sub-process, we need to make a judgment, based on the three states presented in 2.1.3. The real process of judgment is that first we need to connect to the database, create a database cursor, and then traverse the user name of the SQLITE3 database through SQL statements. If the cursor traverses the entire database, triggers SQLITE_DONE and then does not find the corresponding user name, we can then determine that the user name can be used, so we can set the registration status in the data type we specify as successful registration, and use sqlite3_exec to execute the SQL statement inserting our username and password, i.e. the user's registration is complete. When our cursor stops in the middle of the database, that is, in the SQLTIE_ROW state, that means the same user name is found in the database, so we will judge at this point that the user name has been used, so at this point we can return the returned data as the user name already exists.
Once we've made our judgment, we can return data to the client through the sendto function, and our service side is basically set up.
What you need to register a client is an input box for entering your account number and password, and a submit button, some of which need to be done as follows.
Data type conventions are required between the server and the client in order to communicate reasonably, and since we have described the server's communication rules in 2.1.3, we also need to configure the corresponding communication rules on the client side, just copy the proto.h header file, not to be repeated here.
First of all, we refer to the common login interface, you can clearly know that the registration interface is a three-part, that is, the registration username input box, registration password input box, submit the registration button. This is a classic vertical three-component layout, so we just need to declare one QVBOXLAYOUT and then declare two LineEdit and one Pushton. At the same time, the general components are not placed in the top grid, so here we need to set layout margin, according to the specific situationto adjust, here will not be repeated, please refer to rgswidget cpp。
When sending data, we need to use Qt's Socket communication library, and since we've already said that we communicate through a dataser socket, or UDP, we need to introduce a QUdpSocket library here to implement a socket like UDP.
First we need to put a slot function on the send button, which is to trigger the send operation when the button is pressed. A QUdpSocket object is also required as the basis for the next communication.
You then need to get the information from the two input boxes, and for the information we get about the user name, we need to copy the information into the username field in our custom data structure through the string copy function strcpy. But in Qt we use the QString type, and in our custom data type, we use the array type of char, and the two data types are not the same, so we need to convert the data type to prevent errors. The method of conversion is also simple: the data is converted directly to the byte array type through toLatin1, so that communication does not result in errors due to different data types.
And for passwords, which are more sensitive data, we can't send it in clear text, so we need to encrypt the data relatively simply, and the method is simple, we call the QCryptHash library to encrypt the data, and here we use the more secure Sha512 algorithm. We then convert the encrypted binary data to a 16-in string, and then copy the data into our custom data structure.
Eventually, we can get the data returned by the server by sending the custom data structure specified in our protocol to the server via the port and IP address specified in the protocol through the writeDatagram method.
The process of receiving the server side is also relatively complex. First we need to define a slot function, that is, in Qt's Socket class, there is a slot function called readyRead, which implements a slot function that is executed when the Socket signal is passed in, so we need to put this slot function on our Socket object.
When we receive a packet, we need readDatagram to parse the packet, and then we can take the registration information out of our custom data structure. As we agreed, if the registration is successful, we can prompt the registration success through the prompt box, and return to the login interface, if the server returns a user name already exists, we can ask the user through the prompt box whether the user needs to re-enter, if necessary, we need to re-empty the input box. If not, we will close the window directly.
At this point, the full points of registering the client are complete.
Since the login service side is almost identical to most of the registered service side, it is not repeated here to explain the differences directly.
The contract between the service side and the client needs to be data type in order to communicate reasonably, so in order to realize the communication between the two ends, we must carry out the contract of the communication rules, we can intuitively feel that there are several quantities that need to be agreed upon:
Where the port cannot use the same port as the registration, there will be a conflict. At the same time login status is to be considered, for the registration of this scenario, we can through the daily experience, we can find the following states must be included:
The above states are both ends of the need to be agreed upon, otherwise in the actual communication can not be interpreted on the returned information, the actual implementation, you can refer to the loginProto.h section of the appendix, here will not be repeated.
After describing the initialization process above, the next step is to listen to the client, first we need to use recvfrom to receive the data returned by the client. Once we receive the information from the database, we need fork a child process, which is done to ensure that the parent process also maintains the ability to get information in the event of a problem with the child process, and that this action also improves the concurrency of the server.
In the sub-process, we need to make a judgment, based on the three states presented in 2.3.1. The real-world judgment process is this: first we need to connect to the database, create a database cursor, and then traverse the user name of the SQLITE3 database through SQL statements. If the cursor traverses the entire database, triggers SQLITE_DONE and then does not find the corresponding user name, we can then determine that the user name does not exist, so we can set the login status in the data type we specify to be that the user name does not exist. When our cursor stops in the middle of the database, that is, in the SQLTIE_ROW state, that means the same user name is found in the database, so we'll judge that the username exists at this point, so we need to determine if the password is correct. We can determine the row where the current behavior username is located through the cursor, so the second item of this line, the password we need to compare, we just need to use the sqlite3_column_text this command can specify the out of the column, if the removal of this item compared to the password sent is correct, you can judge the success of the login, if the comparison found incorrectly, the password error.
Once we've made our judgment, we can return data to the client through the sendto function, and our service side is basically set up.
Since the login customer side is almost identical to most of the content on the registered customer side, it is not repeated here and explains the differences directly.
First of all, we refer to the common login interface, you can clearly know that the login interface is a four-part, that is, login username input box, login password input box, registration button, submit registration button. This is a classic vertical three-component layout, so we just need to declare one QVBOXLAYOUT and one QHBOXLAYOUT, and then declare two LineEdit and two PushButtons. Then put two PushButtons in QHBOXLAYOUT and insert them into QVBOXLAYOUT. At the same time, the general components are not placed in the top grid, so here we need to set layout margin,according to the specific situation to adjust, here will not be repeated, please refer to loginwidget cpp。
The process of receiving the server side is also relatively complex. First we need to define a slot function, that is, in Qt's Socket class, there is a slot function called readyRead, which implements a slot function that is executed when the Socket signal is passed in, so we need to put this slot function on our Socket object.
When we receive a packet, we need readDatagram to parse the packet, and then we can take the registration information out of our custom data structure. As we agreed, if the login is successful, we can prompt the registration success through the prompt box, and jump to the main interface, if the server returns a user name does not exist or password error, we can ask the user through the prompt box whether the user needs to re-enter, if necessary, we need to re-empty the input box. If not, we will close the window directly.
At this point, the full points of the login client are complete.
Since the client main interface technical points are not many, here are some of the more important points.
The main interface is made up of 10 graphics buttons, and for one button, we need to implement the graphics buttons as follows
Returning to the previous window requires us to define a signal and a slot ourselves, first we need to bind a slot to the new interface to be generated in the interface to be returned, which we define ourselves, and if the slot receives a signal, it will show the original hidden window.
In the new window, we just need to create a new signal, when clicking the back button, directly destroy the current window, and send the signal, to achieve the effect of returning to the next layer.
This interface has the following technical points
We can get the current time of the system using currentTime in the QTime class, and then we need to convert the time to a string in hh:mm:ss format, and since we need to display it on the LCD lcd assembly, we need to use a timer, bind the timer to a slot function, and then let the timer execute once in 1000 milliseconds.
To simulate the actual display, we need to make two colons flash, where we can create a bool type variable that reverses every time a timer event is executed. A colon is displayed when it is true, and a colon is not displayed when it is false, which completes the effect.
Video playback we only need to use the QMediaPlayer library and QVideoWidget to do this, we just need a new QMediaPlayer object and a QVideoWidget object, the QVideoWidget object to the UI component through addWidget, and then we use setMedia to set the file. SetVideoOutput settings play.
from https://github.com/gaowanliang/Qt-demo
虽然 Clion 并不是编写 Qt 程序的一个好选择,但是对于习惯 Jetbrains 家 IDE 的人来说还是可以一用的。
本人使用的环境:
- Windows 11 22H2
- Qt 5.15.2
- Clion 2022.3.1
不多赘述
大学生可以申请免费使用,详见 JetBrains 学习产品

可以参考 JetBrains 的这篇文档 Qt projects | CLion Documentation (jetbrains.com)
打开 Clion,新建项目 ->Qt 微件可执行文件(widget)
位置、c++ 标准自己填,Qt 版本选 5
Qt CMake 前缀路径(prefix):填 % qt 安装路径 %/ 版本号 / 编译器文件夹
例如:我的是 “C:/Environments/qt/5.15.2/mingw81_64”;jetbrains 给的示例是 "C:\Qt\Qt5.14.0\5.14.0\mingw73_32\"
不用双引号,用 / 还是 \ 应该都问题不大,不行就换一个试试.
点确定后,CLion 会自动生成一段示例代码,同时生成 CMakeList.txt, 这时候就可以直接运行了,不行的话可以重新加载一下 CMake 项目.

set(CMAKE_PREFIX_PATH "%你的前缀路径%")
Notes是一款开源的跨平台笔记应用,支持文件夹嵌套与标签管理、可自定义界面主题,基于QT、C++ 原生开发,遵守MPL2.0开源协议。支持操作系统包括Windows, Linux,以及Mac OS。
特色:
Native app (基于 C++, Qt编写).
快速,低资源占用.
完全保护隐私 – 不跟踪任何信息.
界面美观大方.
文件夹和tags. 按照用户想法来组织文件夹和tag分类.
Markdown支持. 快速格式化text .
不同主题,包括亮,暗, 褐色主题.
Feed 视角. 可选择多个笔记然后在其他编辑器中打开.
可后台运行,快捷键 Win+Shift+N 打开 Notes. (macOS使用快捷键Ctrl+N ).
键盘快捷键:多个快捷键操作.
源代码:https://github.com/nuttyartist/notes
----------------------------------------------------
Fast and beautiful note-taking app written in C++. Write down your thoughts.



Notes is an open source and cross-platform note-taking app that is both beautiful and powerful.
Website: get-notes.com Our vision for the future on our Wiki.
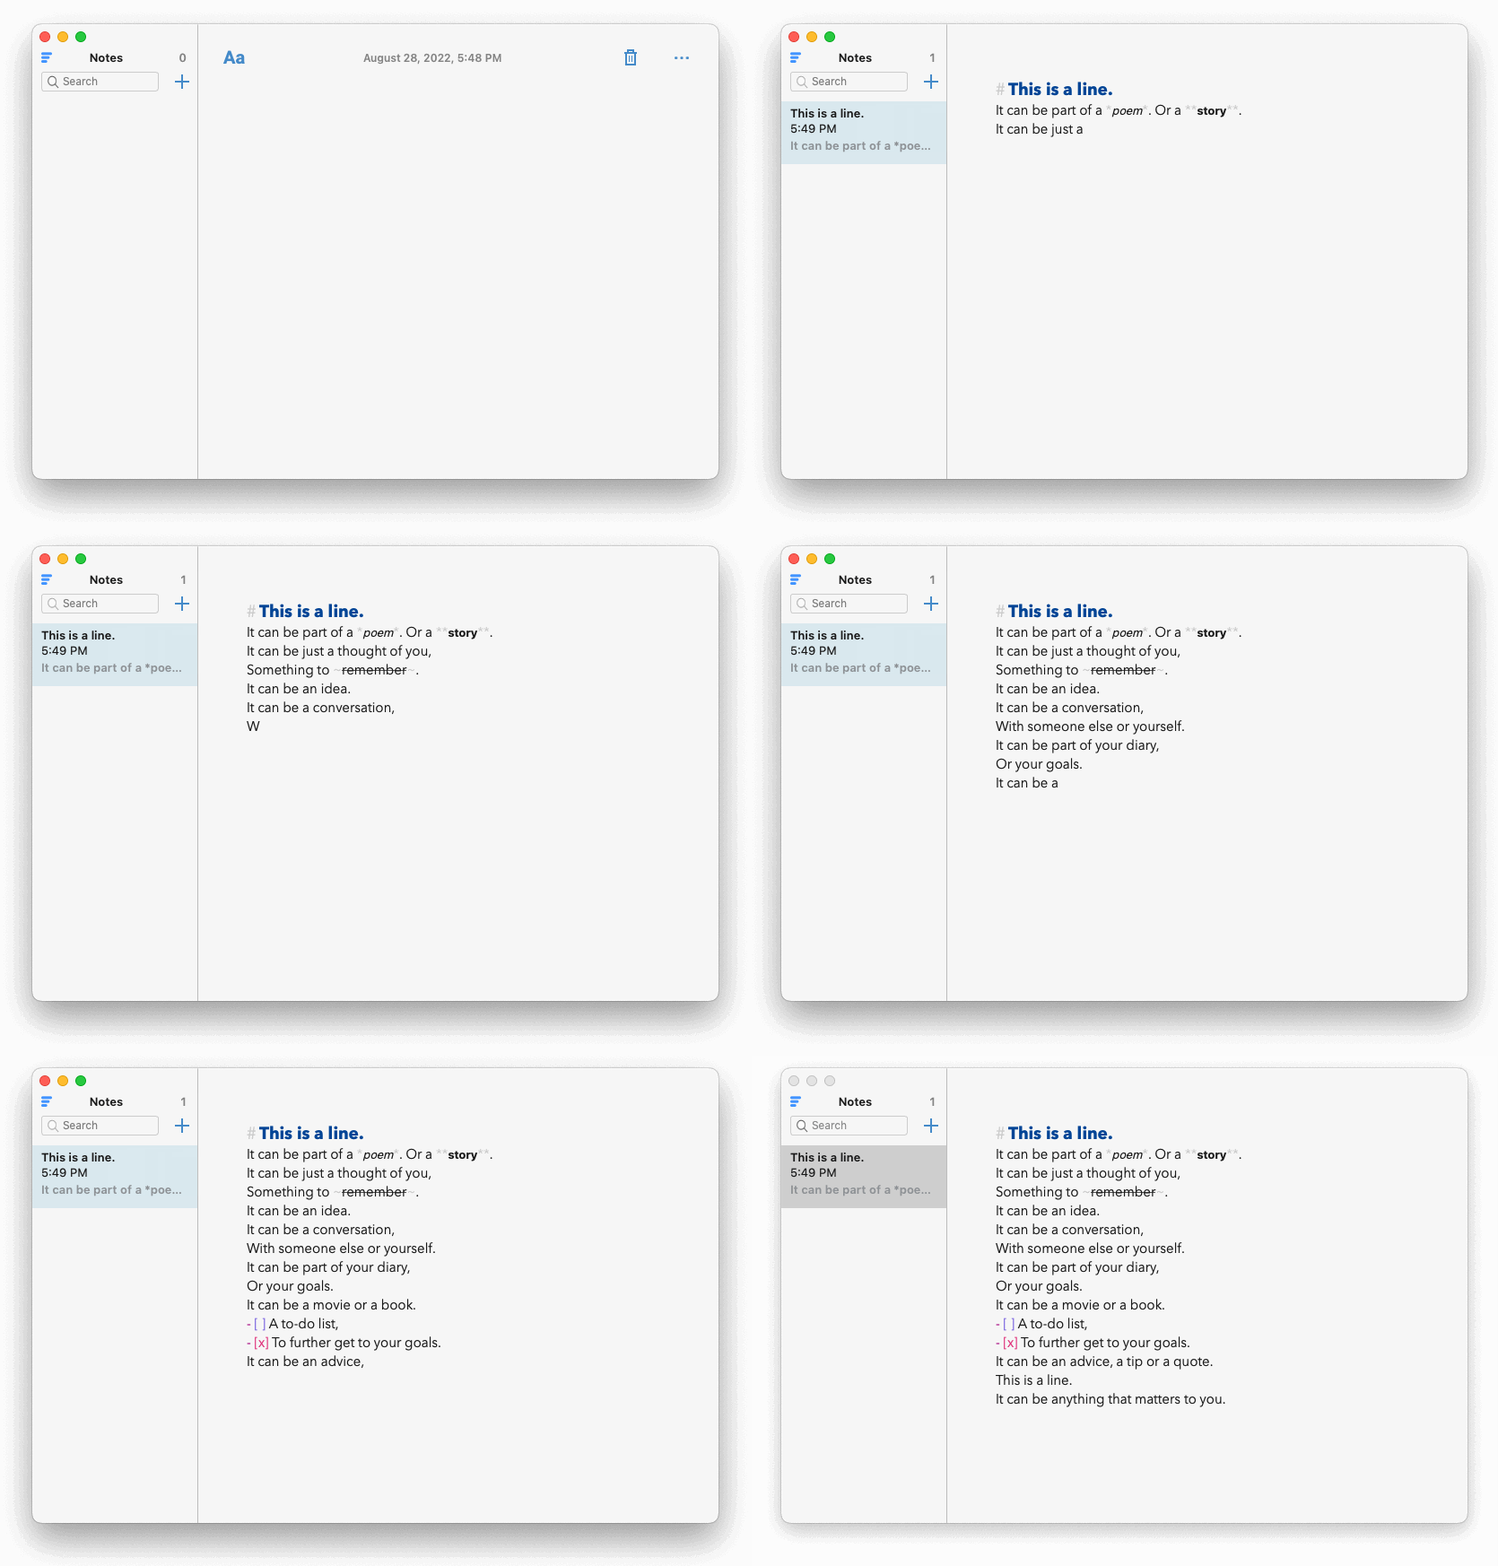

All keyboard shortcuts are documented here.
If you use Notes daily, consider donating money so I can pay programmers to develop new features and fix bugs. I partner with Github Sponsors and Patreon to receive contributions. You can also put a bounty on specific issues using Bountysource. I currently make a living from ads on the website, but I'd like to stop with that.
We have specific instructions for Windows, macOS and Linux (and we also provide build options).
The notes database and settings file are stored in:
| OS | Path |
|---|---|
| Windows | %APPDATA%\Awesomeness |
| Linux | ~/.config/Awesomeness~/snap/notes/x1/.config/Awesomeness (Snap)~/.var/app/io.github.nuttyartist.notes/config/Awesomeness (Flatpak) |
| macOS | ~/.config/Awesomeness |
from https://github.com/nuttyartist/notes
https://github.com/nuttyartist/notes/releases/latest/download/NotesSetup_2.1.0.exe
SMPlayer是一款多平台的强大视频播放工具,基于GPL协议发布。软件可以支持大部分的视频和音频文件。它支持音频轨道切换、允许调节亮度、对比度、色调、饱和度,按照倍速、4倍速等多种速度回放、还可以进行音频和字幕延迟调整以同步音频和字幕。
SMPlayer 的特色,可记住播放文件的相关设置信息。假如在观看电影的中途需要离开,不用担心直接关闭即可。当再次播放该电影时,SMPlayer 会继续从先前停止的地方开始播放。
SMPlayer已经被翻译成超过20种语言,包括西班牙语、德语、法语、意大利语、俄语、汉语、日语……
官网: http://smplayer.org/
https://www.smplayer.info/fr/downloads
https://www.smplayer.info/zh/downloads
https://github.com/smplayer-dev/smplayer
https://github.com/smplayer-dev/smplayer/blob/master/Install.txthttps://github.com/smplayer-dev/smplayer/releases/download/v24.5.0/smplayer-24.5.0-x64-unsigned.exe
绿色版 SMPlayer (WIndows 绿色版)
https://www.smplayer.info/zh/downloads
Windows 的 MPlayer 二进制可执行程序由 redxii 提供。 更多信息请访问 http://mplayerwin.sourceforge.net
(https://www.smplayer.info/zh/download-windows)
CopyQ是一款免费开源的剪贴板管理软件,支持多平台包括: Linux、Windows、Mac OS X. 适用于大量数据的复制粘贴,还具有编辑及脚本化等强大高级的功能。可存储多种文本格式以及图像,可做标签,进行拖拉操作。用户可以快速复制一整张电子表格中的每一个单元格的内容,在粘贴的时候会自动换单元格粘贴。它具有快速打开文件夹、批量打开文件夹、快速打开网络地址、小型个人数据管理等众多功能。
官网下载:http://hluk.github.io/CopyQ/
源码地址:https://github.com/hluk/CopyQ
-----------------------------------------------
This page describes how to build the application from source code.
Download the source code from git repository
git clone https://github.com/hluk/CopyQ.git
or download the latest source code archive from:
The build requires:
On Ubuntu you can install all build dependencies with:
sudo apt install \
  build-essential \
  cmake \
  extra-cmake-modules \
  git \
  libkf5notifications-dev \
  libqt5svg5 \
  libqt5svg5-dev \
  libqt5waylandclient5-dev \
  libqt5x11extras5-dev \
  libwayland-dev \
  libxfixes-dev \
  libxtst-dev \
  qtbase5-private-dev \
  qtdeclarative5-dev \
  qttools5-dev \
  qttools5-dev-tools \
  qtwayland5 \
  qtwayland5-dev-tools
On Fedora and derivatives you can install all build dependencies with:
sudo yum install \
  cmake \
  extra-cmake-modules \
  gcc-c++ \
  git \
  kf5-knotifications-devel \
  libSM-devel \
  libXfixes-devel \
  libXtst-devel \
  qt5-qtbase-devel \
  qt5-qtbase-private-devel \
  qt5-qtdeclarative-devel \
  qt5-qtsvg-devel \
  qt5-qttools-devel \
  qt5-qtwayland-devel \
  qt5-qtx11extras-devel \
  wayland-devel
Build the source code with CMake and make or using an IDE of your choice (see next sections).
cd CopyQ
cmake -DCMAKE_BUILD_TYPE=Release -DCMAKE_INSTALL_PREFIX=/usr/local .
make
make install
Qt Creator is IDE focused on developing C++ and Qt applications.
Install Qt Creator from your package manager or by selecting it from Qt installation utility.
Set up Qt library, C++ compiler and CMake.
See also:
Open file CMakeLists.txt in repository clone to create new project.
from https://copyq.readthedocs.io/en/latest/build-source-code.html


