在彭博曝出许家印被“监视居住”次日,恒大集团公告证实,
法国世界报援引上海经济专家谢安迪(Andy Xie)分析称,“在中国,
ppt.cc/fKlBax ppt.cc/fwlgFx ppt.cc/fVjECx ppt.cc/fEnHsx ppt.cc/fRZTnx ppt.cc/fSZ3cx ppt.cc/fLOuCx ppt.cc/fE9Nux ppt.cc/fL5Kyx ppt.cc/f71Yqx tecmint.com linuxcool.com linux.die.net linux.it.net.cn ostechnix.com unix.com ubuntugeek.com runoob.com man.linuxde.net ppt.cc/fwpCex ppt.cc/fxcLIx ppt.cc/foX6Ux linuxprobe.com linuxtechi.com howtoforge.com linuxstory.org systutorials.com ghacks.net linuxopsys.com ppt.cc/ffAGfx ppt.cc/fJbezx ppt.cc/fNIQDx ppt.cc/fCSllx ppt.cc/fybDVx ppt.cc/fIMQxx
在彭博曝出许家印被“监视居住”次日,恒大集团公告证实,
法国世界报援引上海经济专家谢安迪(Andy Xie)分析称,“在中国,
eCryptFS的基础知识简介
eCryptFS是一种堆叠加密文件系统,自2.6.19以来,它就得到Linux内核的支持(作为ecryptfs模块)。用eCryptFS加密的伪文件系统挂载到你现有的文件系统上。它在EXT文件系统系列及其他文件系统(比如JFS、XFS、ReiserFS和Btrfs,甚至NFS/CIFS共享区)上运行起来非常顺畅。Ubuntu使用eCryptFS 作为其加密主目录的默认方法,ChromeOS也是如此。eCryptFS在底层使用AES算法作为默认算法,但它也支持其他算法,比如blowfish、des3、cast5和cast6等算法。一旦你手动安装eCryptFS,就可以在这些算法当中作一个选择。
正如我说过的那样,Ubuntu让我们可以在安装过程中选择是否对我们的/home目录进行加密。这是使用eCryptFS的最简单的方法。
Ubuntu提供了一系列易于使用的工具,与eCryptFS结合使用可以简化我们的工作;不过在Ubuntu安装过程中启用eCryptFS完全形成一种特定的预配置安装。所以万一默认安装不适合你的要求,你就需要执行手动安装。我在本教程中将介绍如何将eCryptFS手动安装到主要的Linux发行版上。
安装eCryptFS
安装到Debian、Ubuntu或衍生版本上:
$ sudo apt-get install ecryptfs-utils
注意:如果你决定在Ubuntu安装过程中加密你的主目录,就要确保eCryptFS应该已经安装。
安装到CentOS、RHEL或Fedora上:
# yum install ecryptfs-utils
安装到Arch Linux上:
$ sudo pacman -S ecryptfs-utils
为了稳妥起见,安装程序包后,装入eCryptFS内核模块是个好的做法:
$ sudo modprobe ecryptfs
配置eCryptFS
现在不妨运行eCryptFS配置工具,开始加密某个目录:
$ ecryptfs-setup-private
它会要求输入登录密码和挂载密码。登录密码与你平常的那个登录密码一样。挂载密码则用来获得文件加密主密钥。退出,重新登录。
你会注意到eCryptFS在默认情况下创建了两个目录:主目录中的Private目录和.Private目录。~/.Private目录里面含有加密的数据,你可以访问~/Private目录中相应的解密数据。在你登录时, ~/.Private目录自动解密,映射到~/Private目录,那样你就能访问它。你退出后,~/Private目录自动卸载,~/Private目录里面的内容加密回到~/.Private目录。
eCryptFS知道你拥有~/.Private目录,并且自动解密到~/Private,不需要我们键入密码,它是通过eCryptFS PAM模块来做到这一点的,该模块为我们完成了这项任务。
万一你不想在登录时让~/Private目录自动挂载,只要在运行ecryptfs-setup-private工具时,添加“--noautomount”这个选项。同样,如果你不想在退出后让~/Private目录自动卸载,只要指定“--noautoumount”这个选项。不过那样的话,你就得亲自手动挂载或卸载~/Private目录了。
$ ecryptfs-mount-private ~/.Private ~/Private
$ ecryptfs-umount-private ~/Private
你可以运行下面这个命令,确认.Private文件已挂载:
$ mount
现在我们可以开始将任何敏感文件放入到~/Private文件夹里面,我们退出后,它们会自动加密,并在~/.Private文件夹里面严加保护起来。
这一切似乎相当神奇。从根本上来说,ecryptfs-setup-private工具让一切易于安装。如果你想多尝试一下,安装eCryptFS的特定部分,可以参阅官方说明文档:http://ecryptfs.org/documentation.html。
结束语
总之,如果你非常在意自己的隐私,我推荐的最佳方案就是将基于eCryptFS的文件系统级加密与全磁盘加密结合起来。不过总是要记住一点,光靠文件加密无法为你保证隐私。
之前远程Linux桌面,一般用VNC或者XRDP。但是Ubuntu服务器版本的桌面系统稳定性有很大问题,因此近年来基本放弃了远程桌面的打算。
近日不得已需要用到Ubuntu系统的远程界面,设置了很久VNC或者屏幕共享仍然没成功。就在要放弃的时候,忽然想到可以用SSH的X11 Forwarding特性来远程执行Linux系统上的GUI程序啊!
于是在Mac电脑上下载Xserver程序,顺利运行了远程系统的GUI程序,本文做简要记录。
Linux X系统介绍
X系统(X Window System)最早由 MIT在 1984 年提出, 主要目的是希望能够实现一个与系统无关的通用窗口系统。在开发 X 时,开发者就希望窗口接口不要与硬件有强烈的相关性,否则就等于是一个新操作系统了, 会导致应用上的局限。因此 X系统在设计之初就是以应用程序的概念来开发的,而非以操作系统来开发。
X系统提出后不断经厂商更新,一直到 1987 年到 X11 版本,这一版 X 取得了明显的进步, 后来的窗口接口改良都是架构于此一版本,因此后来 X系统也被称为 X11 。
X系统采用Client/Server主从式架构,X Client和X Server 以 X Protocol 沟通。通常情况下,X server与X client都运行在同一台机器上,但因为X系统当初设计成是通过socket在X server与X client之间通信的,所以它们也可以运行在不同的机器上。
X Client执行具体逻辑,将需要绘制的画面告知X Server;X Server管理硬件,绘制界面,同时接受鼠标/键盘的输入。具体来说,我们看到的浏览器、LibreOffice、thunderbird等GUI程序都属于X Client,X server在后台运行,一般通过手动启动或者由Display Manager启动。
使用SSH的X11 Forwarding运行Linux系统的GUI程序。
理解了X Server和X Client的关系,通过SSH远程运行Linux GUI程序就比较简单了:
首先,确认远程服务器上的SSH服务端开启了X11Forwarding功能(默认开启):
# 编辑 /etc/ssh/sshd_config 文件
X11Forwarding yes
# 如果之前未开启,保存配置文件后重启sshd
systemctl restart sshd
解下来,远程服务器上安装xauth包。如果远程服务器安装时带桌面环境,xauth包已经默认安装,可以跳过这一步。无界面版的远程服务器需手动安装:
# CentOS
yum install -y xorg-x11-xauth
# Debian/Ubuntu
apt install -y xauth
接着,在本地电脑上安装X Server程序。运行带桌面环境的Ubuntu、Debian、Fedora、CentOS等Linux发行版的本地电脑,已经自带X Server,可以略过这一步。Windows、MacOS系统需要自行下载X Server程序:MacOS可到 https://www.xquartz.org/ 下载XQuartz程序,Windows可到 https://sourceforge.net/projects/vcxsrv/ 下载VcXsrv,或到 https://sourceforge.net/projects/xming/ 下载Xming,安装并运行X Server程序。
最后,开启X11 Forwarding选项,ssh连接到远程服务器,运行GUI程序:
# -X 选项开启X11 Forwarding
ssh -X user@host
# 运行远程GUI程序,界面将在本地电脑上显示出来
firefox
X11 Forwarding相关事项
1. 和VNC和XRDP等技术相比,X11 Forwarding数据传输量很大,效率低,不建议长时间使用;
2. 如上面所说,不需要在远程服务器上运行桌面系统,只需安装xauth包;
3. GUI形式的ssh客户端,需要在设置中开启X11 Forwarding。例如putty上的设置:
1. 使用SSH的X11 Forwarding远程执行GUI程序
3. Why is X11 forwarding so inefficient?
Linux系统有几个相近但不同的概念:shell、terminal、console、tty、pts,其中shell、terminal和console是经常接触,但很难说出区别的三个概念。这篇英文很好的解释了这几个概念的来源,以及相互之间的区别。
Short Bytes: What sounds like what could be a really bad joke, or a really good one if you’re into that humor, is actually an honest question. The shell, console, and terminal are all very dated concepts that we still use today, in albeit modified forms. Did you know that a terminal used to be a physical monitor and keyboard and a console was a port with a low-level connection to the operating system? But where does that leave the shell?
Introduction
As technology progresses, lines get blurred between objects and concepts that were previously very distinct. Words can be colloquialized to share the same meaning when they once had their own. Sometimes multiple devices can be melted down into a single box without any sign of their separate technological lineage. Something similar happened to the shell, the console, and the terminal.
For many years now, the wireless router has been the backbone of internet connectivity in most homes and many small offices. But many people fail to realize (except for the technically astute among you) that the device is actually made up of several devices that used to be independent of one another and quite well-defined. A typical wireless router, even the cheapest of cheap, contains a wireless access point, ethernet switch, router, stateful firewall, DNS server, DHCP server, QoS engine, and sometimes many more features (such as a DSL/coax modem). As a result, the technical layperson might refer to this device as “the wireless,” a modem, a router, or simply “the internet box.” All of which fail to encapsulate the whole story, and that’s only one example (and not even what this article is about).
Shell, Terminal, and Console — How are they different?
Anyone who has tried their hand at an operating system outside the realm of Microsoft and Apple in any serious capacity has undoubtedly come into contact with the command line interface. What do you call it? The shell? The console? The terminal? Does it matter? They all mean the same thing, right? The answer to that is yes and no. Just like the wireless router, these used to be (and technically still are) different parts of the same whole, despite the words sharing their meanings.
What is a Terminal?
To understand what a terminal is, we have to go back to the mainframe days. Mainframes were computers with many users. They were common in large businesses and on college and university campuses. But when you have dozens of people that want to use one computer at the same time, how do you make them share it? In today’s words, we would give them each a monitor, a keyboard, and a mouse. In the era of the mainframe, terminals were used. A ‘terminal’, as defined by dictionaries, is either the end of something or a point of contact, sometimes both. Mainframes had terminal stations equipped with a display and keyboard scattered around the premise. They were endpoints where users could access the mainframe.
What is a Console?
Today, consoles can be entirely in software, but that wasn’t always the case. Consoles go hand in hand with terminals. With respect to a mainframe, a console was both the port and the digital connection to the mainframe operating system from the terminal. A broader definition of a console is a desk or dashboard like interface from which a system is controlled and/or monitored. The terminal would be physically connected to the console port on the mainframe so that the user could control the mainframe digitally. On a Linux system you can press <ctrl> + <alt> + <F1 | F2 | F3 | …> to reach the different software consoles. Many systems still have serial-based console ports for management, such as professional network equipment.
What is a Shell?
The shell has a funny name, but only because the ‘kernel’ of an operating system is an even funnier name. A shell is the piece of material that wraps around a kernel. In computers, there is no difference (except that the shell and kernel are software). The shell is the command line interface you interact with. Examples of shells are BASH, CSH, and ZSH. The shell takes hand-typed commands and tells the operating system to execute them, or can take scripts and interpret logic within them in addition to instructing the operating system to execute the commands contained in the script.
Shell vs Console vs Terminal
So, what is the actual difference between shell, consol and terminal? The terminal connects to the console where the shell is presented. That’s simple enough, right? There are some other pieces of terminology that might be useful, though. A TTY is a teletypewriter. It is essentially the equivalent of the console port but is often virtualized in software. If you jump to a different virtual console on your Linux machine using the above keyboard combination and login in, you can see the multiple consoles with logged in users by running the who command. Then there are PTS devices which are Pseudo Terminal Slaves, a virtual device of sorts. They are a form of TTY, but one that is emulated to allow a TTY connection over a network or some other means. SSH and Telnet are good examples of programs that use PTS devices.
Over time, many words in technology have fallen victim to over generalization that tends to hide a rich and adventurous history of innovation and evolution. Considering this, it might be worthwhile to curb our adoption of reductive vernacular in an effort to preserve this history and possibly allow for a more technically informed layperson in the future.
Automatically update your DNS record to match your current external IP address.
This app allows you updating your DNS records with your current external IP address.
It is recommended to run this program in your home server, or in your router。
You should NEVER run this program behind a proxy or a VPN. Running it behind a proxy is an unconsidered and untested scenario.
Download the latest release for your target
Extract the archive.
Rename config.yaml.template to config.yaml.
Finish your configuration in the config.yaml
Upload dnsupdater and config.yaml to the device you want this app to run.
These 2 files must be under the same directory.
Set up a cron job like
0 0,12 * * * /home/yourname/dnsupdater/dnsupdater > /var/log/update-dns.log 2>&1 &
The APIKey for your CloudFlare records should be a dedicated API token.
You can generate one here with template Edit zone DNS.
Do not modify the property RegionID for your Aliyun DNS records. cn-hangzhou is the only accepted value for now.
About JSON path
Here's a list of operators used in JSON path:
| Operator | Description |
|---|---|
$ |
The root element to query. This starts all path expressions. |
@ |
The current node being processed by a filter predicate. |
* |
Wildcard. Available anywhere a name or numeric are required. |
.. |
Deep scan. Available anywhere a name is required. |
.<name> |
Dot-notated child |
['<name>' (, '<name>')] |
Bracket-notated child or children |
[<number> (, <number>)] |
Array index or indexes |
[start:end] |
Array slice operator |
[?(<expression>)] |
Filter expression. Expression must evaluate to a boolean value. |
So if you have a JSON like this:
{
  "ip": "103.156.184.21",
  "tz": "Asia/Taipei"
}
You can use $.ip to obtain the value in the field ip.
You can check for all preset targets by running the scripts in the scripts folder.
For Windows users:
build.bat /?For *NIX users:
make helpOr you can specify your own GOARCH and GOOS (and maybe GOMIPS) with go build command
to build the executable for your platform as long as Go provides support to it.
from https://github.com/boris1993/dnsupdater
本文记录如何在 macOS 中安装 X11 客户端,并通过 SSH 进行 X11 转发。
在 macOS 中,可以使用 XQuartz 作为 X11 客户端。可以到 XQuartz Releases下载安装包手动安装,也可使用 Homebrew 安装。
使用 Homebrew 安装 XQuartz 的命令如下:
$ brew cask install xquartz |
注意安装期间需要提供管理员密码以完成安装。安装完成之后需要完全退出并重启终端模拟器。
编辑 /etc/ssh/sshd_config,设定如下条目:
X11Forwarding yes |
然后重启 sshd 使配置生效:
sudo systemctl restart sshd |
使用 ssh -X 连接到远程服务器,执行任意 X11 程序,然后程序的窗口就会在本机显示。
 定义
定义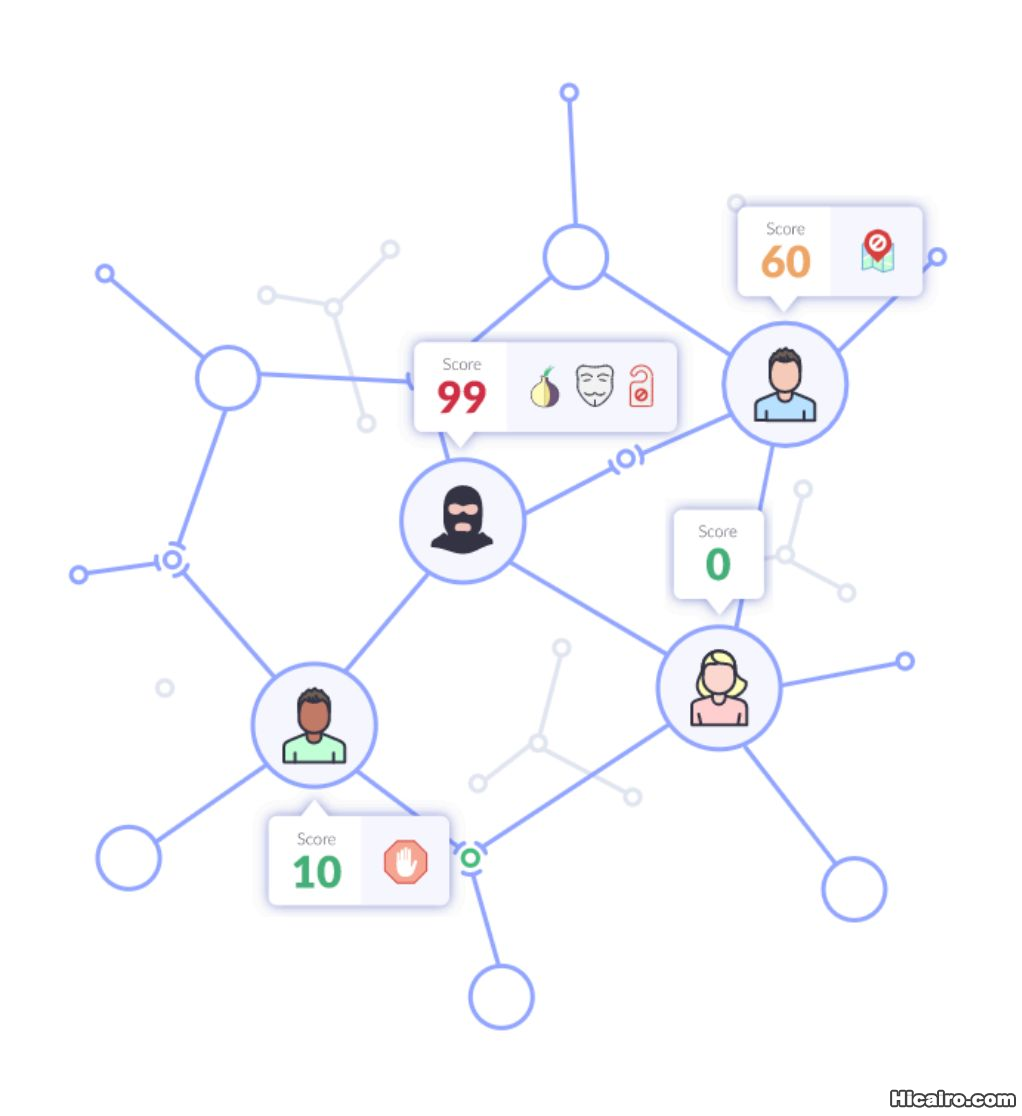 是什么让你暴露身份
{
  "headers": {
    "Accept": "text/html,application/xhtml+xml,application/xml;q=0.9,image/webp,image/apng,*/*;q=0.8,application/signed-exchange;v=b3",
    "Accept-Encoding": "gzip, deflate, br",
    "Accept-Language": "zh-CN,zh;q=0.9,en;q=0.8",
    "Host": "httpbin.org",
    "Sec-Fetch-Mode": "navigate",
    "Sec-Fetch-Site": "none",
    "Sec-Fetch-User": "?1",
    "Upgrade-Insecure-Requests": "1",
    "User-Agent": "Mozilla/5.0 (Macintosh; Intel Mac OS X 10_14_5) AppleWebKit/537.36 (KHTML, like Gecko) Chrome/77.0.3865.90 Safari/537.36"
  }
}12345678910111213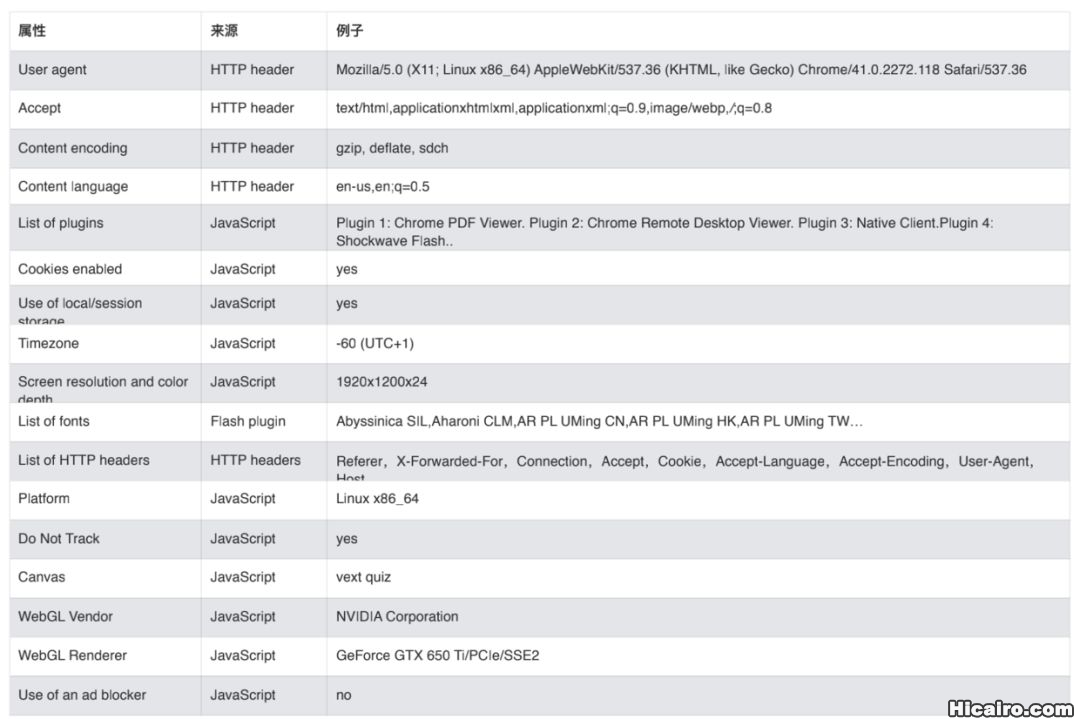 指纹采集
指纹采集| 信息熵(entropy)是接收的每条消息中包含的信息的平均量,熵越高,则能传输越多的信息,熵越低,则意味着传输的信息越少。 |
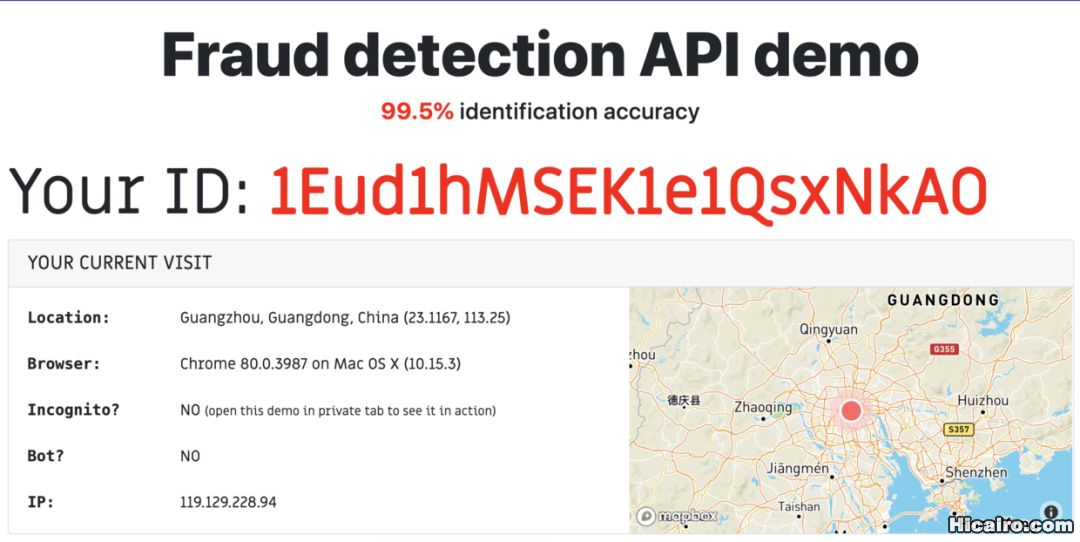 这个网站也可以查看你浏览器的指纹相关信息:https://amiunique.org/fp。
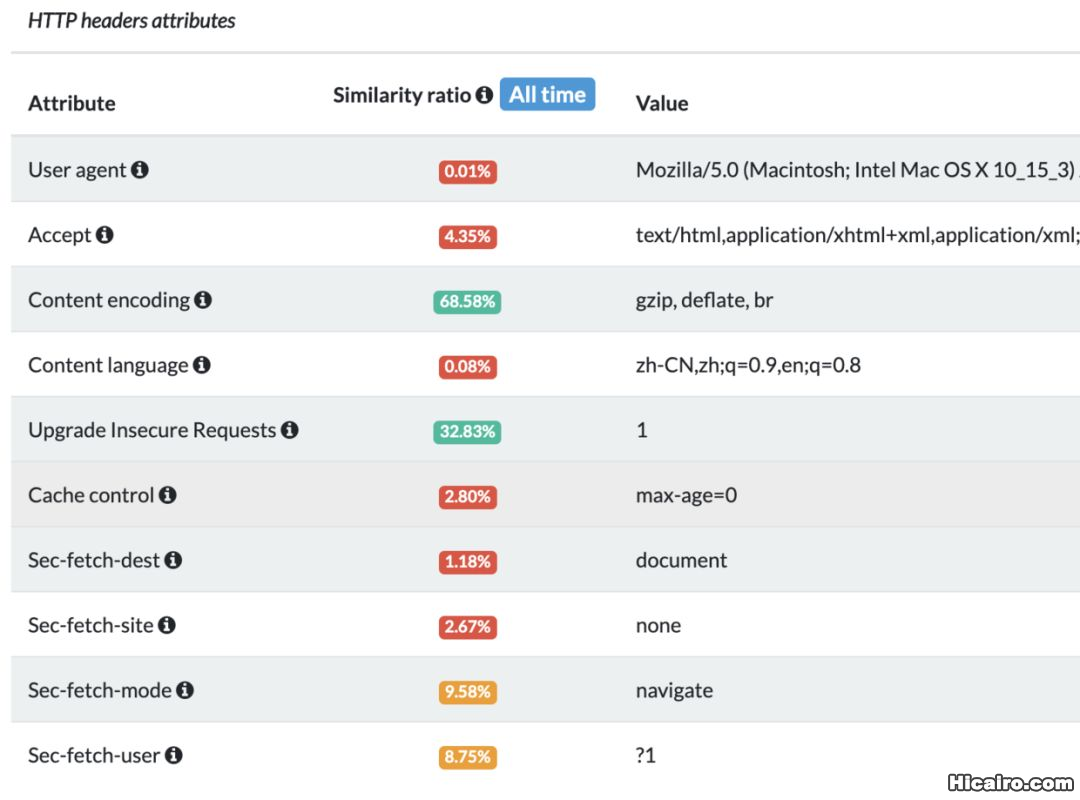
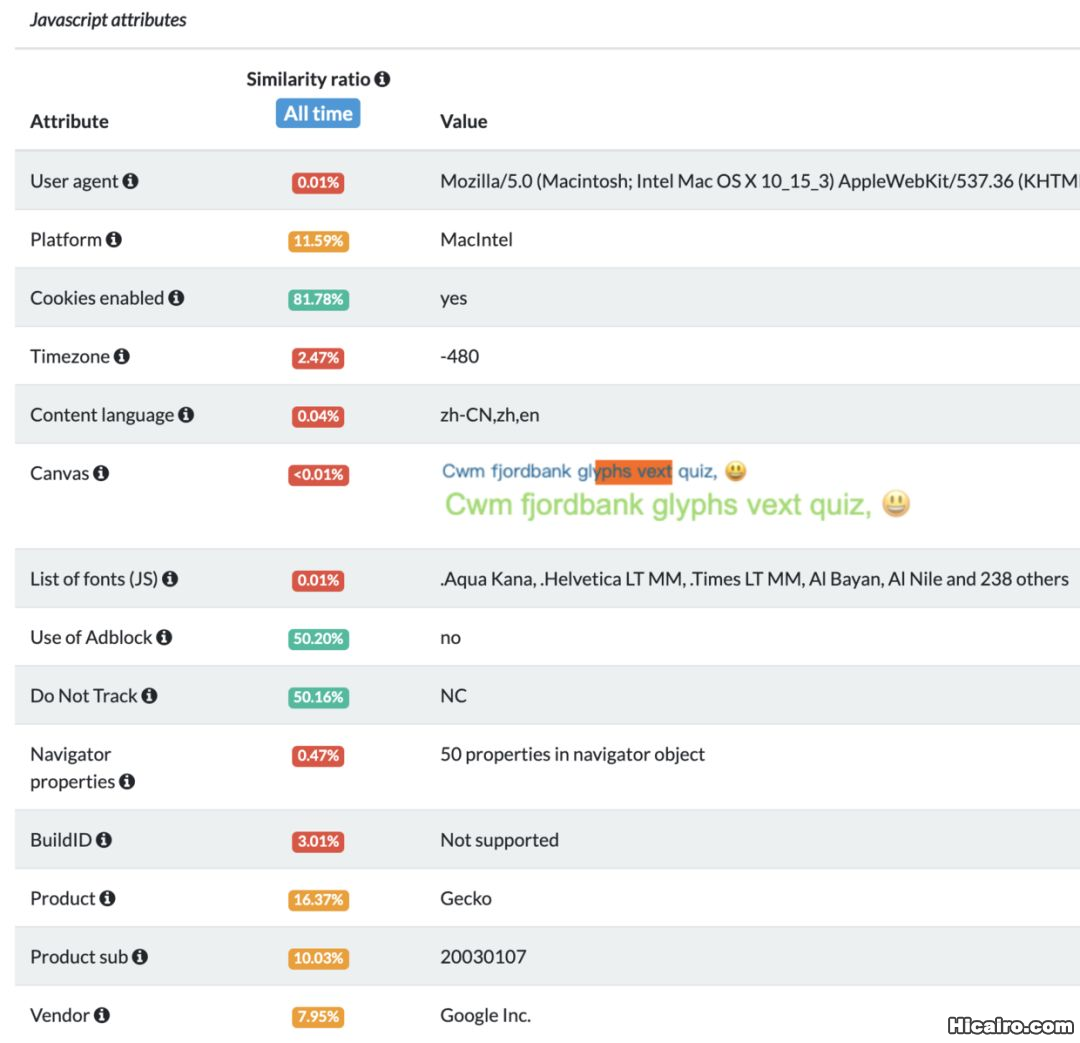
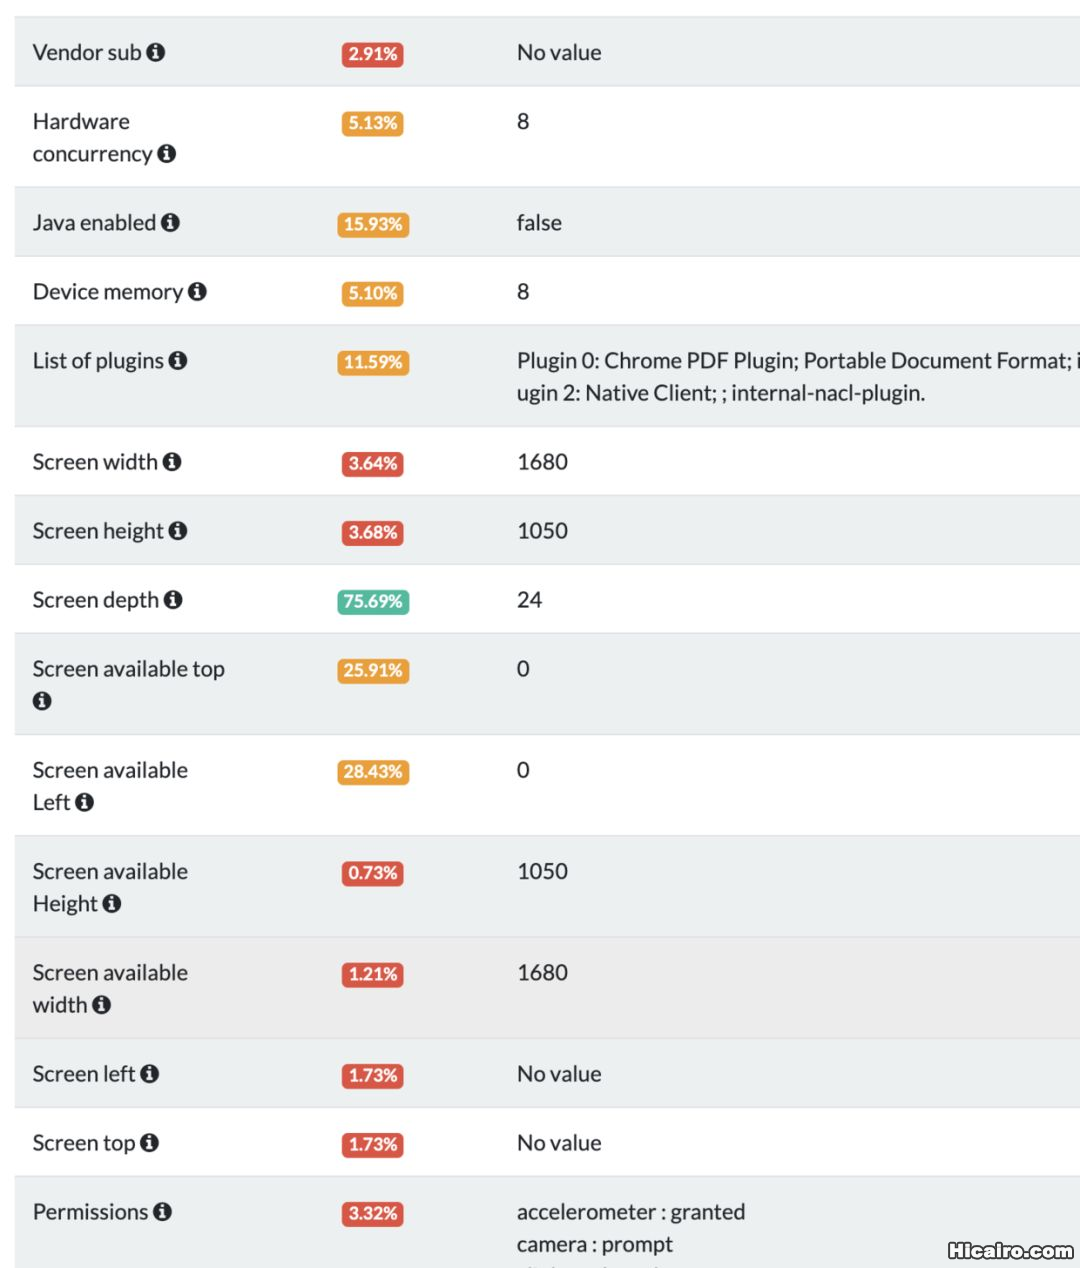
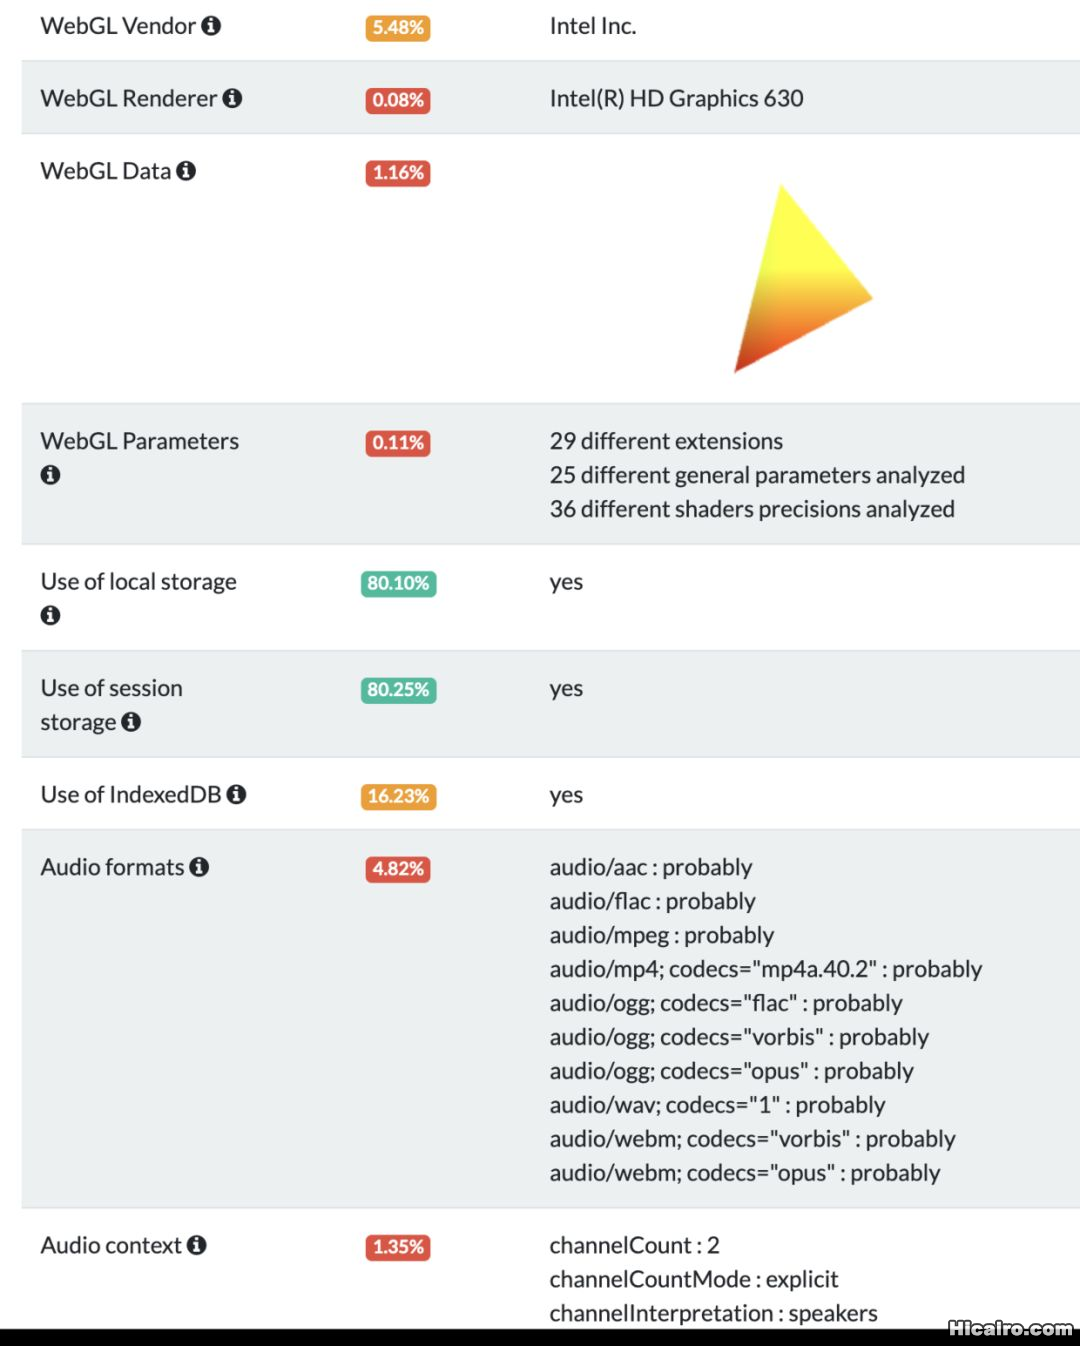
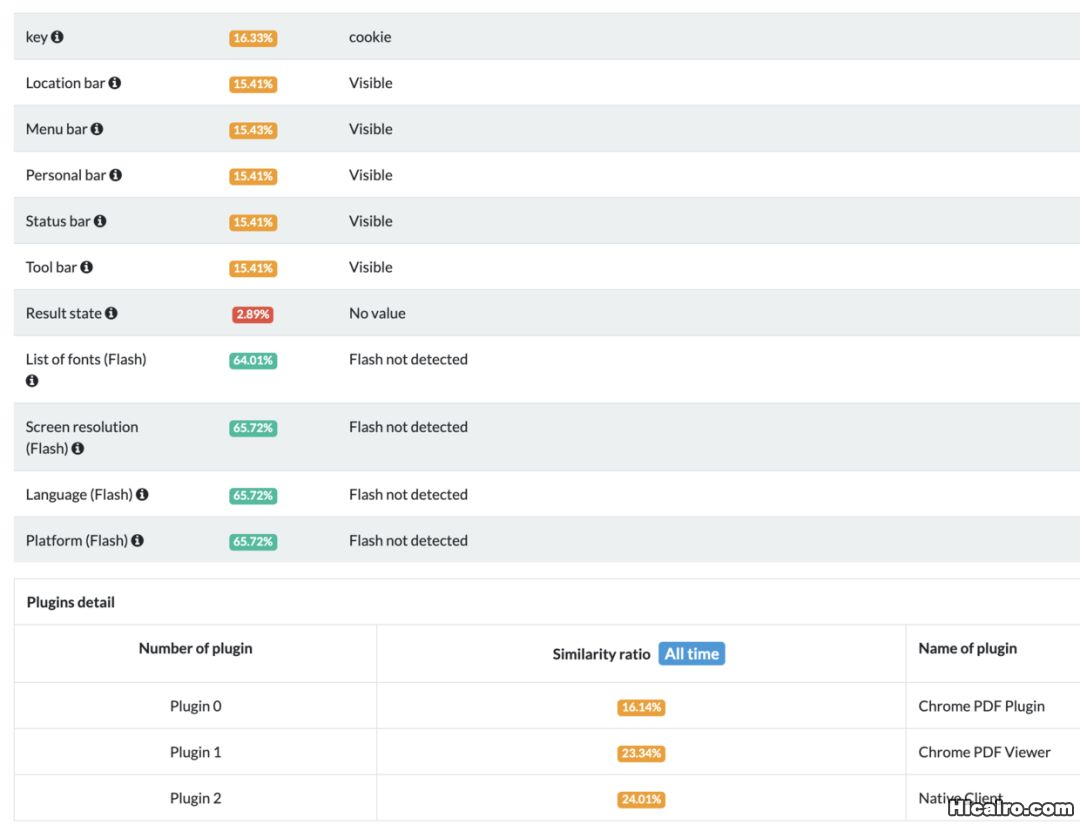 而且浏览器指纹还有一个开源项目了,纯JS实现的,只有引用这个项目就可以获取浏览器的各种信息或者系统的配置了。
if (window.requestIdleCallback) {
    requestIdleCallback(function () {
        Fingerprint2.get(function (components) {
          console.log(components) // an array of components: {key: ..., value: ...}
        })
    })
} else {
    setTimeout(function () {
        Fingerprint2.get(function (components) {
          console.log(components) // an array of components: {key: ..., value: ...}
        })
    }, 500)
}12345678910111213
Ant Media Server is a live streaming engine software that provides adaptive, ultra low latency streaming by using WebRTC technology with ~0.5 seconds latency. Ant Media Server is auto-scalable and it can run on-premise or on-cloud.
Are you ready to revolutionize your live video streaming experience? Look no further! Ant Media Server is your ultimate solution for high-quality, ultra-low latency streaming. With over 2000 enterprises worldwide already relying on our platform, you can trust us to deliver outstanding performance and exceptional user experiences.
TL;DR
Ant Media Server Today!
Ready to embark on your streaming journey? Here's what you need to do:
At Ant Media Server, we're passionate about delivering cutting-edge streaming solutions that empower businesses and individuals worldwide. Join us today and unleash the full potential of live video streaming!
Deploy Ant Media Server seamlessly on your favorite cloud platforms with 1-Click apps, cloud marketplaces, or Docker/Kubernetes/Scripts. Get started quickly and effortlessly with our streamlined deployment options.
| Cloud Provider | Community Edition | Enterprise Edition |
|---|---|---|
| AWS | Community Edition | Enterprise Edition |
| Microsoft Azure | Community Edition | Enterprise Edition |
| Alibaba | - | Enterprise Edition |
| Digital Ocean | Community Edition | Enterprise Edition or Enterprise Edition Kubernetes |
| Linode | Community Edition | Enterprise Edition |
| Linux | Install via Script | SSL Setup |
| Docker | Docker Compose | Docker Swarm |
| Cluster | Cluster installation | Multi Level Cluster |
| Kubernetes | Deploy on Kubernetes | Kubernetes Autoscaling |
Discover the Power of Ant Media: Start Your Free Trial Today!
Whether you opt for our Community Edition, engaging with our active GitHub Discussions community, or our Enterprise Edition with email support. Explore our comprehensive support packages and tap into the resources that will elevate your streaming experience. No matter the edition, our goal is to deliver exceptional support, empowering you to create remarkable streaming experiences. Need help or have inquiries? Contact us at support@antmedia.io. Let's embark on a seamless streaming journey together!
from https://github.com/ant-media/Ant-Media-Server