它允许用户通过几个点击和拖动来真实地修改照片。DragGAN模型本质上是给各种GAN开发的一种交互式图像操作方法,实现了通过鼠标拉伸图像即可自动生成新图像的神奇功能。用户先设置一个起始点,一个目标点,和想要改变的区域,然后模型就会迭代的执行运动监督和点跟踪这两个步骤。运动监督会控制起始点向目标点运动。点跟踪则是根据点的移动而动态修改图像。
https://vcai.mpi-inf.mpg.de/projects/DragGAN/data/DragGAN.mp4
DragGAN 离线版
DragGAN 离线版是国内开发者打包制作的,什么环境都不用配置,解压直接用的dragGAN工具,内置17个模型,小白也能轻松上手,而且支持Windows和Mac,感兴趣的同学可以下载体验。
DragGAN 离线版V1.0 解压就能用-DragGAN Windows GUI
DragGAN 离线版下载地址
GitHub页面:https://github.com/zhaoyun0071/DragGAN-Windows-GUI
Windows用户:V1.2下载(仅支持win10、win11)
(1)百度网盘链接:https://pan.baidu.com/s/1AIVBa6FLu1IH0Saxs7mHMg 提取码:qba7
(2)天翼网盘链接:https://cloud.189.cn/t/u6r2EnJR3qMn (访问码:iv5c)
(3)夸克网盘链接:https://pan.quark.cn/s/273be7b9add4 提取码:yrCu
Mac用户:Drag GAN苹果版V1(无上传图片功能)
百度网盘链接:https://pan.baidu.com/s/1xJMdLW15xLqXX-X5ugvcDw 提取码:ve87
----------------
有手就行的 AI 修图神器「DragGAN」终于开源 :
https://github.com/XingangPan/DragGAN
目前的 Demo:
https://huggingface.co/spaces/radames/DragGan 对于非专业人士,体验没那么友好,并且对性能要求比较高,一般人也不会专门部署好拿来日常用.
-------------------------------------------------------------
Official Code for DragGAN (SIGGRAPH 2023)
https://vcai.mpi-inf.mpg.de/projects/DragGAN/
Drag Your GAN: Interactive Point-based Manipulation on the Generative Image Manifold
Xingang Pan · Ayush Tewari · Thomas Leimkühler · Lingjie Liu · Abhimitra Meka · Christian Theobalt
SIGGRAPH 2023 Conference Proceedings


Web Demos

Requirements
If you have CUDA graphic card, please follow the requirements of NVlabs/stylegan3.
The usual installation steps involve the following commands, they should set up the correct CUDA version and all the python packages
conda env create -f environment.yml
conda activate stylegan3
Then install the additional requirements
pip install -r requirements.txt
Otherwise (for GPU acceleration on MacOS with Silicon Mac M1/M2, or just CPU) try the following:
cat environment.yml | \
  grep -v -E 'nvidia|cuda' > environment-no-nvidia.yml && \
    conda env create -f environment-no-nvidia.yml
conda activate stylegan3

# On MacOS
export PYTORCH_ENABLE_MPS_FALLBACK=1
Run Gradio visualizer in Docker
Provided docker image is based on NGC PyTorch repository. To quickly try out visualizer in Docker, run the following:
# before you build the docker container, make sure you have cloned this repo, and downloaded the pretrained model by `python scripts/download_model.py`.
docker build . -t draggan:latest
docker run -p 7860:7860 -v "$PWD":/workspace/src -it draggan:latest bash
# (Use GPU)if you want to utilize your Nvidia gpu to accelerate in docker, please add command tag `--gpus all`, like:
#   docker run --gpus all  -p 7860:7860 -v "$PWD":/workspace/src -it draggan:latest bash

cd src && python visualizer_drag_gradio.py --listen
Now you can open a shared link from Gradio (printed in the terminal console).
Beware the Docker image takes about 25GB of disk space!
Download pre-trained StyleGAN2 weights
To download pre-trained weights, simply run:
python scripts/download_model.py
If you want to try StyleGAN-Human and the Landscapes HQ (LHQ) dataset, please download weights from these links: StyleGAN-Human, LHQ, and put them under ./checkpoints.
Feel free to try other pretrained StyleGAN.
Run DragGAN GUI
To start the DragGAN GUI, simply run:
sh scripts/gui.shIf you are using windows, you can run:
.\scripts\gui.bat
This GUI supports editing GAN-generated images. To edit a real image, you need to first perform GAN inversion using tools like PTI. Then load the new latent code and model weights to the GUI.
You can run DragGAN Gradio demo as well, this is universal for both windows and linux:
python visualizer_drag_gradio.pyAcknowledgement
This code is developed based on StyleGAN3. Part of the code is borrowed from StyleGAN-Human.
(cheers to the community as well)
from https://github.com/XingangPan/DragGAN
-------
什么是 GAN
GAN的中文名字叫「生成对抗网络」, 是一种无监督算法,他能生成出非常逼真的照片甚至视频
资料1:https://mp.weixin.qq.com/s/ti2ZkDk3SIiW6dvAt20_jQ
资料2: https://easyai.tech/ai-definition/gan/
------
Unofficial Implementation of DragGAN - "Drag Your GAN: Interactive Point-based Manipulation on the Generative Image Manifold" (DragGAN 全功能实现,在线Demo,本地部署试用,代码、模型已全部开源,支持Windows, macOS, Linux)
DragGAN

💥 Colab Demo Awesome-DragGAN InternGPT Demo Local Deployment
Note for Colab, remember to select a GPU via
Runtime/Change runtime type(代码执行程序/更改运行时类型).If you want to upload custom image, please install 1.1.0 via
pip install draggan==1.1.0.
Unofficial implementation of Drag Your GAN: Interactive Point-based Manipulation on the Generative Image Manifold


How it Work ?
Here is a simple tutorial video showing how to use our implementation.
demo.mp4
Check out the original paper for the backend algorithm and math.

News
🌟 What's New
- [2023/6/25] Relase version 1.1.1, it includes a major bug fix and speed improvement.
- [2023/6/25] Official Code is released, check it out.
- [2023/5/29] A new version is in beta, install via
pip install draggan==1.1.0b2, includes speed improvement and more models. - [2023/5/25] DragGAN is on PyPI, simple install via
pip install draggan. Also addressed the common CUDA problems #38 #12 - [2023/5/25] We now support StyleGAN2-ada with much higher quality and more types of images. Try it by selecting models started with "ada".
- [2023/5/24] An out-of-box online demo is integrated in InternGPT - a super cool pointing-language-driven visual interactive system. Enjoy for free.:lollipop:
- [2023/5/24] Custom Image with GAN inversion is supported, but it is possible that your custom images are distorted due to the limitation of GAN inversion. Besides, it is also possible the manipulations fail due to the limitation of our implementation.
🌟 Changelog
- Add a docker image, thanks @egbaydarov.
- PTI GAN inversion #71 (comment)
- Tweak performance, See v2.
- Improving installation experience, DragGAN is now on PyPI.
- Automatically determining the number of iterations, See v2.
- Allow to save video without point annotations, custom image size.
- Support StyleGAN2-ada.
- Integrate into InternGPT
- Custom Image with GAN inversion.
- Download generated image and generation trajectory.
- Controlling generation process with GUI.
- Automatically download stylegan2 checkpoint.
- Support movable region, multiple handle points.
- Gradio and Colab Demo.
This project is now a sub-project of InternGPT for interactive image editing. Future updates of more cool tools beyond DragGAN would be added in InternGPT.
Running Locally
Please refer to INSTALL.md.
from https://github.com/OpenGVLab/DragGAN
-------
DragGAN 抢先体验与本地部署教程
May 25, 2023
最近风靡全网的DragGAN, 官方代码尚未放出。不过现在已经可以抢先体验啦。
项目地址
- Zeqiang-Lai/DragGAN: 相关代码模型,支持本地部署,Colab在线体验。
- OpenGVLab/InternGPT: 可以免费在线体验
在线体验 #
InternGPT Google Colab CodewithGPU
⚠️ 注意 Google Colab 记得通过
代码执行程序/更改运行时类型选择一块GPU。
本地部署 - Pip Install 方式 #
接来下的图片展示以Windows下的部署为例,Linux下的部署也是相同的
目前,
Zeqiang-Lai/DragGAN 的实现已经上传到 PyPI 源上了,因此,我们无需下载代码,只需要使用 pip install 即可进行安装。
安装 Conda #
为了避免依赖冲突,我们首先使用Conda创建一个虚拟环境,如果你还没有安装Conda,可以在 这里下载一个Miniconda。
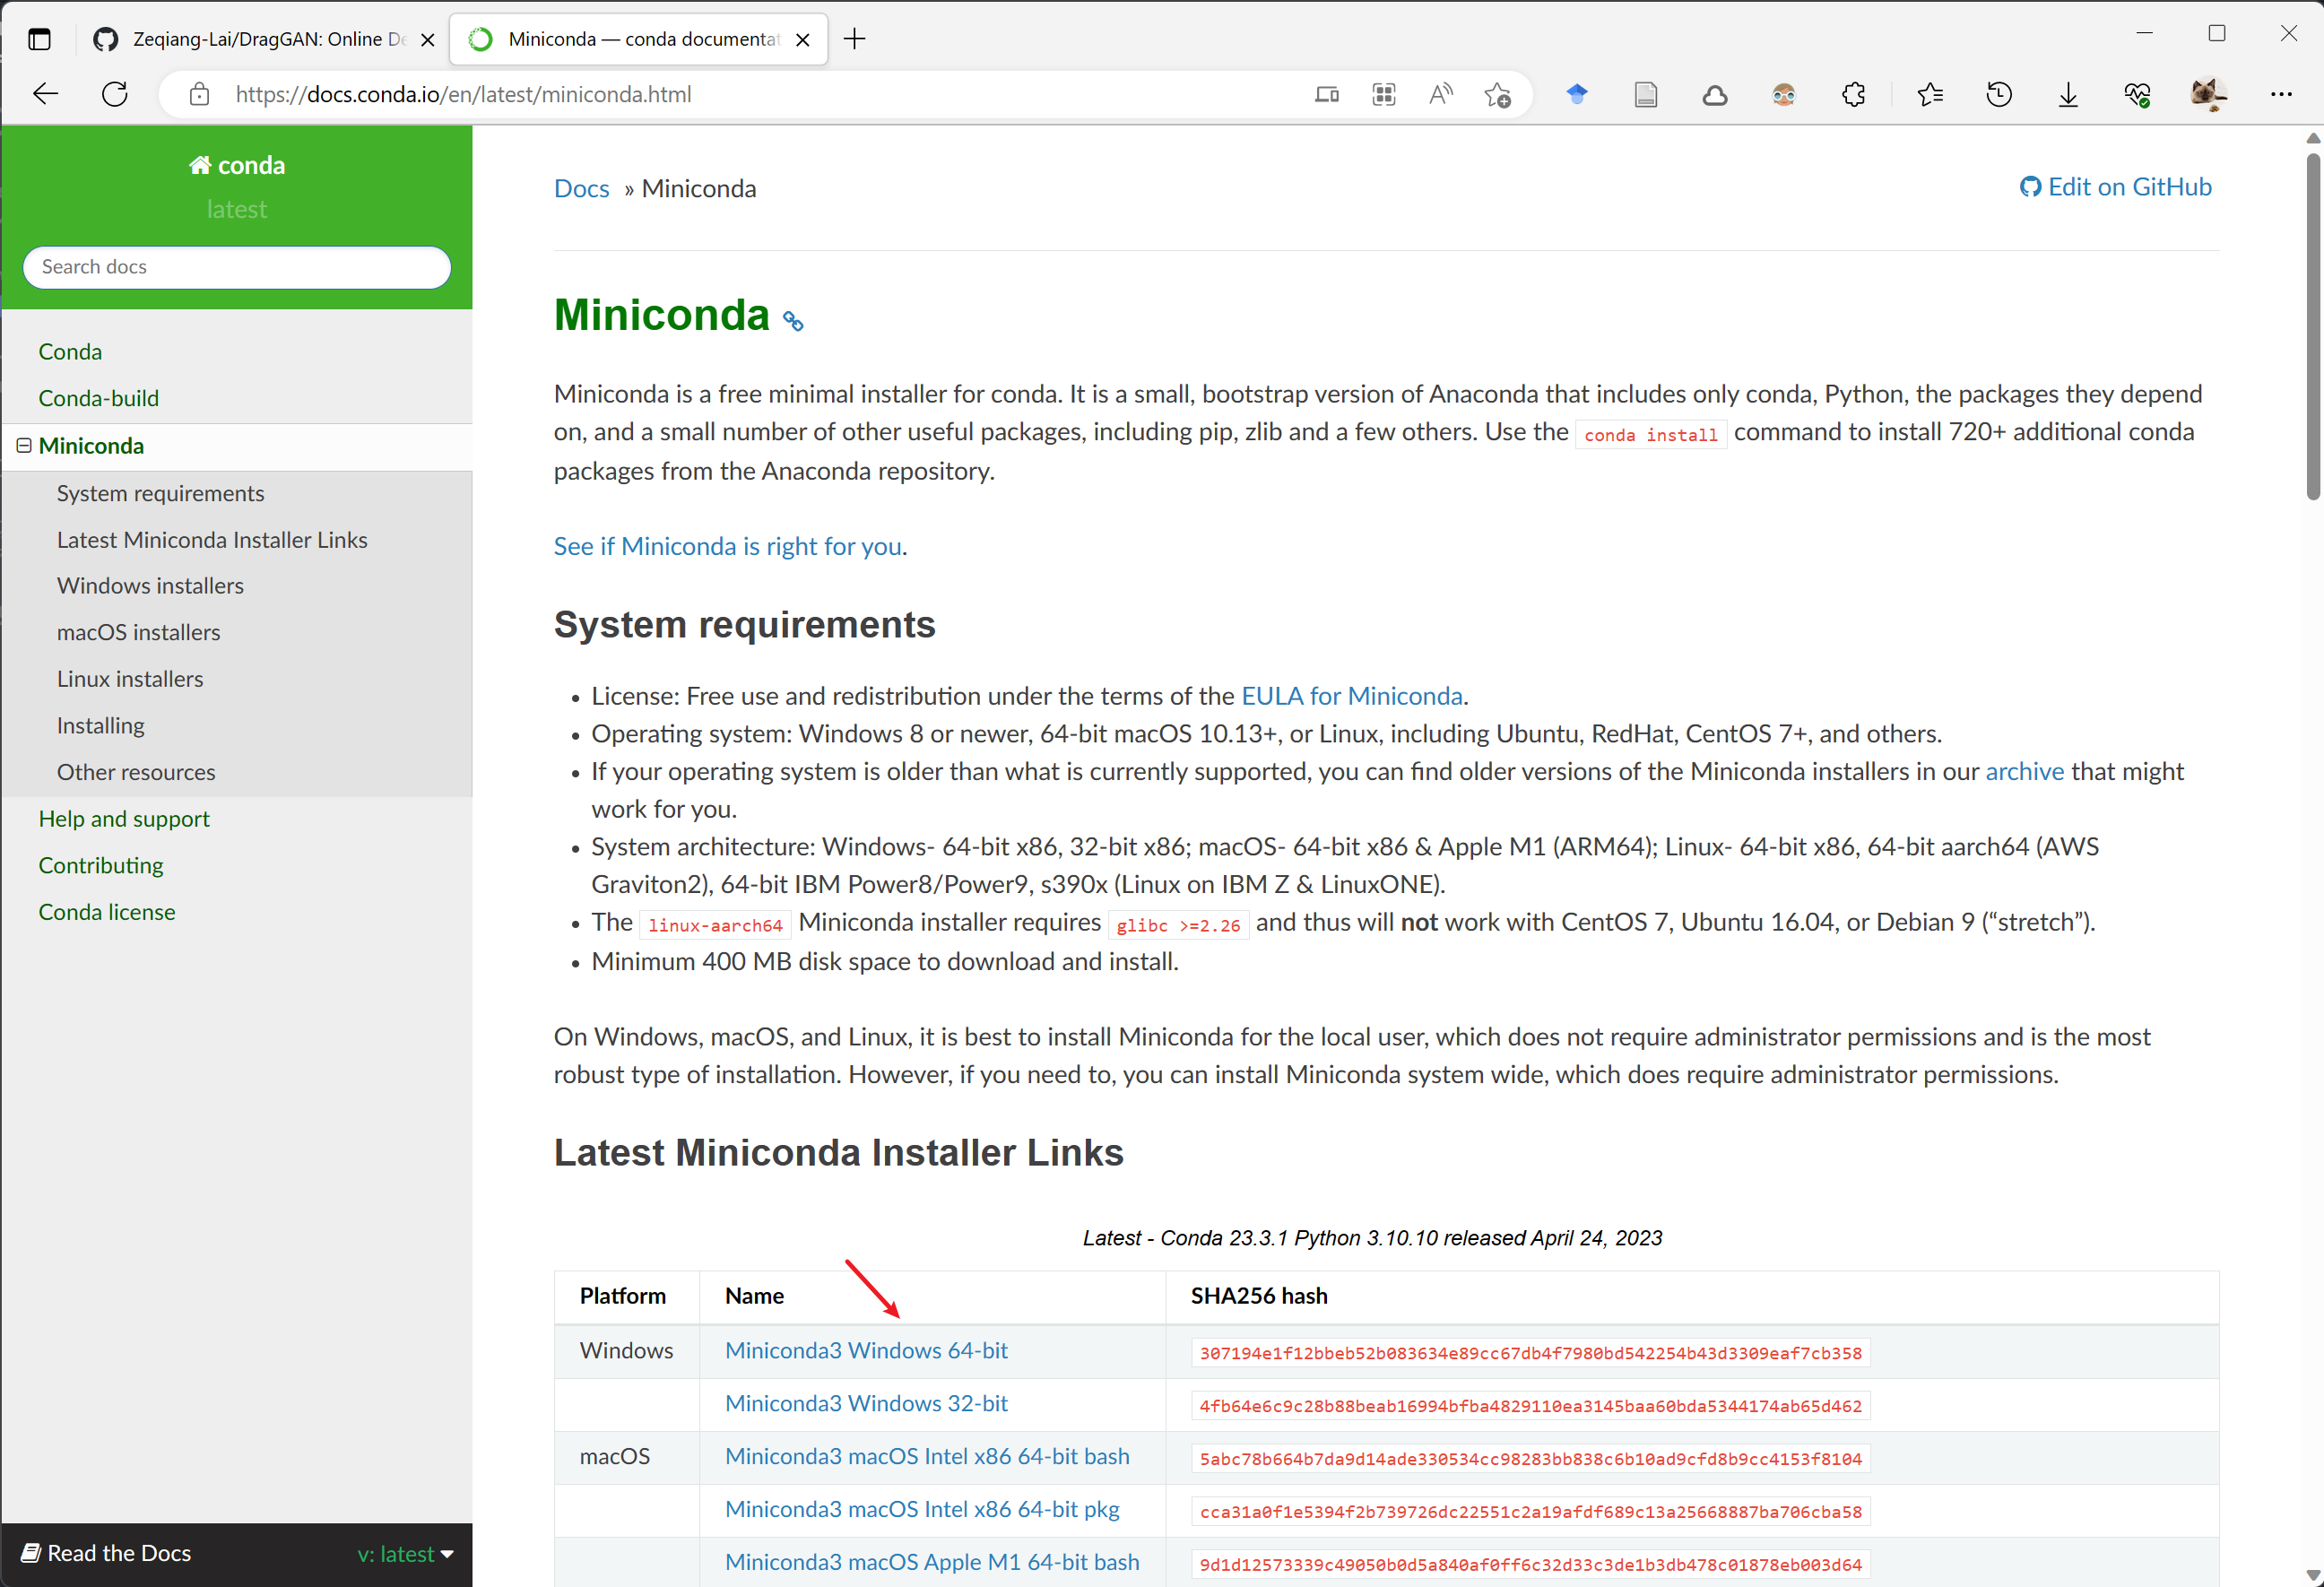
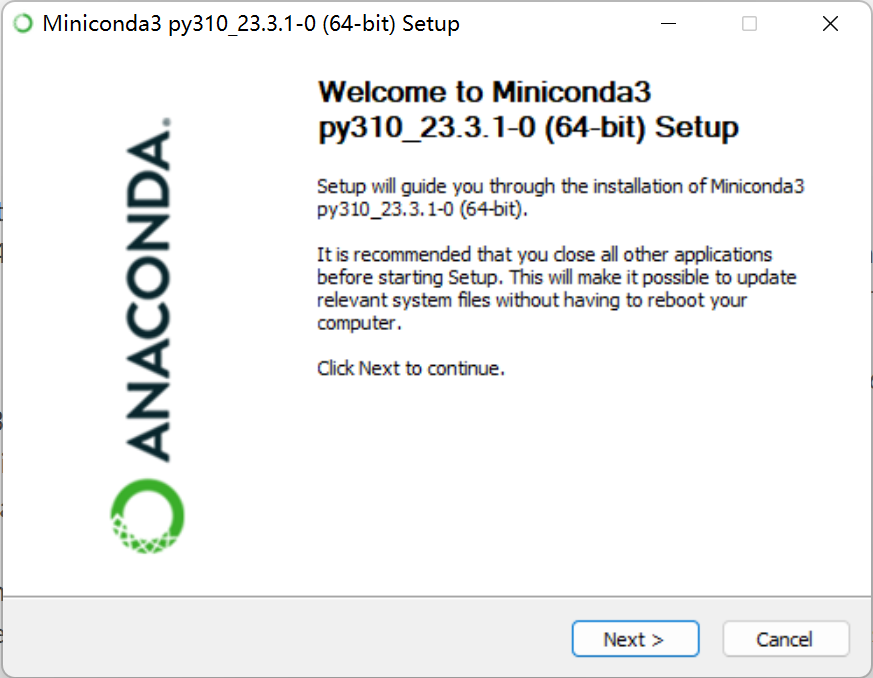
下载完成后,点击安装包一直下一步就可以了。
创建 Conda 虚拟环境 #
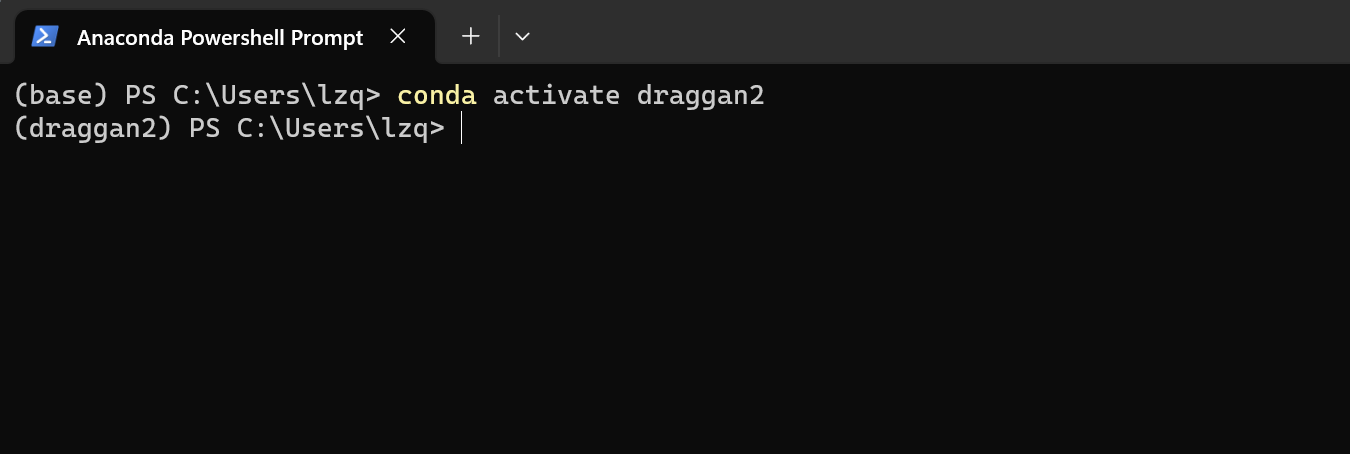
接下来从 Windows 菜单栏选择 Anaconda Powershell Prompt (miniconda3) 进入Conda 的命令行。
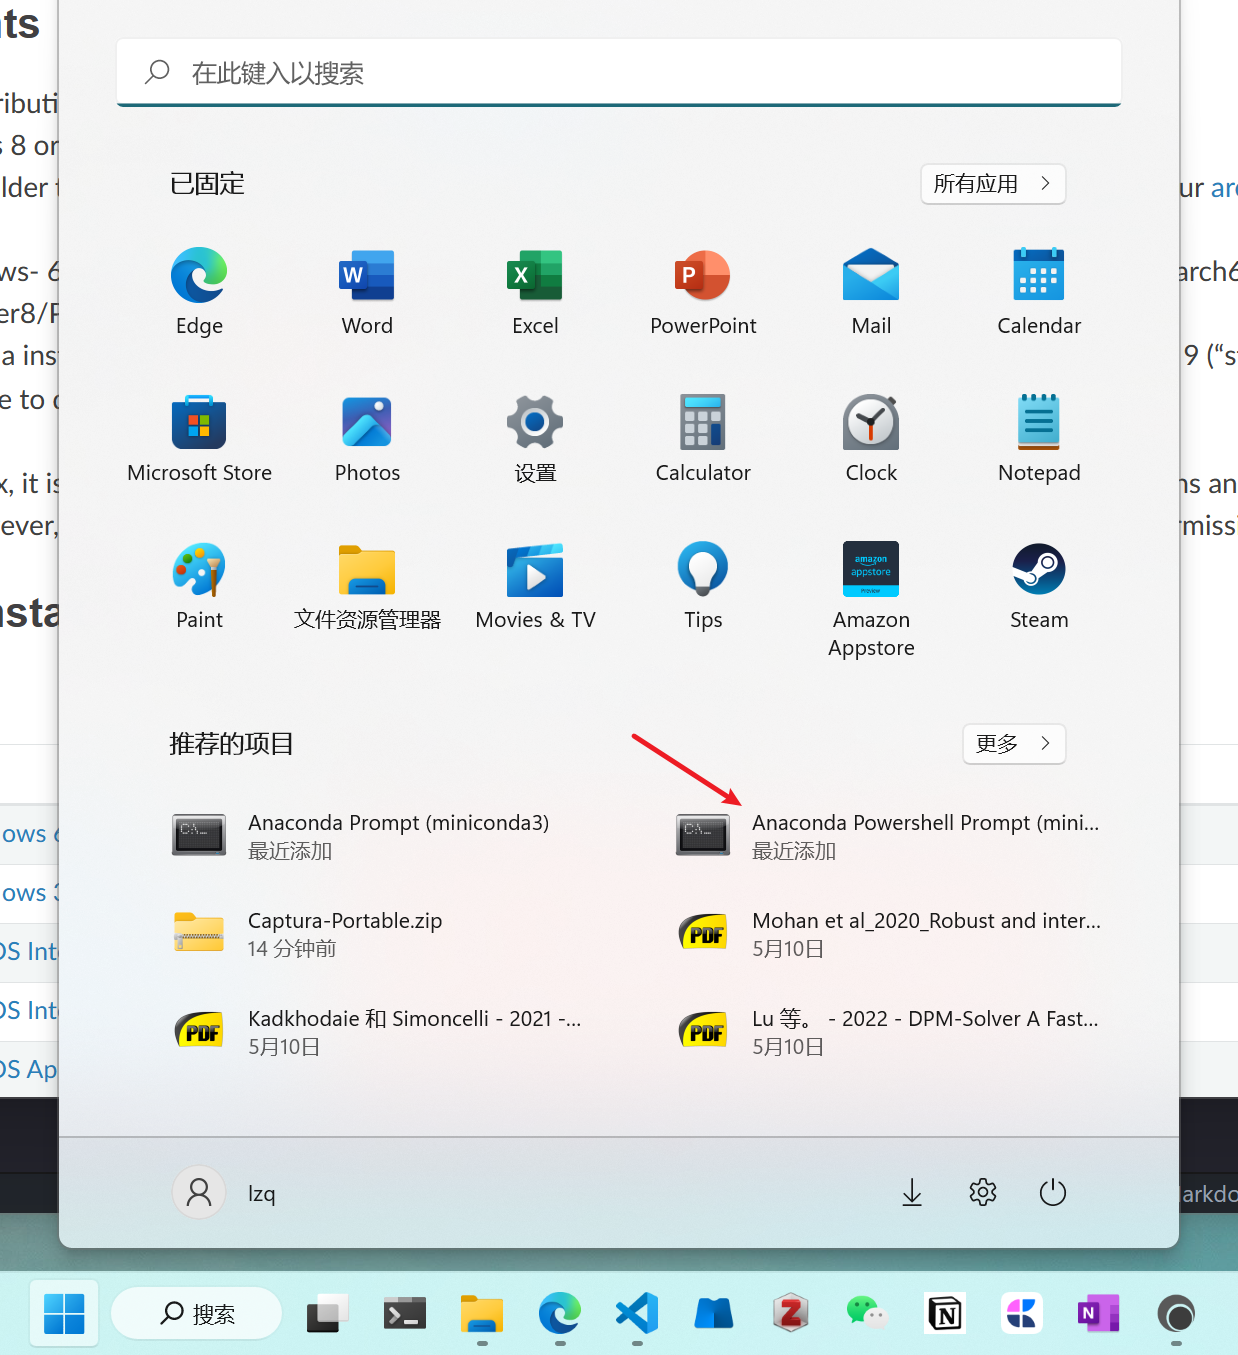
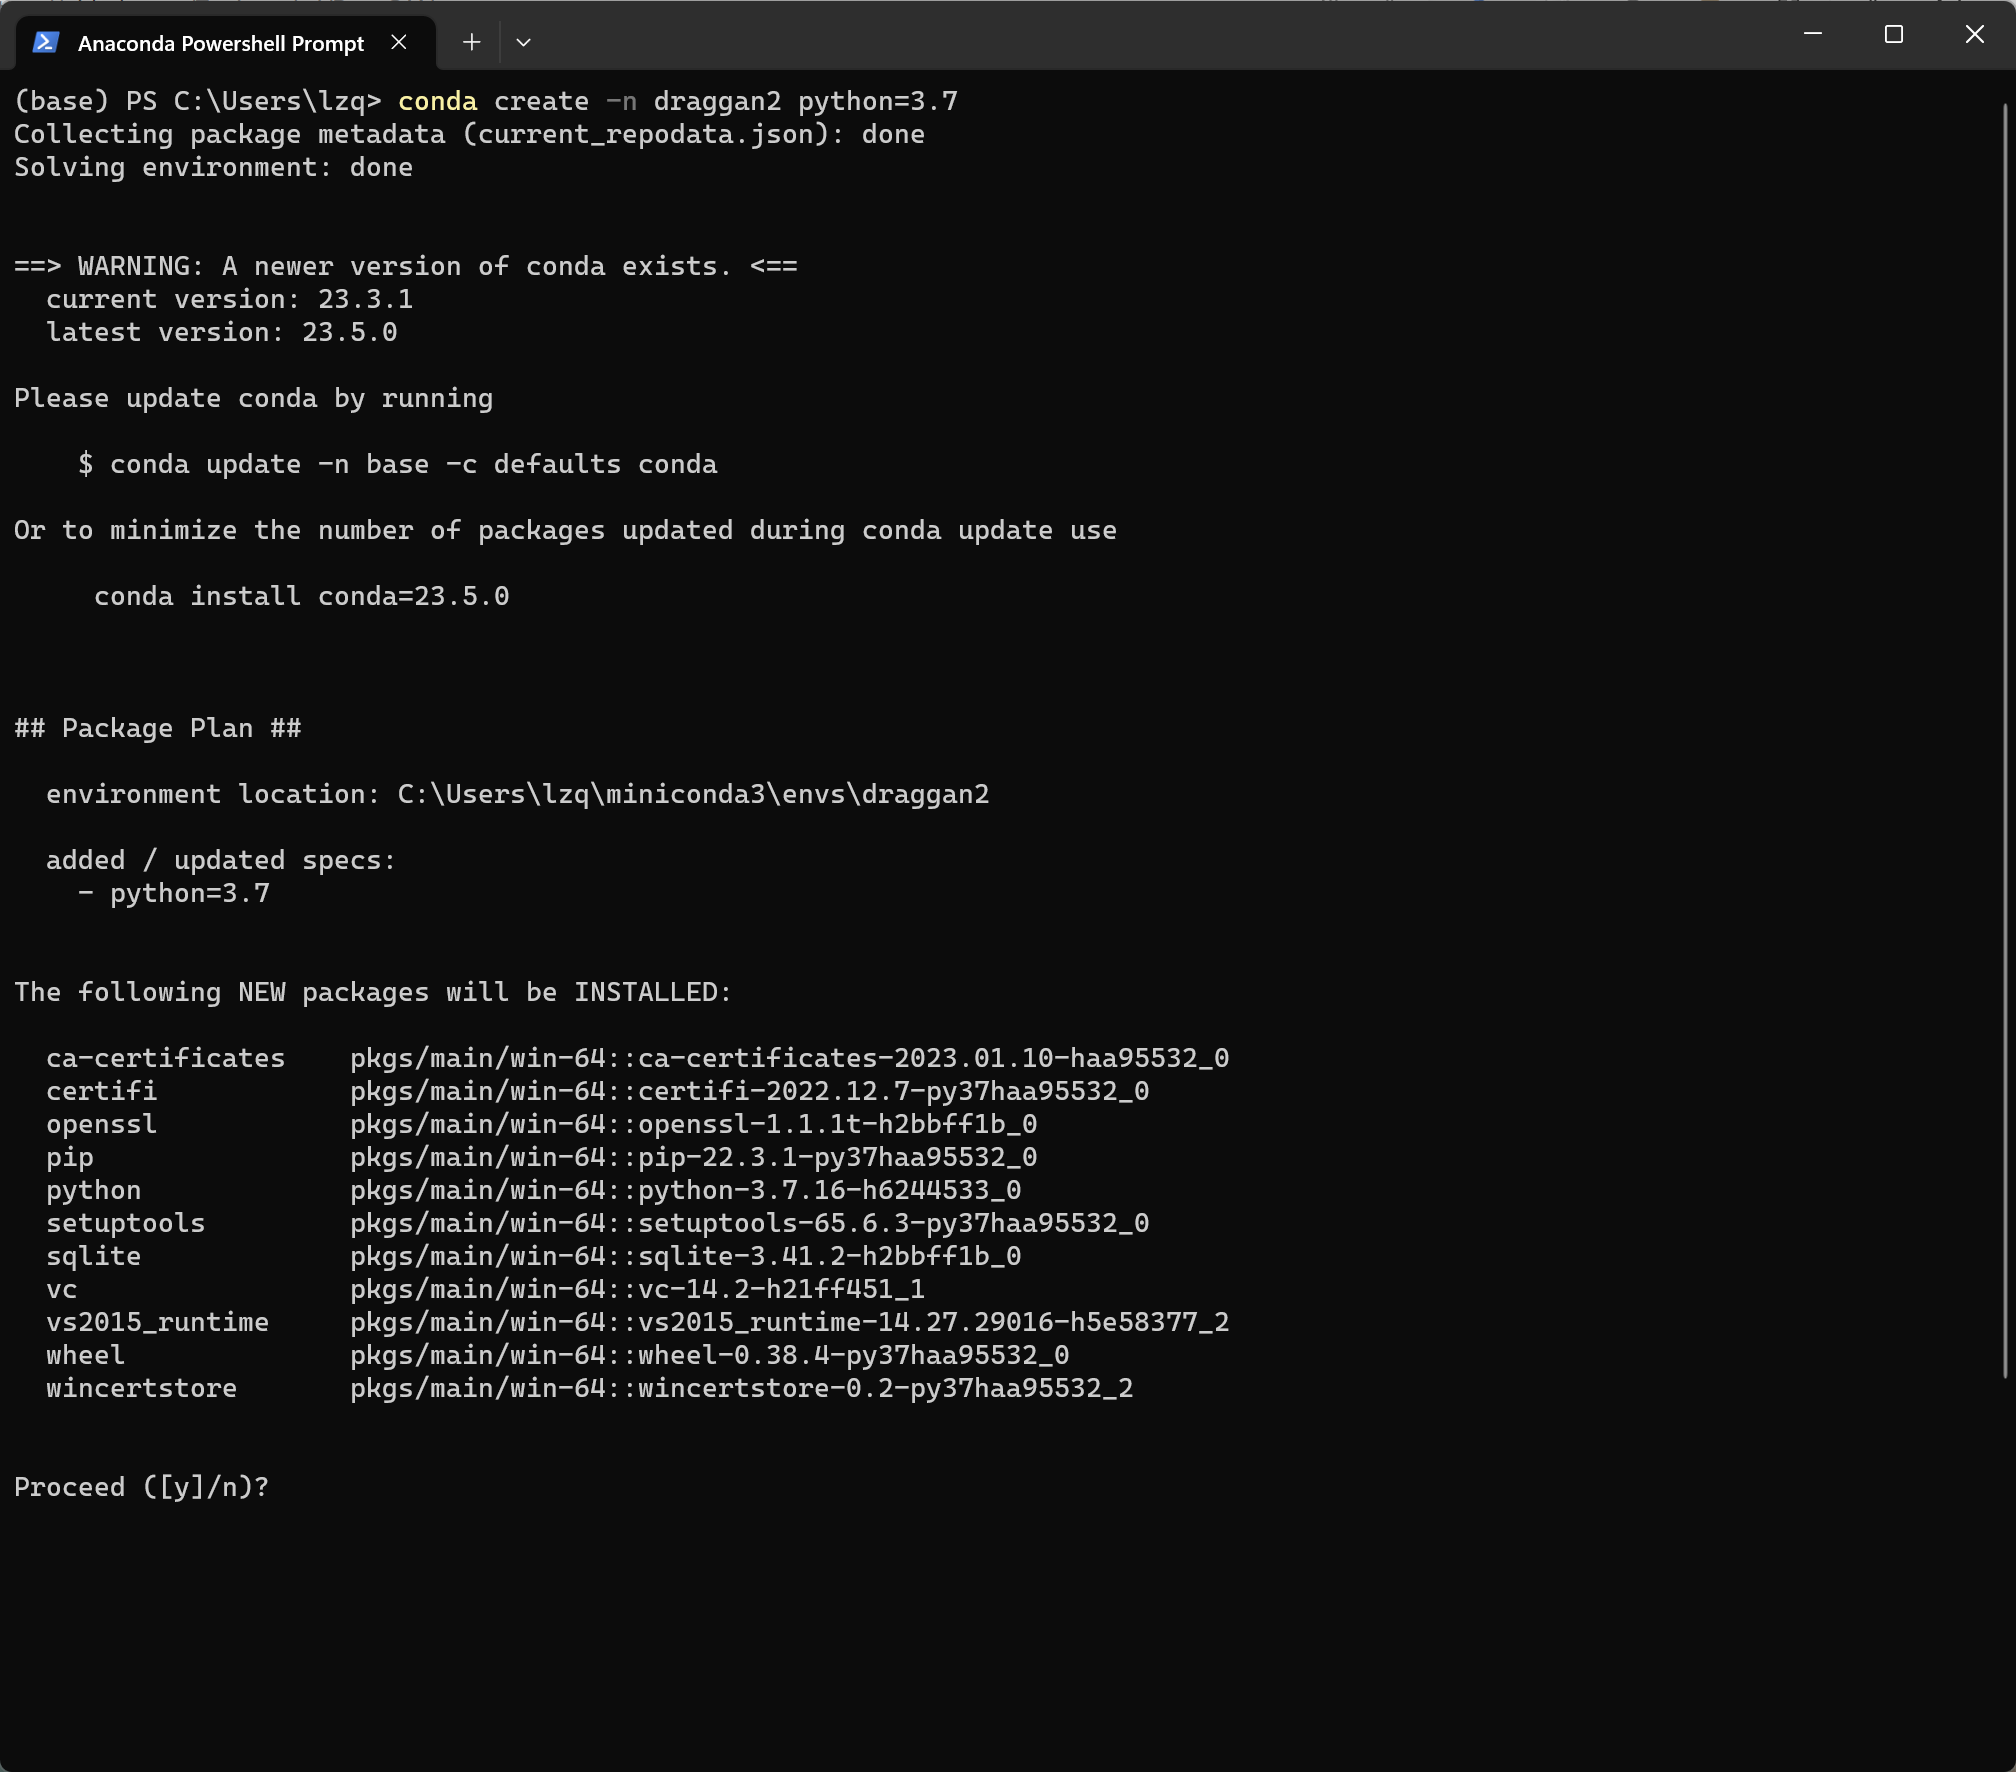
进入之后,输入以下指令创建一个名为 draggan 的环境,python 版本为3.7。提示是否继续的时候输入 y 即可继续。
conda create -n draggan python=3.7
因为我这把已经有一个环境叫draggan了,所以图片里用的是draggan2
安装 PyTorch #
我们首先激活一下刚刚创建的环境,输入以下指令即可
conda activate draggan
接着,参考PyTorch的 官方安装教程,
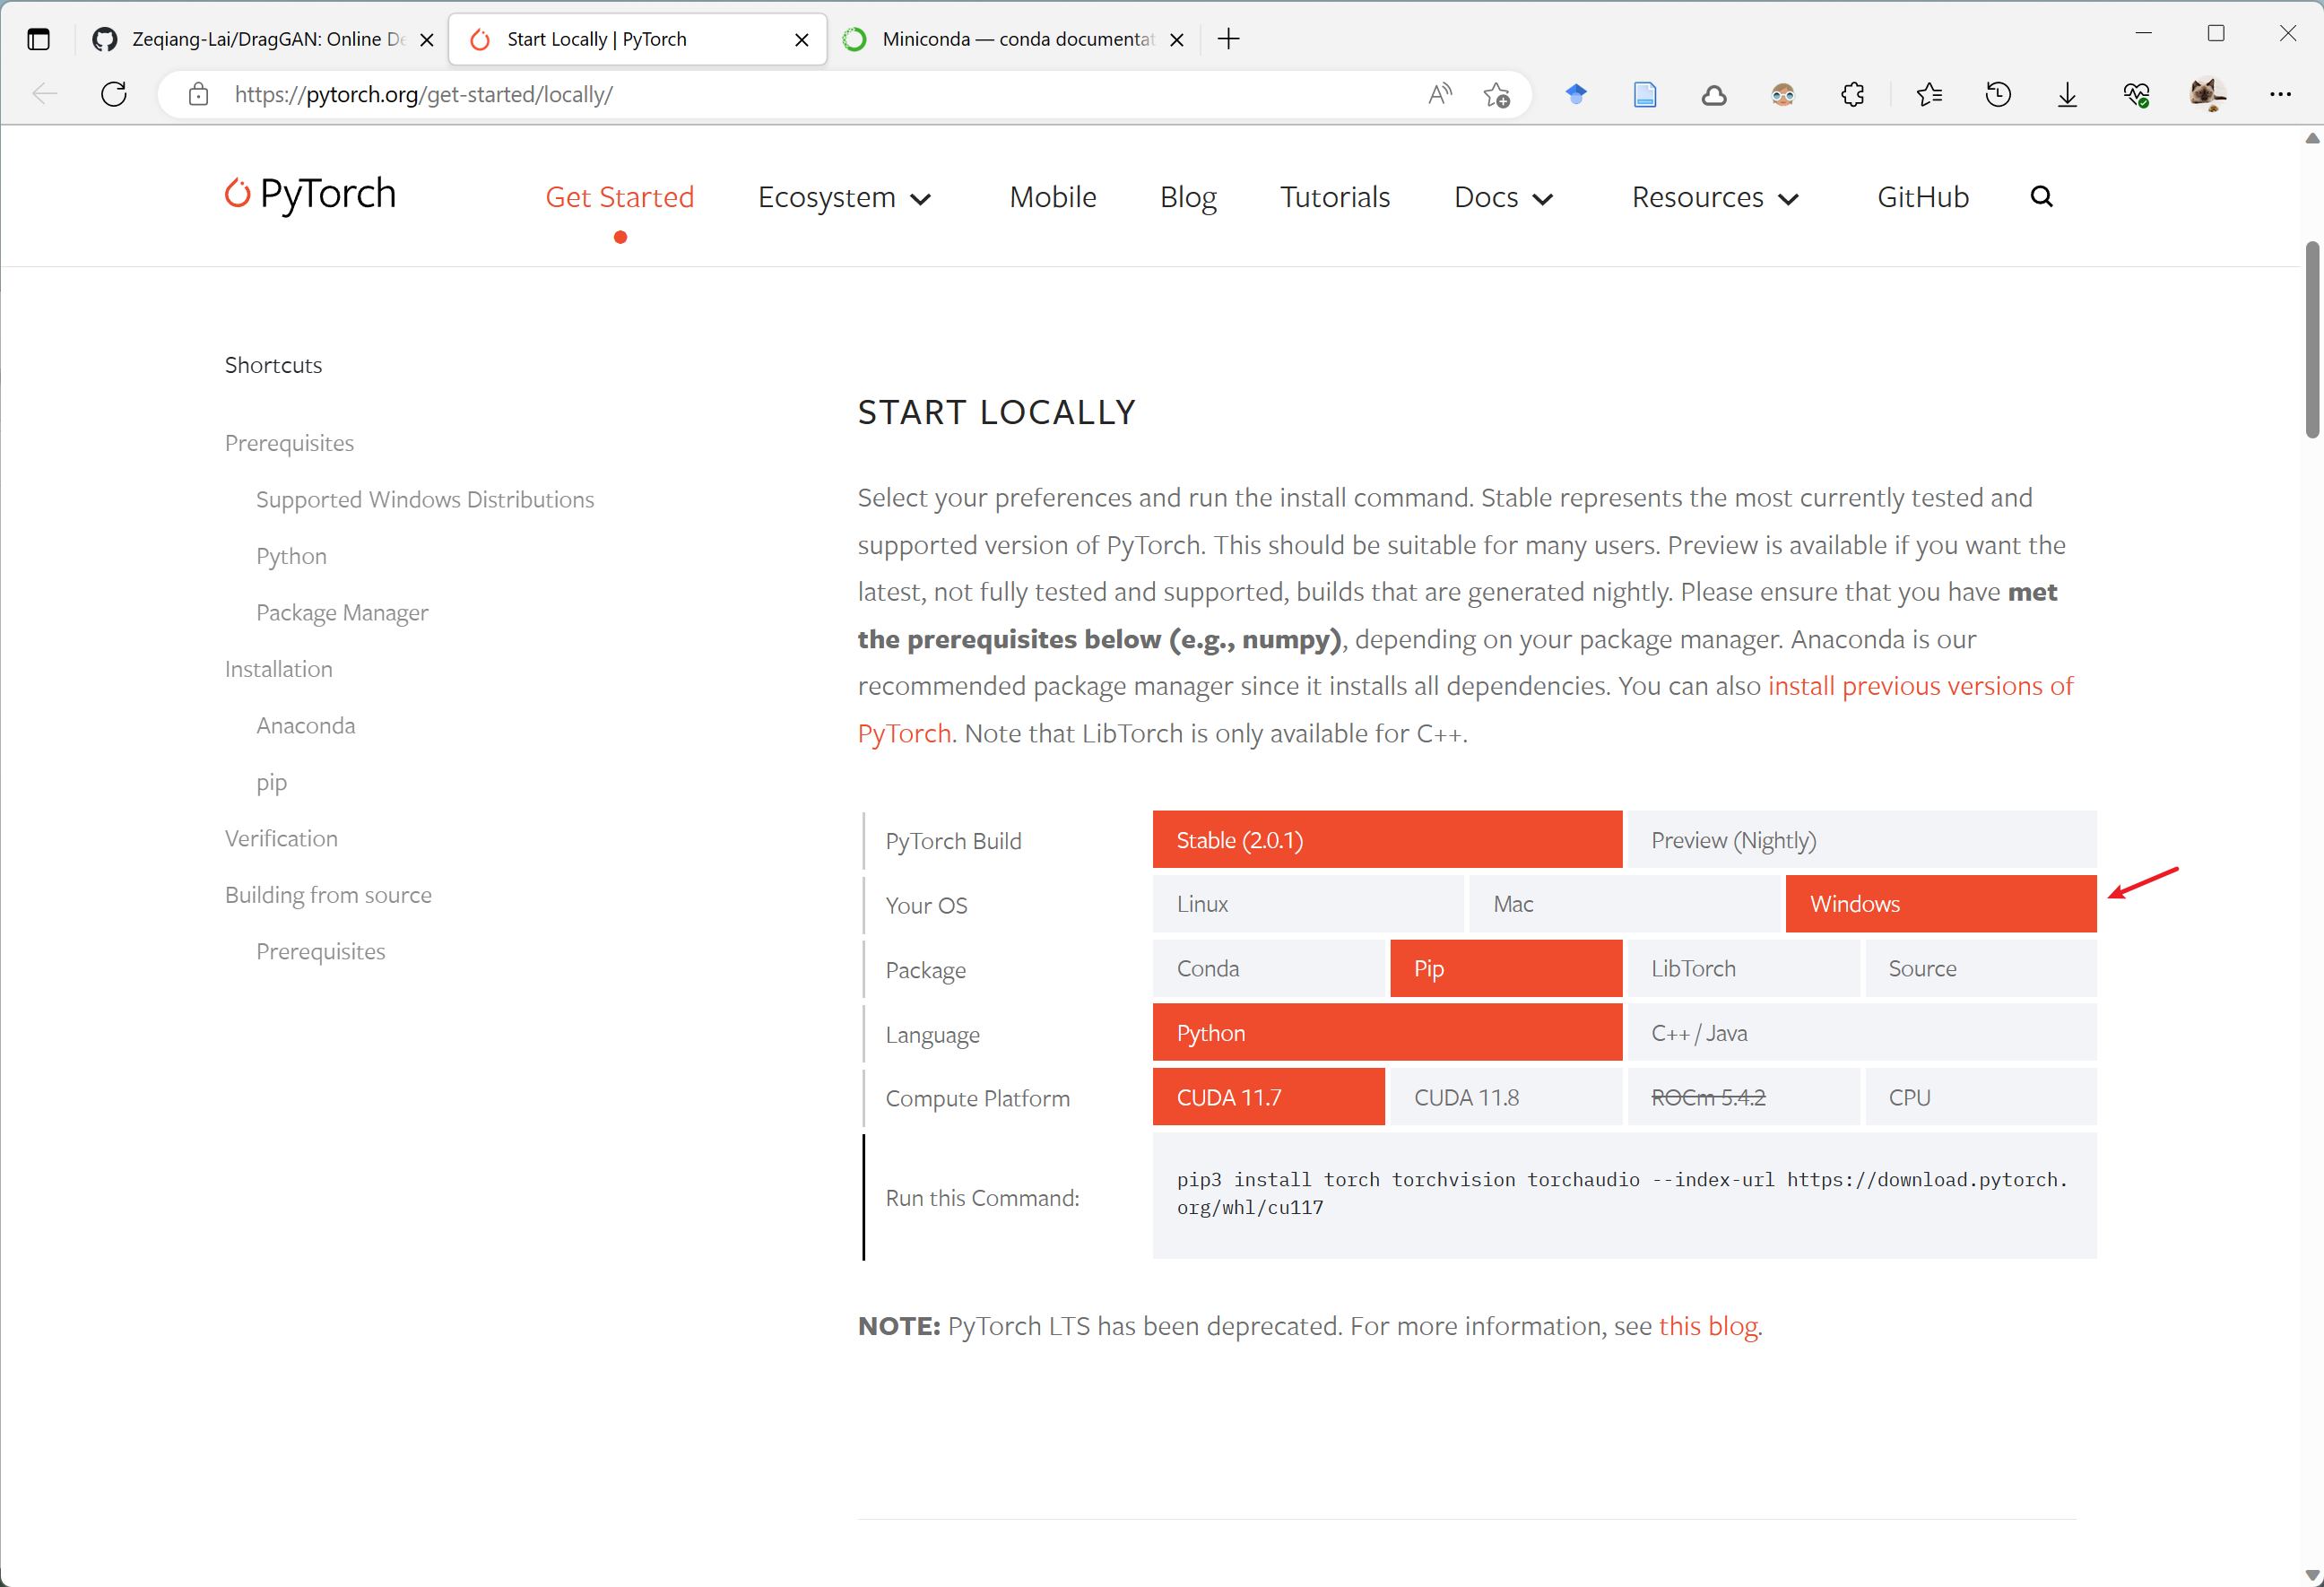
我们可以使用以下指令安装PyTorch,二选一即可,具体选哪个按下载速度自行选择,
pip3 install torch torchvision torchaudio --index-url https://download.pytorch.org/whl/cu117

conda install pytorch torchvision torchaudio pytorch-cuda=11.7 -c pytorch -c nvidia
没有GPU的用户用这个指令安装
pip3 install torch torchvision torchaudio
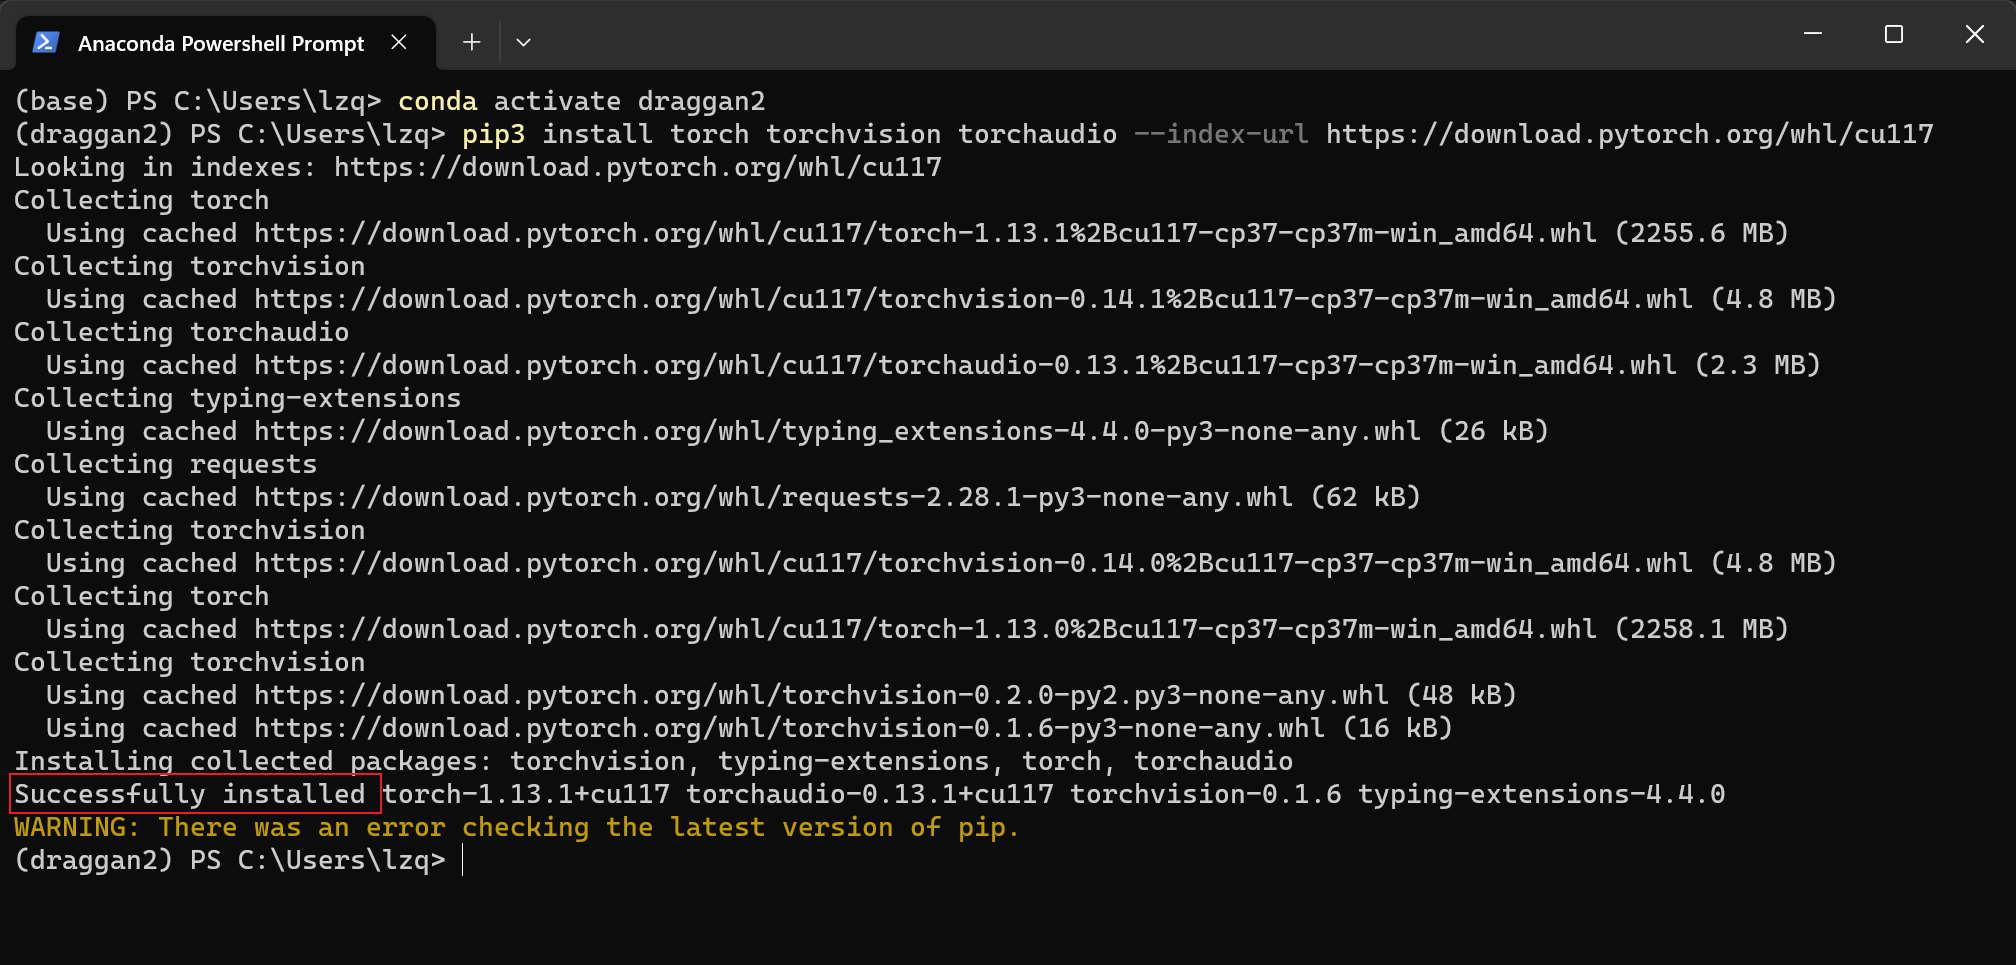
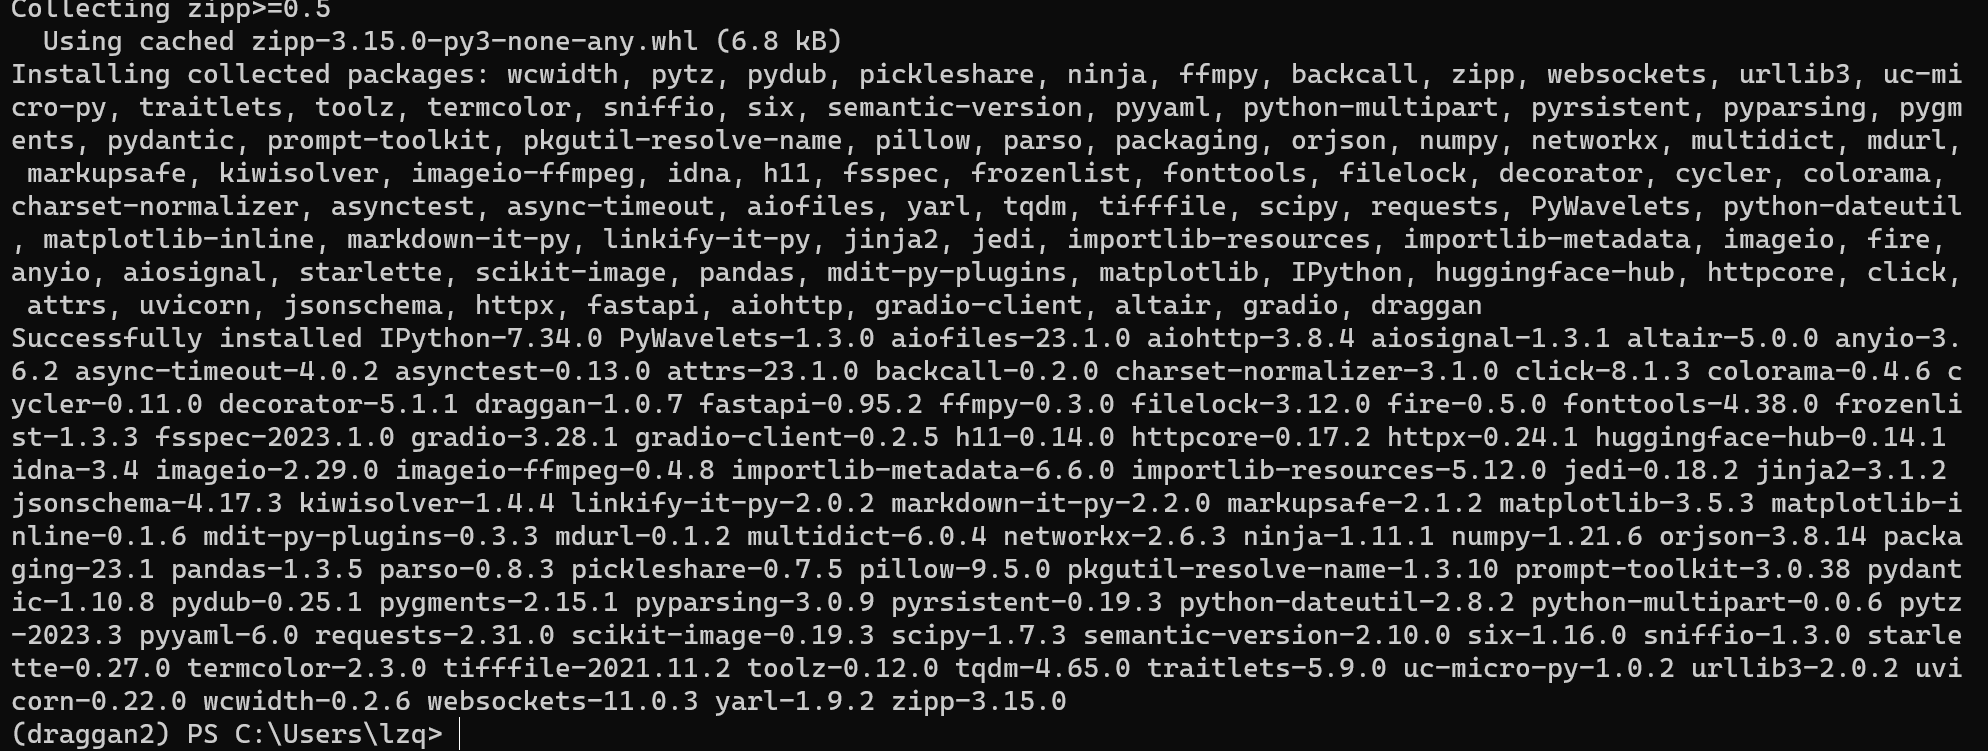
当出现 Successfully installed 就说明安装成功啦,其他 WARNING 都不用管。
安装 DragGAN #
安装完成之后,我们安装DragGAN,这可以通过以下指令进行
pip install draggan
因为一些我也不知道的原因,清华pip源没有同步draggan 这个包,如果你的 pip 配置过清华或国内的pip源,你可能会遇到包找不到的问题

这时候你可以使用这个指令,临时使用官方源进行安装
pip install draggan -i https://pypi.org/simple/
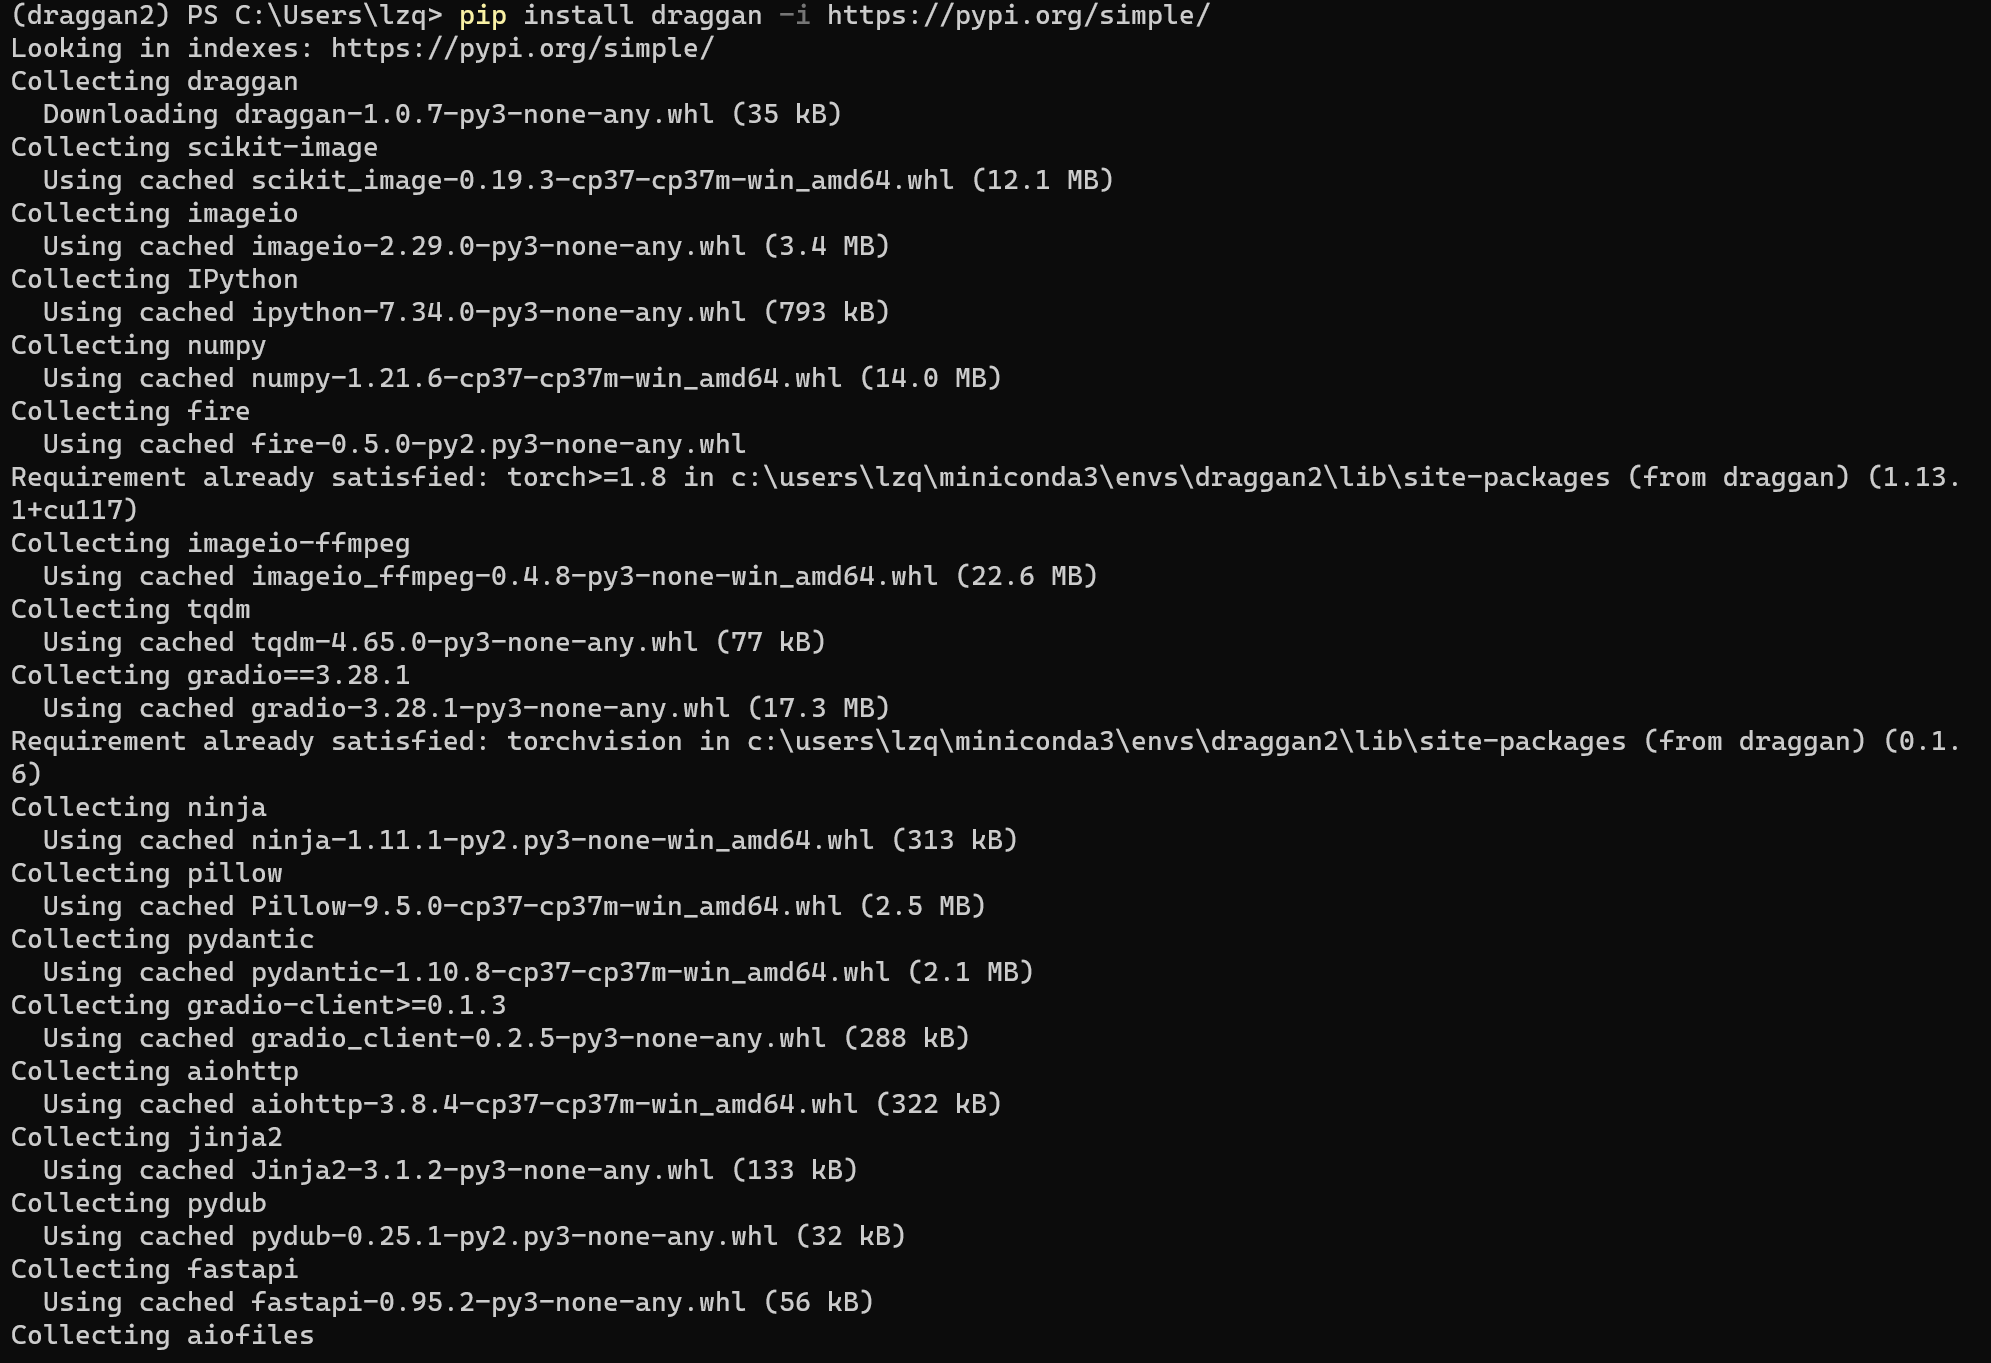
与PyTorch安装类似,当出现 Successfully installed 就说明安装成功了,其他 WARNING 都不用管。
至此,所有依赖安装完成,接下来可以开始运行了。
运行 DragGAN Demo #
你可以通过以下指令运行 DragGAN 的 Demo
python -m draggan.web
如果你不小心关掉了命令行,也不用重新安装,通过 Anaconda Powershell Prompt (miniconda3) 重新进入Conda 的命令行,激活环境,运行即可。
conda activate draggan
python -m draggan.web
没有GPU的用户,使用
python -m draggan.web --device cpu
当出现这个网址的时候 http://127.0.0.1:7860 ,说明程序已经成功运行
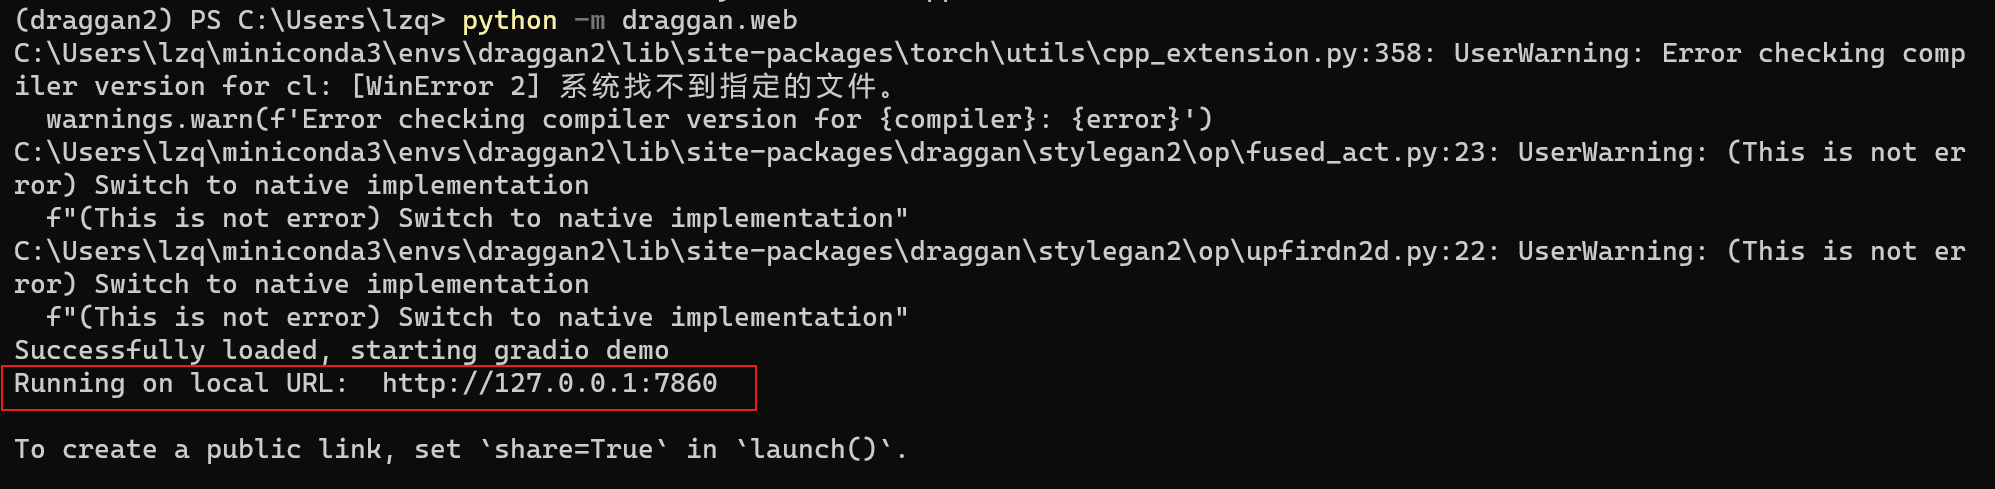
将这个网址输入到浏览器里就可以访问到 DragGAN 的 Demo 了
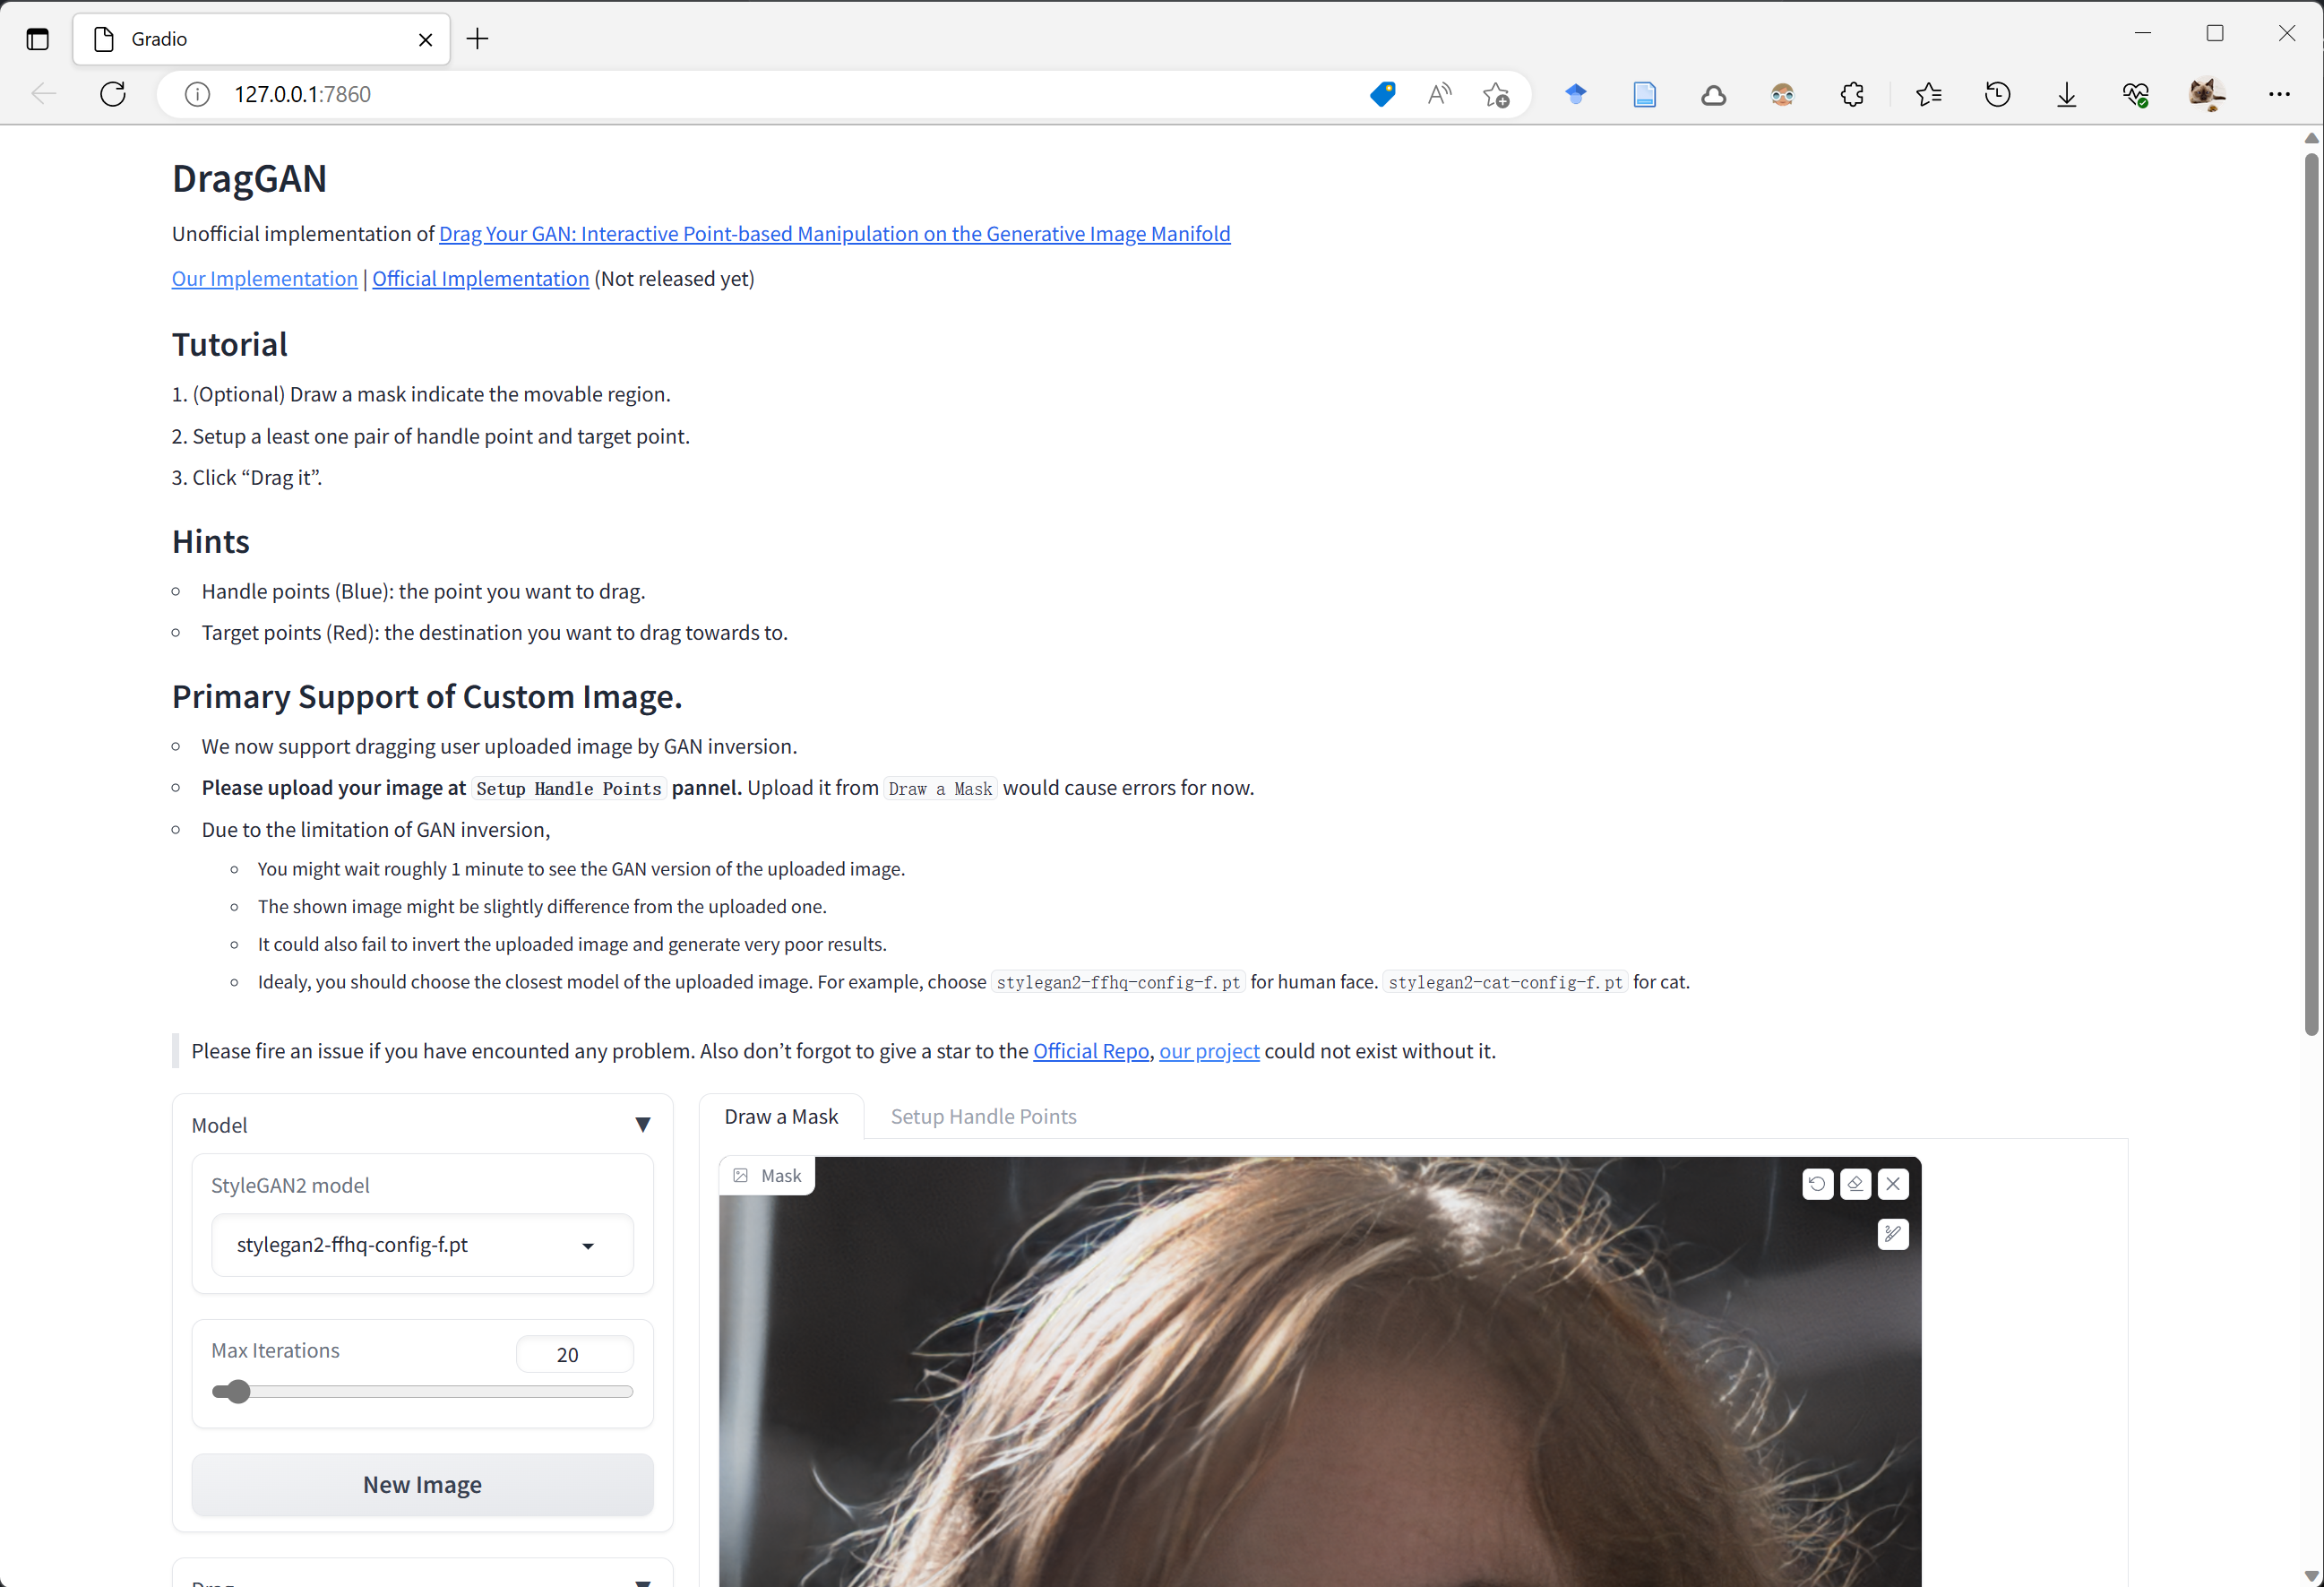
功能介绍 #
界面功能介绍如下
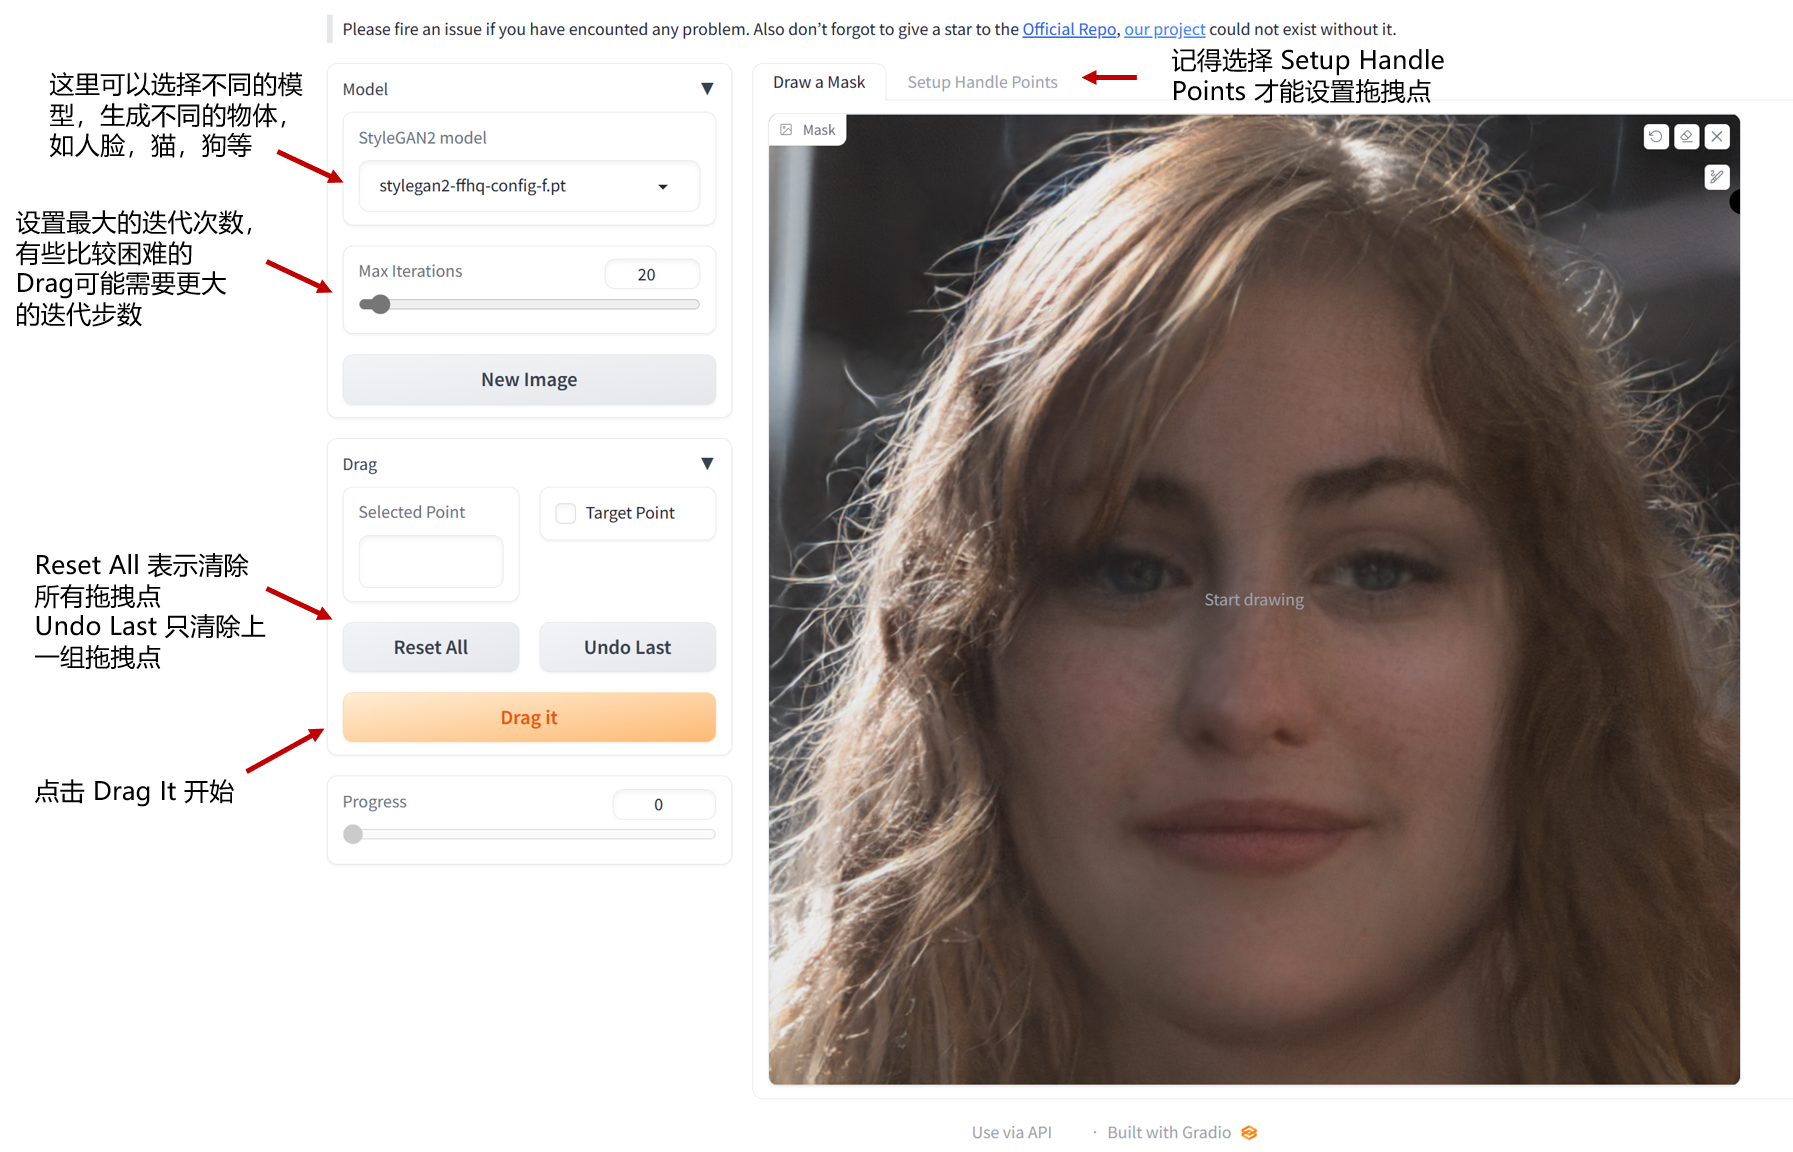
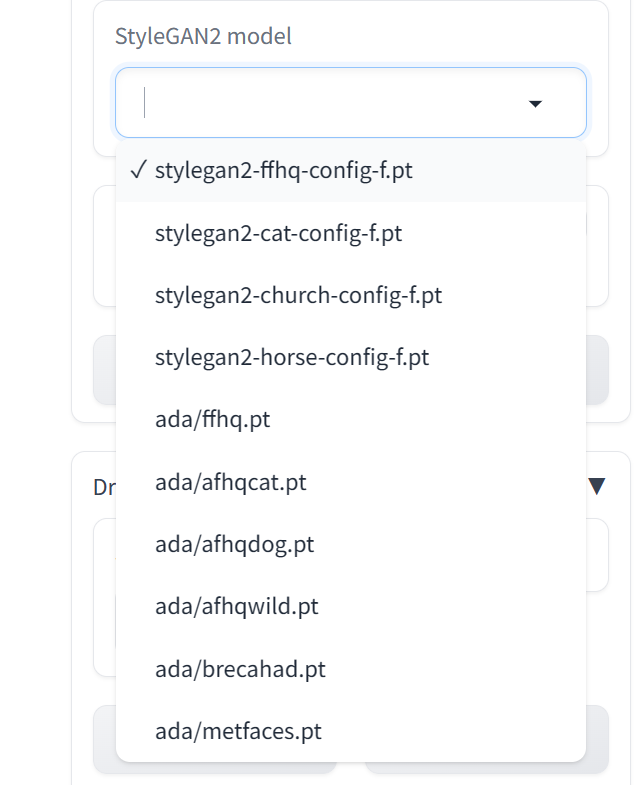
- 选择模型:目前我们提供了10个模型(在web界面选择后会自动下载),不同模型输出图片分辨率,和对显存要求不一样,具体如下
模型信息汇总
| 名称 | 分辨率 | 显存占用 (MB) |
|---|---|---|
| stylegan2-ffhq-config-f.pt | 1024 | 7987 |
| stylegan2-cat-config-f.pt | 256 | 4085 |
| stylegan2-church-config-f.pt | 256 | 4085 |
| stylegan2-horse-config-f.pt | 256 | 4085 |
| ada/ffhq.pt | 1024 | 7987 |
| ada/afhqcat.pt | 512 | 4473 |
| ada/afhqdog.pt | 512 | 4473 |
| ada/afhqwild.pt | 512 | 4473 |
| ada/brecahad.pt | 512 | 4473 |
| ada/metfaces.pt | 512 | 4473 |
-
最大迭代步数:有些比较困难的拖拽,需要增大迭代次数,当然简单的也可以减少。
-
设置拖拽点对,模型会将蓝色的点拖拽到红色点位置。记住需要在 Setup handle points 设置拖拽点对。
-
设置可变化区域(可选):这部分是可选的,你只需要设置拖拽点对就可以正常允许。如果你想的话, 你可以在 Draw a mask 这个面板画出你允许模型改变的区域。注意这是一个软约束,即使你加了这个mask,模型还是有可能会改变超出许可范围的区域。
from https://zeqiang-lai.github.io/blog/posts/ai/drag_gan/
---------------------------------------------------------------------------
DragGAN ,动动鼠标可以完成惊人的修图效果,目前已经有抢先体验版,并已经有开发者提供在线体验地址和部署教程了!
进入 Google Colab ,然后点击上方菜单栏「代码执行程序」,选择「更改运行时类型」,最后在硬件加速器选择 GPU 点击保存,
点击「Installation」下方的按钮,再点击下方的按钮,稍等片刻,
往下拉会看到 Gradiologo 界面,即可开始体验.
如果你不知道怎么玩,可以看看这个网站的 DEMO:https://vcai.mpi-inf.mpg.de/projects/DragGAN/
NVIDIA的StyleGAN算法-AI创建人脸图像
StyleGAN是英伟达(NVIDIA)公司开源的图像AI算法,可以定制不同的方面来更改生成图像的结果。不仅能够绘制出逼真的人类肖像,也将相同的机器学习应用于生成其他动物,汽车,房间, 以及复制动画人物、涂鸦、字体等绝大多数事物。StyleGAN依赖于英伟达的CUDA软件、gpu以及TensorFlow。
StyleGAN生成器使用风格迁移的思路。拿人脸图像举例,向AI输入两张图,图A决定人物的年龄、性别、头发长度和姿势;图B决定一切其他因素:肤色、发色、衣服颜色等等。这样一来,图B的画风,就可以自然地转移给图A。StyleGAN还可以从粗糙、中等、精细三种尺度上调节图像的生成:粗糙尺度的调整包括人脸的朝向、脸型和发型;中等尺度调整,涉及脸部特征、发色发量。精细尺度调整,包含改变图像配色等。有网友用大量动漫图集训练了StyleGAN, 生成各种二次元的妹子图.
[repo owner=”NVlabs” name=”stylegan”]
StyleGAN - Official TensorFlow Implementation
arxiv.org/abs/1812.04948StyleGAN — Official TensorFlow Implementation
 Picture: These people are not real – they were produced by our generator that allows control over different aspects of the image.
This repository contains the official TensorFlow implementation of the following paper:
A Style-Based Generator Architecture for Generative Adversarial Networks
Tero Karras (NVIDIA), Samuli Laine (NVIDIA), Timo Aila (NVIDIA)
https://arxiv.org/abs/1812.04948Abstract: We propose an alternative generator architecture for generative adversarial networks, borrowing from style transfer literature. The new architecture leads to an automatically learned, unsupervised separation of high-level attributes (e.g., pose and identity when trained on human faces) and stochastic variation in the generated images (e.g., freckles, hair), and it enables intuitive, scale-specific control of the synthesis. The new generator improves the state-of-the-art in terms of traditional distribution quality metrics, leads to demonstrably better interpolation properties, and also better disentangles the latent factors of variation. To quantify interpolation quality and disentanglement, we propose two new, automated methods that are applicable to any generator architecture. Finally, we introduce a new, highly varied and high-quality dataset of human faces.
For business inquiries, please visit our website and submit the form: NVIDIA Research Licensing
★★★ NEW: StyleGAN2-ADA-PyTorch is now available; see the full list of versions here ★★★
Resources
Material related to our paper is available via the following links:
- Paper: https://arxiv.org/abs/1812.04948
- Video: https://youtu.be/kSLJriaOumA
- Code: https://github.com/NVlabs/stylegan
- FFHQ: https://github.com/NVlabs/ffhq-dataset
Additional material can be found on Google Drive:
| Path | Description |
|---|---|
| StyleGAN | Main folder. |
| ├ stylegan-paper.pdf | High-quality version of the paper PDF. |
| ├ stylegan-video.mp4 | High-quality version of the result video. |
| ├ images | Example images produced using our generator. |
| │ ├ representative-images | High-quality images to be used in articles, blog posts, etc. |
| │ └ 100k-generated-images | 100,000 generated images for different amounts of truncation. |
| │ ├ ffhq-1024x1024 | Generated using Flickr-Faces-HQ dataset at 1024×1024. |
| │ ├ bedrooms-256x256 | Generated using LSUN Bedroom dataset at 256×256. |
| │ ├ cars-512x384 | Generated using LSUN Car dataset at 512×384. |
| │ └ cats-256x256 | Generated using LSUN Cat dataset at 256×256. |
| ├ videos | Example videos produced using our generator. |
| │ └ high-quality-video-clips | Individual segments of the result video as high-quality MP4. |
| ├ ffhq-dataset | Raw data for the Flickr-Faces-HQ dataset. |
| └ networks | Pre-trained networks as pickled instances of dnnlib.tflib.Network. |
| ├ stylegan-ffhq-1024x1024.pkl | StyleGAN trained with Flickr-Faces-HQ dataset at 1024×1024. |
| ├ stylegan-celebahq-1024x1024.pkl | StyleGAN trained with CelebA-HQ dataset at 1024×1024. |
| ├ stylegan-bedrooms-256x256.pkl | StyleGAN trained with LSUN Bedroom dataset at 256×256. |
| ├ stylegan-cars-512x384.pkl | StyleGAN trained with LSUN Car dataset at 512×384. |
| ├ stylegan-cats-256x256.pkl | StyleGAN trained with LSUN Cat dataset at 256×256. |
| └ metrics | Auxiliary networks for the quality and disentanglement metrics. |
| ├ inception_v3_features.pkl | Standard Inception-v3 classifier that outputs a raw feature vector. |
| ├ vgg16_zhang_perceptual.pkl | Standard LPIPS metric to estimate perceptual similarity. |
| ├ celebahq-classifier-00-male.pkl | Binary classifier trained to detect a single attribute of CelebA-HQ. |
| └ ⋯ | Please see the file listing for remaining networks. |
Licenses
All material, excluding the Flickr-Faces-HQ dataset, is made available under Creative Commons BY-NC 4.0 license by NVIDIA Corporation. You can use, redistribute, and adapt the material for non-commercial purposes, as long as you give appropriate credit by citing our paper and indicating any changes that you've made.
For license information regarding the FFHQ dataset, please refer to the Flickr-Faces-HQ repository.
inception_v3_features.pkl and inception_v3_softmax.pkl are derived from the pre-trained Inception-v3 network by Christian Szegedy, Vincent Vanhoucke, Sergey Ioffe, Jonathon Shlens, and Zbigniew Wojna. The network was originally shared under Apache 2.0 license on the TensorFlow Models repository.
vgg16.pkl and vgg16_zhang_perceptual.pkl are derived from the pre-trained VGG-16 network by Karen Simonyan and Andrew Zisserman. The network was originally shared under Creative Commons BY 4.0 license on the Very Deep Convolutional Networks for Large-Scale Visual Recognition project page.
vgg16_zhang_perceptual.pkl is further derived from the pre-trained LPIPS weights by Richard Zhang, Phillip Isola, Alexei A. Efros, Eli Shechtman, and Oliver Wang. The weights were originally shared under BSD 2-Clause "Simplified" License on the PerceptualSimilarity repository.
System requirements
- Both Linux and Windows are supported, but we strongly recommend Linux for performance and compatibility reasons.
- 64-bit Python 3.6 installation. We recommend Anaconda3 with numpy 1.14.3 or newer.
- TensorFlow 1.10.0 or newer with GPU support.
- One or more high-end NVIDIA GPUs with at least 11GB of DRAM. We recommend NVIDIA DGX-1 with 8 Tesla V100 GPUs.
- NVIDIA driver 391.35 or newer, CUDA toolkit 9.0 or newer, cuDNN 7.3.1 or newer.
Using pre-trained networks
A minimal example of using a pre-trained StyleGAN generator is given in pretrained_example.py. When executed, the script downloads a pre-trained StyleGAN generator from Google Drive and uses it to generate an image:
> python pretrained_example.py
Downloading https://drive.google.com/uc?id=1MEGjdvVpUsu1jB4zrXZN7Y4kBBOzizDQ .... done

Gs                              Params    OutputShape          WeightShape
---                             ---       ---                  ---
latents_in                      -         (?, 512)             -
...
images_out                      -         (?, 3, 1024, 1024)   -
---                             ---       ---                  ---
Total                           26219627

> ls results
example.png # https://drive.google.com/uc?id=1UDLT_zb-rof9kKH0GwiJW_bS9MoZi8oP
A more advanced example is given in generate_figures.py. The script reproduces the figures from our paper in order to illustrate style mixing, noise inputs, and truncation:
> python generate_figures.py
results/figure02-uncurated-ffhq.png     # https://drive.google.com/uc?id=1U3r1xgcD7o-Fd0SBRpq8PXYajm7_30cu
results/figure03-style-mixing.png       # https://drive.google.com/uc?id=1U-nlMDtpnf1RcYkaFQtbh5oxnhA97hy6
results/figure04-noise-detail.png       # https://drive.google.com/uc?id=1UX3m39u_DTU6eLnEW6MqGzbwPFt2R9cG
results/figure05-noise-components.png   # https://drive.google.com/uc?id=1UQKPcvYVeWMRccGMbs2pPD9PVv1QDyp_
results/figure08-truncation-trick.png   # https://drive.google.com/uc?id=1ULea0C12zGlxdDQFNLXOWZCHi3QNfk_v
results/figure10-uncurated-bedrooms.png # https://drive.google.com/uc?id=1UEBnms1XMfj78OHj3_cx80mUf_m9DUJr
results/figure11-uncurated-cars.png     # https://drive.google.com/uc?id=1UO-4JtAs64Kun5vIj10UXqAJ1d5Ir1Ke
results/figure12-uncurated-cats.png     # https://drive.google.com/uc?id=1USnJc14prlu3QAYxstrtlfXC9sDWPA-W
The pre-trained networks are stored as standard pickle files on Google Drive:
# Load pre-trained network.
url = 'https://drive.google.com/uc?id=1MEGjdvVpUsu1jB4zrXZN7Y4kBBOzizDQ' # karras2019stylegan-ffhq-1024x1024.pkl
with dnnlib.util.open_url(url, cache_dir=config.cache_dir) as f:
    _G, _D, Gs = pickle.load(f)
    # _G = Instantaneous snapshot of the generator. Mainly useful for resuming a previous training run.
    # _D = Instantaneous snapshot of the discriminator. Mainly useful for resuming a previous training run.
    # Gs = Long-term average of the generator. Yields higher-quality results than the instantaneous snapshot.
The above code downloads the file and unpickles it to yield 3 instances of dnnlib.tflib.Network. To generate images, you will typically want to use Gs – the other two networks are provided for completeness. In order for pickle.load() to work, you will need to have the dnnlib source directory in your PYTHONPATH and a tf.Session set as default. The session can initialized by calling dnnlib.tflib.init_tf().
There are three ways to use the pre-trained generator:
Use
Gs.run()for immediate-mode operation where the inputs and outputs are numpy arrays:# Pick latent vector. rnd = np.random.RandomState(5) latents = rnd.randn(1, Gs.input_shape[1]) # Generate image. fmt = dict(func=tflib.convert_images_to_uint8, nchw_to_nhwc=True) images = Gs.run(latents, None, truncation_psi=0.7, randomize_noise=True, output_transform=fmt)The first argument is a batch of latent vectors of shape
[num, 512]. The second argument is reserved for class labels (not used by StyleGAN). The remaining keyword arguments are optional and can be used to further modify the operation (see below). The output is a batch of images, whose format is dictated by theoutput_transformargument.Use
Gs.get_output_for()to incorporate the generator as a part of a larger TensorFlow expression:latents = tf.random_normal([self.minibatch_per_gpu] + Gs_clone.input_shape[1:]) images = Gs_clone.get_output_for(latents, None, is_validation=True, randomize_noise=True) images = tflib.convert_images_to_uint8(images) result_expr.append(inception_clone.get_output_for(images))The above code is from metrics/frechet_inception_distance.py. It generates a batch of random images and feeds them directly to the Inception-v3 network without having to convert the data to numpy arrays in between.
Look up
Gs.components.mappingandGs.components.synthesisto access individual sub-networks of the generator. Similar toGs, the sub-networks are represented as independent instances of dnnlib.tflib.Network:src_latents = np.stack(np.random.RandomState(seed).randn(Gs.input_shape[1]) for seed in src_seeds) src_dlatents = Gs.components.mapping.run(src_latents, None) # [seed, layer, component] src_images = Gs.components.synthesis.run(src_dlatents, randomize_noise=False, **synthesis_kwargs)The above code is from generate_figures.py. It first transforms a batch of latent vectors into the intermediate W space using the mapping network and then turns these vectors into a batch of images using the synthesis network. The
dlatentsarray stores a separate copy of the same w vector for each layer of the synthesis network to facilitate style mixing.
The exact details of the generator are defined in training/networks_stylegan.py (see G_style, G_mapping, and G_synthesis). The following keyword arguments can be specified to modify the behavior when calling run() and get_output_for():
truncation_psiandtruncation_cutoffcontrol the truncation trick that that is performed by default when usingGs(ψ=0.7, cutoff=8). It can be disabled by settingtruncation_psi=1oris_validation=True, and the image quality can be further improved at the cost of variation by setting e.g.truncation_psi=0.5. Note that truncation is always disabled when using the sub-networks directly. The average w needed to manually perform the truncation trick can be looked up usingGs.get_var('dlatent_avg').randomize_noisedetermines whether to use re-randomize the noise inputs for each generated image (True, default) or whether to use specific noise values for the entire minibatch (False). The specific values can be accessed via thetf.Variableinstances that are found using[var for name, var in Gs.components.synthesis.vars.items() if name.startswith('noise')].When using the mapping network directly, you can specify
dlatent_broadcast=Noneto disable the automatic duplication ofdlatentsover the layers of the synthesis network.Runtime performance can be fine-tuned via
structure='fixed'anddtype='float16'. The former disables support for progressive growing, which is not needed for a fully-trained generator, and the latter performs all computation using half-precision floating point arithmetic.
Preparing datasets for training
The training and evaluation scripts operate on datasets stored as multi-resolution TFRecords. Each dataset is represented by a directory containing the same image data in several resolutions to enable efficient streaming. There is a separate *.tfrecords file for each resolution, and if the dataset contains labels, they are stored in a separate file as well. By default, the scripts expect to find the datasets at datasets/<NAME>/<NAME>-<RESOLUTION>.tfrecords. The directory can be changed by editing config.py:
result_dir = 'results'
data_dir = 'datasets'
cache_dir = 'cache'
To obtain the FFHQ dataset (datasets/ffhq), please refer to the Flickr-Faces-HQ repository.
To obtain the CelebA-HQ dataset (datasets/celebahq), please refer to the Progressive GAN repository.
To obtain other datasets, including LSUN, please consult their corresponding project pages. The datasets can be converted to multi-resolution TFRecords using the provided dataset_tool.py:
> python dataset_tool.py create_lsun datasets/lsun-bedroom-full ~/lsun/bedroom_lmdb --resolution 256
> python dataset_tool.py create_lsun_wide datasets/lsun-car-512x384 ~/lsun/car_lmdb --width 512 --height 384
> python dataset_tool.py create_lsun datasets/lsun-cat-full ~/lsun/cat_lmdb --resolution 256
> python dataset_tool.py create_cifar10 datasets/cifar10 ~/cifar10
> python dataset_tool.py create_from_images datasets/custom-dataset ~/custom-images
Training networks
Once the datasets are set up, you can train your own StyleGAN networks as follows:
- Edit train.py to specify the dataset and training configuration by uncommenting or editing specific lines.
- Run the training script with
python train.py. - The results are written to a newly created directory
results/<ID>-<DESCRIPTION>. - The training may take several days (or weeks) to complete, depending on the configuration.
By default, train.py is configured to train the highest-quality StyleGAN (configuration F in Table 1) for the FFHQ dataset at 1024×1024 resolution using 8 GPUs. Please note that we have used 8 GPUs in all of our experiments. Training with fewer GPUs may not produce identical results – if you wish to compare against our technique, we strongly recommend using the same number of GPUs.
Expected training times for the default configuration using Tesla V100 GPUs:
| GPUs | 1024×1024 | 512×512 | 256×256 |
|---|---|---|---|
| 1 | 41 days 4 hours | 24 days 21 hours | 14 days 22 hours |
| 2 | 21 days 22 hours | 13 days 7 hours | 9 days 5 hours |
| 4 | 11 days 8 hours | 7 days 0 hours | 4 days 21 hours |
| 8 | 6 days 14 hours | 4 days 10 hours | 3 days 8 hours |
Evaluating quality and disentanglement
The quality and disentanglement metrics used in our paper can be evaluated using run_metrics.py. By default, the script will evaluate the Fréchet Inception Distance (fid50k) for the pre-trained FFHQ generator and write the results into a newly created directory under results. The exact behavior can be changed by uncommenting or editing specific lines in run_metrics.py.
Expected evaluation time and results for the pre-trained FFHQ generator using one Tesla V100 GPU:
| Metric | Time | Result | Description |
|---|---|---|---|
| fid50k | 16 min | 4.4159 | Fréchet Inception Distance using 50,000 images. |
| ppl_zfull | 55 min | 664.8854 | Perceptual Path Length for full paths in Z. |
| ppl_wfull | 55 min | 233.3059 | Perceptual Path Length for full paths in W. |
| ppl_zend | 55 min | 666.1057 | Perceptual Path Length for path endpoints in Z. |
| ppl_wend | 55 min | 197.2266 | Perceptual Path Length for path endpoints in W. |
| ls | 10 hours | z: 165.0106 w: 3.7447 | Linear Separability in Z and W. |
Please note that the exact results may vary from run to run due to the non-deterministic nature of TensorFlow.
from https://github.com/NVlabs/stylegan
No comments:
Post a Comment