为了解决的问题
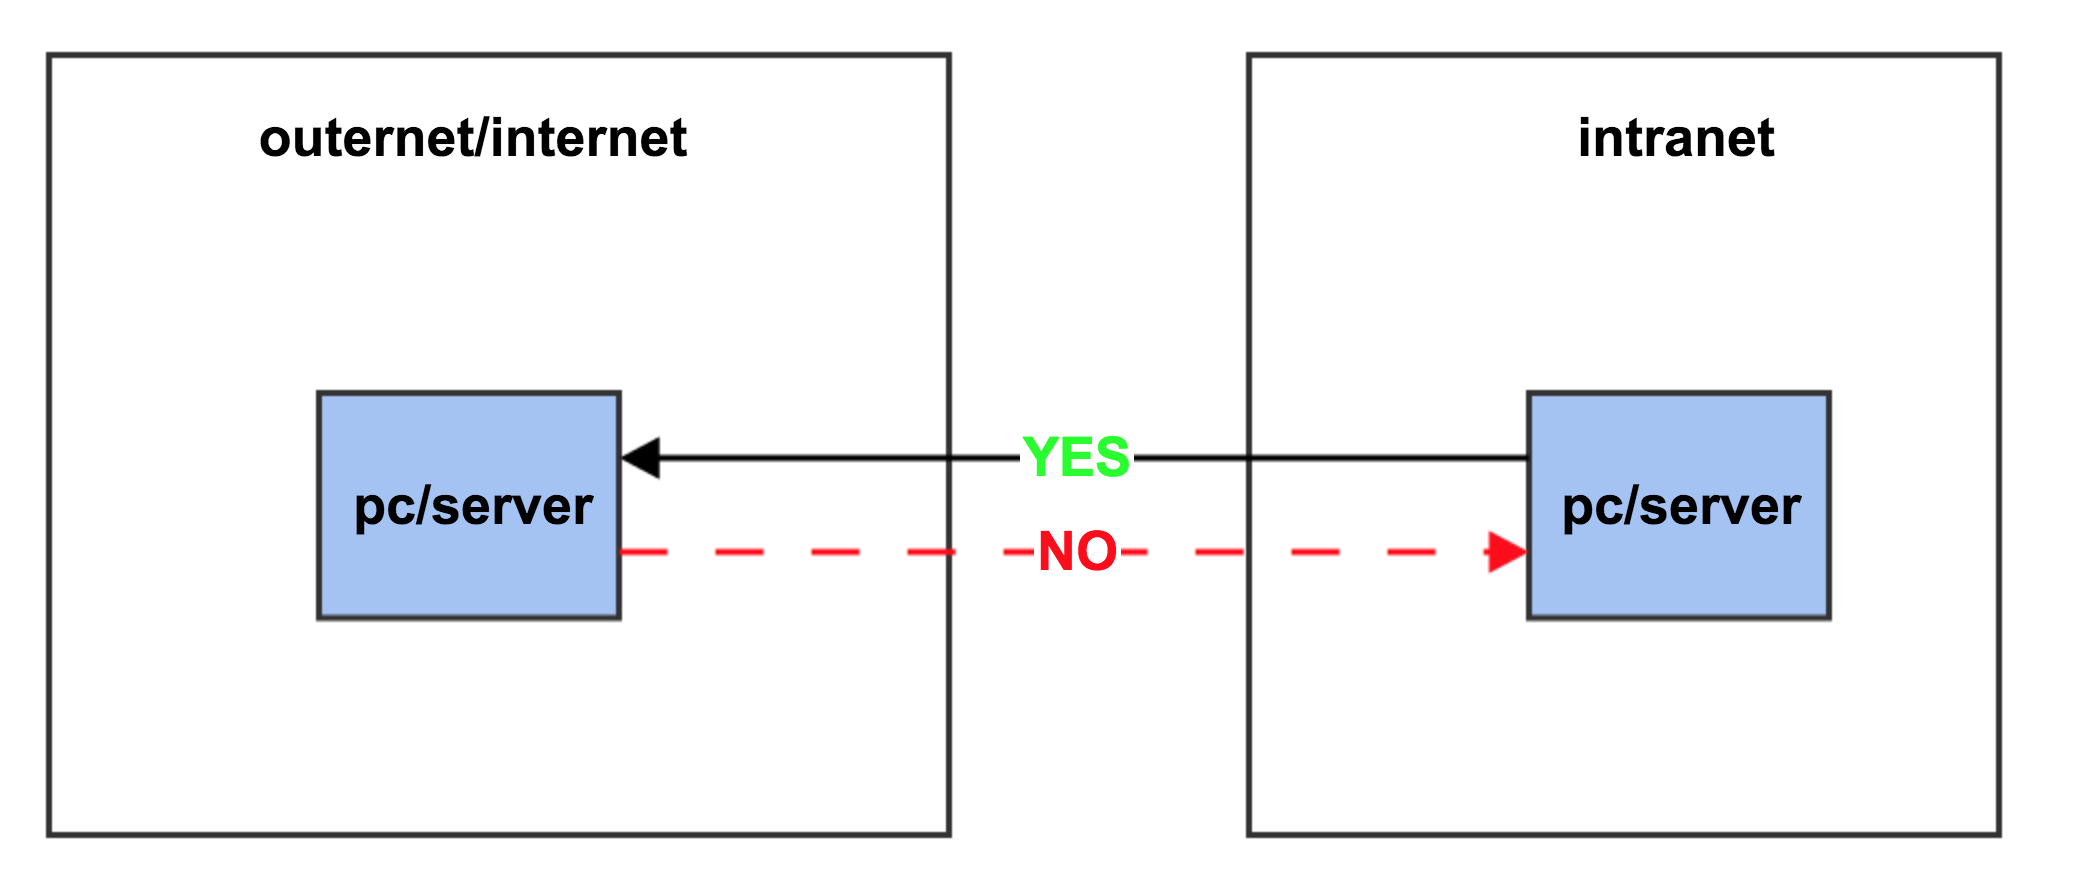
- 内网主机可以直接访问外网主机(snat、防火墙允许)
- 外网主机不能直接连接内网主机(防火墙拦截)
一般的解决方法
- 向网管申请,在防火墙上为内网主机某个端口开通dnat
- 部署vpn服务,使用vpn接入内网
这些方法的局限
- 如果需要开的端口较多网管不会允许
- 如果需要变换端口需要再次申请,费时费力
- vpn部署需要的工作量较大,且由于内网安全性,不是所有的公司都允许部署
tcp-forward的解决方案

- 在外网和内网分别部署forward_server和forward_client
- forward_client会主动向forward_server建立一个通道
- 在forward_server监听一些端口,并配置这些端口到内网主机:端口的映射
- 外网主机想访问内网主机时,只需要连接外网端口,则forward_server自动向forward_client发送创建连接请求,forward_client会向内网主机建立连接,形成一个通道,传输数据
典型案例
网络拓扑
内网:
- 主机A:192.168.10.100 部署forward_client
- 主机B:192.168.10.5 centos server
外网
- 主机C:221.10.12.34 部署forward_server
其他网络
- 主机D:任意ip 只要能访问主机C
需求
- 主机D通过ssh协议连接到主机B
做法
- 在forward_server配置端口映射 1234=192.168.10.5:22
- 启动forward_server和forward_client
- 在主机D执行
ssh usr@221.10.12.23 -p 1234
使用说明
源码安装(server & client)
git clone https://github.com/cao19881125/tcp_forward.git
cd tcp_forward
pip install .
pip源安装
pip install tcp-forward
docker安装
源码编译安装
git clone https://github.com/cao19881125/tcp_forward.git
docker build -t tcp-forward:latest tcp_forward/docker
docker hub安装
docker pull cao19881125/tcp-forward:latest
配置
注意,docker启动由于把/etc/tcp-forward目录mount出来,导致没有配置文件,先执行下面的命令安装配置文件
pip install tcp-forward
server
- 在/etc/tcp-forward/forward_server.cfg中配置forward_client连入的端口,日志级别,带宽(以实际带宽配置,单位是M)
[DEFAULT]
INNER_PORT=1111
OUTER_PORTS_FILE=/etc/tcp-forward/port_mapper.cfg
LOG_LEVEL=DEBUG
#minimal network BANDWIDTH in Mb
BANDWIDTH=100

api_paste_config=/etc/tcp-forward/api-paste.ini
user_file=/etc/tcp-forward/user_file
- 在/etc/tcp-forward/port_mapper.cfg中配置外网端口到内网的映射,格式为:外网端口=内网ip:内网端口,以及端口对应的client tag,如下
[MAPPER]
1234=192.168.10.5:80
4444=192.168.105:22

[TAG]
1234=default
4444=default
- 配置用户
# vim /etc/tcp-forward/user_file
[USER]
test1=123456
test2=654321
- 格式为用户名=密码
- 修改完后不需要重启
client
- 在/etc/tcp-forward/forward_client.cfg中配置forward_server的ip和端口以及日志级别以及client的tag
[DEFAULT]
SERVER_IP=221.10.12.34
SERVER_PORT=1111
LOG_LEVEL=DEBUG
TAG=default
启动
docker启动
server
docker run -t -d --name "forward_server" --network host -v /etc/tcp-forward/:/etc/tcp-forward/ -v /var/log/tcp_forward/:/var/log/tcp_forward/ --restart always tcp-forward:latest tcp-forward --run_type server --config-file /etc/tcp-forward/forward_server.cfg
client
docker run -t -d --name "forward_client" --network host -v /etc/tcp-forward/:/etc/tcp-forward/ -v /var/log/tcp_forward/:/var/log/tcp_forward/ --restart always cao19881125/tcp-forward:latest tcp-forward --run_type client --config-file /etc/tcp-forward/forward_client.cfg
命令启动
server
tcp-forward --run_type server --config-file /etc/tcp-forward/forward_server.cfg
client
tcp-forward --run_type client --config-file /etc/tcp-forward/forward_client.cfg
查看日志
- 日志生成在/var/log/tcp_forward 目录下面
配套的web项目
可以使tcp-forward-web进行设置和监控,项目地址 https://github.com/cao19881125/tcp-forward-web
from https://github.com/cao19881125/tcp_forward
-----------------------------------------
部署
以下两种部署方式任选其一
1.使用dockerhub镜像部署
pull镜像
docker pull cao19881125/tcp-forward-web:latest
run
docker run -it -d --name 'ng1' --network host cao19881125/tcp-forward-web:latest
修改web服务端口和tcp-forward server地址
默认web服务使用的端口是7070,如果需要修改则执行 默认地址是用的http://localhost:8080/,如果不同则需要修改
docker cp ng1:/etc/nginx/nginx.conf ./
# vim docker/nginx.conf
server {
    listen       7070 default_server;
    ...
    location /tcp-forward-web/forward_server/{
                ...
                proxy_pass http://localhost:8080/;
                ...
            }
}
- 修改listen 后的端口值,即修改了web服务的地址
- 修改proxy_pass地址为tcp-forward server服务的地址
docker cp ./nginx.conf ng1:/etc/nginx/nginx.conf
docker restart ng1
2.编译部署
修改web服务端口和tcp-forward server地址
默认web服务使用的端口是7070,如果需要修改则执行 默认地址是用的http://localhost:8080/,如果不同则需要修改
docker cp ng1:/etc/nginx/nginx.conf ./
# vim docker/nginx.conf
server {
    listen       7070 default_server;
    ...
    location /tcp-forward-web/forward_server/{
                ...
                proxy_pass http://localhost:8080/;
                ...
            }
}
- 修改listen 后的端口值,即修改了web服务的地址
- 修改proxy_pass地址为tcp-forward server服务的地址
build docker image
cd docker
./build.sh
# docker images
REPOSITORY                                                              TAG                 IMAGE ID            CREATED             SIZE
cao19881125/tcp-forward-web                                            latest              709c90d11224        8 minutes ago       145.4 MB
run
docker run -it -d --name 'ng1' --network host cao19881125/tcp-forward-web:latest
访问
- 浏览器访问 http://ip:7070/
- 登录的用户名和密码在tcp-forward server的配置文件中配:https://github.com/cao19881125/tcp_forward
from https://github.com/cao19881125/tcp-forward-web

