编译Strongswan以搭建IPSec/IKEv2 VPN server
RAM大小合适的VPS或者服务器(96MB RAM就足够了,64MB RAM未测试)
可以是OpenVZ,但注意看教程中标注的针对OpenVZ的特殊步骤。
请在虚拟机或服务器上安装好Ubuntu操作系统,32位、64位均可,建议14.04 LTS,并执行以下命令:
apt-get update
apt-get install libpam0g-dev libssl-dev make gcc
wget http://download.strongswan.org/strongswan.tar.gz
tar zxvf strongswan.tar.gz
cd strongswan-*
./configure  --enable-eap-identity --enable-eap-md5 \
--enable-eap-mschapv2 --enable-eap-tls --enable-eap-ttls --enable-eap-peap  \
--enable-eap-tnc --enable-eap-dynamic --enable-eap-radius --enable-xauth-eap  \
--enable-xauth-pam  --enable-dhcp  --enable-openssl  --enable-addrblock --enable-unity  \
--enable-certexpire --enable-radattr --enable-openssl --disable-gmp --enable-kernel-libipsec
./configure  --enable-eap-identity --enable-eap-md5 \
--enable-eap-mschapv2 --enable-eap-tls --enable-eap-ttls --enable-eap-peap  \
--enable-eap-tnc --enable-eap-dynamic --enable-eap-radius --enable-xauth-eap  \
--enable-xauth-pam  --enable-dhcp  --enable-openssl  --enable-addrblock --enable-unity  \
--enable-certexpire --enable-radattr --enable-openssl --disable-gmp
make; make install
ipsec version检查是否出现版本号等信息.若出现
ipsec: command not found则代表没有成功编译。 生成私钥
ipsec pki --gen --outform pem > ca.pem
ipsec pki --self --in ca.pem --dn "C=com, O=myvpn, CN=VPN CA" --ca --outform pem >ca.cert.pem
ipsec pki --gen --outform pem > server.pem
ipsec pki --pub --in server.pem | ipsec pki --issue --cacert ca.cert.pem --cakey ca.pem --dn "C=com, O=myvpn, CN=123.123.123.123" --san="123.123.123.123" --flag serverAuth --flag ikeIntermediate --outform pem > server.cert.pem
ipsec pki --gen --outform pem > client.pem
ipsec pki --pub --in client.pem | ipsec pki --issue --cacert ca.cert.pem --cakey ca.pem --dn "C=com, O=myvpn, CN=VPN Client" --outform pem > client.cert.pem
openssl pkcs12 -export -inkey client.pem -in client.cert.pem -name "client" -certfile ca.cert.pem -caname "VPN CA" -out client.cert.p12
cp -r ca.cert.pem /usr/local/etc/ipsec.d/cacerts/
cp -r server.cert.pem /usr/local/etc/ipsec.d/certs/
cp -r server.pem /usr/local/etc/ipsec.d/private/
cp -r client.cert.pem /usr/local/etc/ipsec.d/certs/
cp -r client.pem  /usr/local/etc/ipsec.d/private/
nano /usr/local/etc/ipsec.confconfig setup
uniqueids=never
conn iOS_cert
keyexchange=ikev1
# strongswan version >= 5.0.2, compatible with iOS 6.0,6.0.1
fragmentation=yes
left=%defaultroute
leftauth=pubkey
leftsubnet=0.0.0.0/0
leftcert=server.cert.pem
right=%any
rightauth=pubkey
rightauth2=xauth
rightsourceip=10.31.2.0/24
rightcert=client.cert.pem
auto=add
conn android_xauth_psk
keyexchange=ikev1
left=%defaultroute
leftauth=psk
leftsubnet=0.0.0.0/0
right=%any
rightauth=psk
rightauth2=xauth
rightsourceip=10.31.2.0/24
auto=add
conn networkmanager-strongswan
keyexchange=ikev2
left=%defaultroute
leftauth=pubkey
leftsubnet=0.0.0.0/0
leftcert=server.cert.pem
right=%any
rightauth=pubkey
rightsourceip=10.31.2.0/24
rightcert=client.cert.pem
auto=add
conn windows7
keyexchange=ikev2
ike=aes256-sha1-modp1024!
rekey=no
left=%defaultroute
leftauth=pubkey
leftsubnet=0.0.0.0/0
leftcert=server.cert.pem
right=%any
rightauth=eap-mschapv2
rightsourceip=10.31.2.0/24
rightsendcert=never
eap_identity=%any
auto=add
/usr/local/etc/strongswan.conf charon {
load_modular = yes
compress = yes
plugins {
include strongswan.d/charon/*.conf
}
dns1 = 8.8.8.8
dns2 = 8.8.4.4
nbns1 = 8.8.8.8
nbns2 = 8.8.4.4
}
include strongswan.d/*.conf
/usr/local/etc/ipsec.secrets中的用户名、密码 : RSA server.pem
: PSK "mypsk"
: XAUTH "mykey"
用户名 %any : EAP "密码"
首先编辑
/etc/sysctl.conf,将net.ipv4.ip_forward=1一行前面的#号去掉,保存后执行sysctl -p。接下来修改iptables。
OpenVZ执行:
iptables -A FORWARD -m state --state RELATED,ESTABLISHED -j ACCEPT
iptables -A FORWARD -s 10.31.0.0/24 -j ACCEPT
iptables -A FORWARD -s 10.31.1.0/24 -j ACCEPT
iptables -A FORWARD -s 10.31.2.0/24 -j ACCEPT
iptables -A INPUT -i venet0 -p esp -j ACCEPT
iptables -A INPUT -i venet0 -p udp --dport 500 -j ACCEPT
iptables -A INPUT -i venet0 -p tcp --dport 500 -j ACCEPT
iptables -A INPUT -i venet0 -p udp --dport 4500 -j ACCEPT
iptables -A INPUT -i venet0 -p udp --dport 1701 -j ACCEPT
iptables -A INPUT -i venet0 -p tcp --dport 1723 -j ACCEPT
iptables -A FORWARD -j REJECT
iptables -t nat -A POSTROUTING -s 10.31.0.0/24 -o venet0 -j MASQUERADE
iptables -t nat -A POSTROUTING -s 10.31.1.0/24 -o venet0 -j MASQUERADE
iptables -t nat -A POSTROUTING -s 10.31.2.0/24 -o venet0 -j MASQUERADE
iptables -A FORWARD -m state --state RELATED,ESTABLISHED -j ACCEPT
iptables -A FORWARD -s 10.31.0.0/24 -j ACCEPT
iptables -A FORWARD -s 10.31.1.0/24 -j ACCEPT
iptables -A FORWARD -s 10.31.2.0/24 -j ACCEPT
iptables -A INPUT -i eth0 -p esp -j ACCEPT
iptables -A INPUT -i eth0 -p udp --dport 500 -j ACCEPT
iptables -A INPUT -i eth0 -p tcp --dport 500 -j ACCEPT
iptables -A INPUT -i eth0 -p udp --dport 4500 -j ACCEPT
iptables -A INPUT -i eth0 -p udp --dport 1701 -j ACCEPT
iptables -A INPUT -i eth0 -p tcp --dport 1723 -j ACCEPT
iptables -A FORWARD -j REJECT
iptables -t nat -A POSTROUTING -s 10.31.0.0/24 -o eth0 -j MASQUERADE
iptables -t nat -A POSTROUTING -s 10.31.1.0/24 -o eth0 -j MASQUERADE
iptables -t nat -A POSTROUTING -s 10.31.2.0/24 -o eth0 -j MASQUERADE
iptables-save > /etc/iptables.rules nano iptables-restore.shcat iptables-restore.shiptables-restore < /etc/iptables.ruleschmod 755 iptables-restore.sh
/usr/local/etc/ipsec.secrets中PSK后的字符串(不含引号),用户名密码同上,可以通过IP连接,不需要证书.from https://hjc.im/shi-yong-strongswanda-jian-ipsecikev2-vpn/
在 CentOS/Ubuntu VPS上使用Strongswan架设IPSec Ikev1/v2 VPN 教程
IPSec 简介
IPSec是虚拟私密网络(VPN)的一种协议,它通过认证和加密每一个IP数据包来确保IP通信的安全。
- 它由两个阶段组成:
- 第一阶段(Security Association) 使用互联网金钥交换(ike)协议,目的是通过Diffie-Hellman密钥交换算法来生成一个共享密钥来加密进一步IKE通信的安全认证通道;
- 第二阶段(IPsec Protocol Suite) 连接建立后对数据进行加密传输,使用封装安全载荷协议(ESP)或验证头部(Authentication Header)。
开始之前
用ssh连接上你的VPS, 在命令行中输入下列命令:
$ cat /dev/net/tun
输出应该是:
cat: /dev/net/tun: File descriptor in bad state
再输入以下命令:
$ cat /dev/ppp
输出应该是:
cat: /dev/ppp: No such device or address
若没有以上输出则无法继续下一步, 请联系你VPS的客服
安装 Strongswan
1安装必须的依赖
CentOS:
# yum update
# yum install gmp-devel pam-devel openssl-devel libssl-dev make gcc
2下载Strongswan
$ wget http://download.strongswan.org/strongswan.tar.bz2
$ tar xjvf strongswan.tar.bz2
$ cd strongswan-*
3编译
OpenVZ类型 (需添加enable-kernel-libipsec)
$ ./configure --prefix=/usr --sysconfdir=/etc \
--enable-eap-mschapv2 --enable-xauth-eap --enable-eap-identity --enable-eap-tls \
--enable-eap-ttls --enable-eap-md5 --enable-eap-tnc --enable-eap-dynamic \
--enable-openssl --disable-gmp --enable-eap-aka --enable-nat-transport \
--enable-kernel-libipsec
4安装
# make
# make install
生成证书
1生成自签名的根证书 (root CA)
$ cd /etc/ipsec.d/
$ ipsec pki --gen --type rsa --size 2048 \
--outform pem \
> private/ca.key.pem
$ chmod 600 private/ca.key.pem
$ ipsec pki --self --ca --lifetime 730 \
--in private/ca.key.pem --type rsa \
--dn "C=CN, O=strongSwan, CN=strongSwan Root CA" \
--outform pem \
> cacerts/ca.cert.pem
size 2048: 2048 bit 的 RSA 密钥
lifetime 730: 730天 (2年)
dn: C 代表国家, O 代表组织, CN(common name) 代表名称
2生成服务器证书 (host CA)
$ cd /etc/ipsec.d/
$ ipsec pki --gen --type rsa --size 2048 \
--outform pem \
> private/host.key.pem
$ chmod 600 private/host.key.pem
$ ipsec pki --pub --in private/host.key.pem --type rsa | \
ipsec pki --issue --lifetime 730 \
--cacert cacerts/ca.cert.pem \
--cakey private/ca.key.pem \
--dn "C=CN, O=strongSwan, CN=vpn.example.com" \
--san "1.2.3.4" \
--flag serverAuth --flag ikeIntermediate \
--outform pem > certs/host.cert.pem
CN: 填的是你服务器的 URL 或 IP
san: 填的是服务器IP
3生成客户端证书 (client CA)
$ cd /etc/ipsec.d/
$ ipsec pki --gen --type rsa --size 2048 \
--outform pem \
> private/client.key.pem
$ chmod 600 private/client.key.pem
$ ipsec pki --pub --in private/client.key.pem --type rsa | \
ipsec pki --issue --lifetime 730 \
--cacert cacerts/ca.cert.pem \
--cakey private/ca.key.pem \
--dn "C=CN, O=strongSwan, CN=myself@example.com" \
--san myself@example.com \
--outform pem > certs/client.cert.pem
4生成pkcs12证书
$ openssl pkcs12 -export -inkey private/client.key.pem \
-in certs/client.cert.pem -name "My own VPN client certificate" \
-certfile cacerts/ca.cert.pem \
-caname "strongSwan Root CA" \
-out client.p12
生成该证书时要输入密码,在客户端安装该证书时会用到这个密码。
为在IOS设备上安装密码最好为4位数字,密码也可以为空
然后将该证书发生到客户端安装 (IOS设备要发送ca.cert.pem和client.p12)
更详细参考Strongswan Wiki: IKEv2 on iOS 9 & OS X 10.11 / IKEv2 on Win7+
Strongswan 配置
1编辑 ipsec.conf
# /etc/ipsec.conf
# ipsec.conf - strongSwan IPsec configuration file
# basic configuration
config setup
# strictcrlpolicy=yes
uniqueids = never
conn %default
dpdaction = clear
dpddelay = 35s
dpdtimeout = 300s
# for IOS 6+ and Android 4+ without install CA
conn IPSec-IKEv1-PSK
keyexchange = ikev1
fragmentation = yes
#left -- local(server) side
left = %any
leftauth = psk
leftsubnet = 0.0.0.0/0
#right -- remote(client) side
right = %any
rightauth = psk
rightauth2 = xauth
rightsourceip = 10.36.1.0/24
auto = add
# for IOS 8+ Android 4.4+ Win 7+
conn IPSec-IKEv2
keyexchange = ikev2
ike = aes256-sha1-modp1024,aes128-sha1-modp1024,3des-sha1-modp1024!
esp = aes256-sha256,aes256-sha1,3des-sha1!
eap_identity = %any
fragmentation = yes
rekey = no
mobike = no
#left -- local(server) side
left = %any
leftauth = pubkey
leftcert = host.cert.pem
leftsubnet = 0.0.0.0/0
leftsendcert = always
#right -- remote(client) side
right = %any
rightauth = eap-mschapv2
rightcert = client.cert.pem
rightsourceip = 10.36.2.0/24
rightsendcert = never
auto = add
2编辑 ipsec.secrets
# /etc/ipsec.secrets
# ipsec.secrets
: RSA host.key.pem
: PSK "your_psk"
# use XAUTH
user1 : XAUTH "password"
user2 : XAUTH "password"
# use EAP
user3 : EAP "password"
user4 : EAP "password"
3编辑 strongswan.conf
# /etc/strongswan.conf - strongSwan configuration file
charon {
load_modular = yes
duplicheck.enable = no #是为了你能同时连接多个设备,所以要把冗余检查关闭
compress = yes
plugins {
include strongswan.d/charon/*.conf
}
dns1 = 8.8.4.4
dns2 = 8.8.8.8
# for Windows WINS Server
nbns1 = 8.8.4.4
nbns2 = 8.8.8.8
}
include strongswan.d/*.conf
配置防火墙
1编辑 sysctl.conf
在终端执行下列命令(需要root权限):
# sysctl -w net.ipv4.ip_forward = 1
# sysctl -w net.ipv4.conf.all.accept_redirects = 0
# sysctl -w net.ipv4.conf.all.send_redirects = 0
2设置 iptables 转发
OpenVZ类型, 执行:
# iptables -A INPUT -i venet0 -p esp -j ACCEPT
# iptables -A INPUT -i venet0 -p udp --dport 500 -j ACCEPT
# iptables -A INPUT -i venet0 -p udp --dport 4500 -j ACCEPT
# iptables -t nat -A POSTROUTING -s 10.36.1.0/24 -o venet0 -j MASQUERADE
# iptables -t nat -A POSTROUTING -s 10.36.2.0/24 -o venet0 -j MASQUERADE
# iptables -A FORWARD -s 10.36.1.0/24 -j ACCEPT
# iptables -A FORWARD -s 10.36.2.0/24 -j ACCEPT
3开机自动载入 iptables 设定
CentOS, 执行:
# /sbin/service iptables save
启用 IPSec
# ipsec start
CentOS 7 / Ubuntu 开机自启动:
# systemctl enable strongswan
你可能会遇到一些名称中有 “Swan” 的各种 VPN 工具。FreeS/WAN 、OpenSwan、LibreSwan 和 strongSwan 都是同一个项目的分叉,后者是我个人最喜欢的。在服务器端,strongSwan 可以运行在 Linux 2.6、3.x 和 4x 内核、Android、FreeBSD、macOS、iOS 和 Windows 上。
StrongSwan 使用 IKEv2 协议和 IPSec 。与 OpenVPN 相比,IKEv2 连接速度更快,同时提供了很好的速度和安全性。如果你更喜欢不需要在客户端安装额外应用程序的协议,这将非常有用,因为现在生产的大多数新设备都支持 IKEv2,包括 Windows、MacOS、iOS 和 Android。
StrongSwan 并不特别容易使用,尽管文档不错,但它使用的词汇与大多数其他工具不同,这可能会让人比较困惑。它的模块化设计让它对企业来说很棒,但这也意味着它不是很精简。
访问控制可以基于使用 X.509 属性证书的组成员身份,这是 strongSwan独有的功能。它支持用于集成到其他环境(如 Windows Active Directory)中的 EAP 身份验证方法。strongSwan 可以穿透NAT 网络防火墙。)
搭建IPSEC/IKEV2 VPN服务器
1,安装必须的库
Ubuntu:
Xen、KVM使用以下参数:
OpenVZ需额外增加一个 enable-kernel-libipsec:
4,编译并安装:
配置证书
1,生成CA证书的私钥
如果需要多个vps使用同一个CA根证书,则以上两步只执行一次,之后所有vps都使用上面生成的这两个ca.pem和ca.cert.pem文件进行后续的操作.
然后把多台vps解析到同一个域名的不同二级域名下.
这样客户端连接各个服务器时,只需要客户端安装一次根证书ca.cert.pem即可.
然后将下面命令中的123.123.123.123替换为自己服务器的IP地址或域名,一共需要替换两处:
配置Strongswan
1,编辑/usr/local/etc/ipsec.conf文件:
config setup
    uniqueids=never

conn iOS_cert
    keyexchange=ikev1
    # strongswan version >= 5.0.2, compatible with iOS 6.0,6.0.1
    fragmentation=yes
    left=%defaultroute
    leftauth=pubkey
    leftsubnet=0.0.0.0/0
    leftcert=server.cert.pem
    right=%any
    rightauth=pubkey
    rightauth2=xauth
    rightsourceip=10.31.2.0/24
    rightcert=client.cert.pem
    auto=add

conn android_xauth_psk
    keyexchange=ikev1
    left=%defaultroute
    leftauth=psk
    leftsubnet=0.0.0.0/0
    right=%any
    rightauth=psk
    rightauth2=xauth
    rightsourceip=10.31.2.0/24
    auto=add

conn networkmanager-strongswan
    keyexchange=ikev2
    left=%defaultroute
    leftauth=pubkey
    leftsubnet=0.0.0.0/0
    leftcert=server.cert.pem
    right=%any
    rightauth=pubkey
    rightsourceip=10.31.2.0/24
    rightcert=client.cert.pem
    auto=add

conn windows7
    keyexchange=ikev2
    ike=aes256-sha1-modp1024!
    rekey=no
    left=%defaultroute
    leftauth=pubkey
    leftsubnet=0.0.0.0/0
    leftcert=server.cert.pem
    right=%any
    rightauth=eap-mschapv2
    rightsourceip=10.31.2.0/24
    rightsendcert=never
    eap_identity=%any
    auto=add
将上面的myXAUTHPass单词更改为你需要的XAUTH认证方式的密码,该认证方式的用户名是随意的;
将上面的用户名改为自己想要的登录名,密码改为自己想要的密码,可以添加多行,得到多个用户账号,这即是使用IKEv2的用户名+密码认证方式的登录凭据.
(注:ipsec.secrets文件也可写成如下格式:
: PSK "自定义PSK密钥"
用户名1 : XAUTH "密码1"

: RSA server.pem
用户名2 : EAP "密码2"
走IKEv1协议的设备用PSK认证方式,走IKEv2协议的设备用RSA方式.对于走IKEv2的客户端如win7来说,我试了一下EAP或XAUTH格式的帐号都能用,而IKEv1的只能用XAUTH格式,似乎是IKEv2向下兼容的缘故。)
由于wp8.1连接IKEv2的vpn时,默认会加上与手机名称相同的域,于是连接时会显示用户名或密码错误.这里有两种解决方法:
方法1:将上面/usr/local/etc/ipsec.secrets文件的最后一行改为%any %any : EAP “[密码]” ,这样就可以使用任意用户名登录,带上域也不会出错.
方法2:用FreeRADIUS过滤掉登录名的域,参考连接:让FreeRADIUS去掉登陆用户名中的Windows登录域
配置防火墙
OpenVZ执行:
PS:你可将上述防火墙规则的最后3条NAT规则替换为以下3条来提升处理效率:
PS:也可将上述防火墙规则的最后3条NAT规则替换为以下3条来提升处理效率:
以下步骤需要你有自己的 VPS。
以下操作基于 Ubuntu,以非 root 用户 ssh 登录。其它发行版应该只有包管理和防火墙部分稍有不同。
IPsec VPN
我是在 Twitter 上看到 Justin 说 Anyconnect 在 iOS8 上变的特别慢之后,才开始考虑停掉 ocserv 换用 IPsec VPN ,IPsec 的配置方法参考了 Justin 的文章。由于 IKEv2 在 iOS8 上有 Bug,所以这里还是用IKEv1 协议。不过如果 Apple 在哪个版本修复了 IKEv2 的话,现在这个配置方式也是很容易迁移到 IKEv2 的。
编译 Strongswan
apt-get 里的 Strongswan 版本低,所以这里需要自行编译最新版的 Strongswan。
检查依赖
如果是基于 OpenVZ 的 VPS 的话,先要检查一下有没有 TUN Device。输入下面的命令。非 OpenVZ 可以跳过这一步。
1cat /dev/net/tun
如果执行结果如下,那么就可以安装 Strongswan 了。否则的话,去给 VPS 提供商发 Ticket 看能不能解决吧。
1cat: /dev/net/tun: File descriptor in bad state
下载源码
1wget http://download.strongswan.org/strongswan.tar.gz && tar zxvf strongswan*2cd strongswan*
安装编译所需的包
1sudo apt-get build-dep strongswan2sudo apt-get install libgmp3-dev openssl libssl-dev
编译
Strongswan 在 configure 时要对 OpenVZ 特殊处理。
非 OpenVZ 执行如下命令。
1./configure --sysconfdir=/etc --disable-sql --disable-mysql --disable-ldap --enable-dhcp --enable-eap-identity --enable-eap-mschapv2 --enable-md4 --enable-xauth-eap --enable-eap-peap --enable-eap-md5 --enable-openssl --enable-shared --enable-unity --enable-eap-tls --enable-eap-ttls --enable-eap-tnc --enable-eap-dynamic --enable-addrblock --enable-radattr --enable-nat-transport --enable-kernel-netlink
OpenVZ 要加上 --enable-kernel-libipsec 参数,完整命令如下。
1./configure --sysconfdir=/etc --disable-sql --disable-mysql --disable-ldap --enable-dhcp --enable-eap-identity --enable-eap-mschapv2 --enable-md4 --enable-xauth-eap --enable-eap-peap --enable-eap-md5 --enable-openssl --enable-shared --enable-unity --enable-eap-tls --enable-eap-ttls --enable-eap-tnc --enable-eap-dynamic --enable-addrblock --enable-radattr --enable-nat-transport --enable-kernel-netlink --enable-kernel-libipsec
configure 完之后就可以 make 和 install 了
1make && sudo make install
生成证书
这里是使用的自签名证书,需要你把 CA 证书用邮件发到 iOS 设备上安装才行。如果要用 ssl 证书,可以参考 wzxjohn 的文章。
Strongswan 的证书都是要放在 /etc/ipsec.d/ 里的,不过我们是非 root 登录的,不方便直接操作这个目录,可以现在 home 目录下新建个目录来生成证书,等都生成好了再复制到 /etc/ipsec.d/ 就行了。
1mkdir ~/ipsec_cert && cd ~/ipsec_cert
生成证书用到的命令比较多,我写好了 script 来做这件事
生成服务器证书
记得把我这里写的 emptyzone.github.io 换成你自己的 Server IP 或者是域名。你打算用域名访问 VPN 就写 域名,打算用 IP 访问就写 IP,别写错了。
1wget https://gist.githubusercontent.com/songchenwen/14c1c663ea65d5d4a28b/raw/cef8d8bafe6168388b105f780c442412e6f8ede7/server_key.sh2sh server_key.sh emptyzone.github.io
生成客户端证书
把 gary 和 gary@gmail.com 换成你自己的用户名和email。这个脚本执行完会生成好导入 iOS 时需要的 p12 证书文件,最后提示你输入的密码就是用来加密它的,在往 iOS 导入时输入相同的即可。
1wget https://gist.githubusercontent.com/songchenwen/14c1c663ea65d5d4a28b/raw/54843ae2e5e6d1159134cd9a90a08c31ff5a253d/client_key.sh2sh client_key.sh gary gary@gmail.com
执行完成后可以把以用户名开头的 .p12 文件 和 cacerts/strongswanCert.pem 下载到本地来备用。
复制证书到 /etc/ipsec.d/
Strongswan 需要的是 cacerts/strongswanCert.pem certs/vpnHostCert.pem private/vpnHostKey.pem 这三个文件。
1sudo cp cacerts/strongswanCert.pem /etc/ipsec.d/cacerts/strongswanCert.pem2sudo cp certs/vpnHostCert.pem /etc/ipsec.d/certs/vpnHostCert.pem3sudo cp private/vpnHostKey.pem /etc/ipsec.d/private/vpnHostKey.pem
配置 Strongswan
编辑 /etc/ipsec.conf
1sudo vi /etc/ipsec.conf
1config setup2 # strictcrlpolicy=yes3 # uniqueids = replace4 # charondebug="cfg 2, dmn 2, ike 2, net 0" #要看Log时,取消注释本行56conn %default7 keyexchange=ikev18 dpdaction=hold9 dpddelay=600s10 dpdtimeout=5s11 lifetime=24h12 ikelifetime=240h13 rekey=no14 left=emptyzone.github.io #这里换成你登录 VPN 用的域名或 IP,与生成证书时相同15 leftsubnet=0.0.0.0/016 leftcert=vpnHostCert.pem17 leftsendcert=always18 right=%any19 rightdns=8.8.8.820 rightsourceip=10.0.0.0/82122conn CiscoIPSec23 rightauth=pubkey24 rightauth2=xauth25 auto=add
编辑 /etc/ipsec.secrets
1sudo vi /etc/ipsec.secrets
1#验证用户所需的信息2#用户名 : EAP "密码"3: RSA vpnHostKey.pem4gary : EAP "strongpassword"
配置防火墙 iptables
参考我的配置文件,重要的是开启 NAT 转发 开放
4500500端口和esp协议
/etc/iptables.firewall.rules
注意别把自己的 ssh 端口关闭了
1*filter23# Allow all loopback (lo0) traffic and drop all traffic to 127/8 that doesn't use lo04-A INPUT -i lo -j ACCEPT5-A INPUT -d 127.0.0.0/8 -j LOG --log-prefix "looback denied: " --log-level 76-A INPUT -d 127.0.0.0/8 -j REJECT78# Accept all established inbound connections9-A INPUT -m state --state ESTABLISHED,RELATED -j ACCEPT1011# Allow all outbound traffic - you can modify this to only allow certain traffic12-A OUTPUT -j ACCEPT1314# Allow HTTP and HTTPS connections from anywhere (the normal ports for websites and SSL).15-A INPUT -p tcp --dport 80 -j ACCEPT1617# Allow ipsec18-A INPUT -p udp --dport 4500 --j ACCEPT19-A INPUT -p udp --dport 500 --j ACCEPT20-A INPUT -p esp -j ACCEPT2122# Allow SSH connections23#24# The -dport number should be the same port number you set in sshd_config25#26-A INPUT -p tcp -m state --state NEW --dport 1010 -j ACCEPT2728# Allow ping29-A INPUT -p icmp -j ACCEPT3031# Log iptables denied calls32-A INPUT -m limit --limit 5/min -j LOG --log-prefix "iptables denied: " --log-level 73334-A INPUT -j DROP3536COMMIT
在 /etc/sysctl.conf 中开启 net.ipv4.ip_forward=1
编辑 /etc/network/if-pre-up.d/firewall
1#!/bin/sh2/sbin/iptables-restore < /etc/iptables.firewall.rules
执行
1sudo chmod +x /etc/network/if-pre-up.d/firewall
编辑 /etc/rc.local 在 exit 0 前加上,20.16.3.18 换成你的服务器 IP。
1iptables -t nat -A POSTROUTING -j MASQUERADE2iptables -A FORWARD -p tcp --tcp-flags SYN,RST SYN -j TCPMSS --clamp-mss-to-pmtu3iptables -A POSTROUTING -t nat -s 10.0.0.0/8 -j SNAT --to-source 20.16.3.18
现在可以重启一下服务器,然后执行 sudo iptables -L,看看防火墙有没有添加对。
至此,你可以不用往下看了。
区分流量自动路由
SplitTunneling 之后,iOS 端就不会使用我们在服务器端配置的 DNS 了,所以我们还需要利用 Unity Plugin 的 Split DNS 来把抗干扰的 DNS 推给客户端。home 目录里就好了。修改 /ETC/STRONGSWAN.CONF
include /home/gary/ipsec_config/*.conf ,gary 换成你的 ssh 用户名,这样strongswan 就会导入我的 ~/ipsec_config 目录下的所有 .conf 文件。添加 IP 列表配置
IKE DELETE。28675 是 Split DNS 的 Key,我这里用上了 GFWList 中的所有顶级域名。~/ipsec_config/attr.confcharon {
plugins {
attr {
split-include = 63.140.32.0/19, 66.117.16.0/20, 66.235.0.0/16, 130.248.0.0/16, 153.32.0.0/16, 185.34.188.0/22, 192.147.117.0/24, 192.150.0.0/16, 192.243.224.0/20, 192.243.248.0/21, 193.104.215.0/24, 195.35.86.0/24, 208.77.136.0/22, 216.104.0.0/16, 8.18.144.0/23, 23.20.0.0/14, 27.0.0.0/22, 46.51.128.0/18, 46.51.192.0/20, 46.51.216.0/21, 46.51.224.0/19, 46.137.0.0/17, 46.137.128.0/18, 46.137.224.0/19, 50.16.0.0/14, 50.112.0.0/16, 54.0.0.0/8, 67.202.0.0/18, 72.21.192.0/19, 72.44.32.0/19, 75.101.128.0/17, 79.125.0.0/17, 87.238.80.0/21, 96.127.0.0/17, 103.246.148.0/22, 107.20.0.0/14, 122.248.192.0/18, 174.129.0.0/16, 176.32.64.0/19, 176.34.0.0/16, 178.236.0.0/20, 184.72.0.0/15, 184.169.128.0/17, 184.154.0.0/16, 185.48.120.0/22, 199.0.0.0/8, 203.83.220.0/22, 204.236.128.0/17, 204.246.160.0/20, 204.246.176.0/22, 204.246.180.0/23, 204.246.182.0/24, 204.246.184.0/21, 205.251.192.0/19, 205.251.224.0/20, 205.251.240.0/21, 205.251.248.0/22, 205.251.252.0/23, 205.251.254.0/24, 207.171.160.0/19, 216.137.32.0/21, 216.137.40.0/22, 216.137.44.0/23, 216.137.48.0/20, 216.182.224.0/20, 17.0.0.0/8, 63.92.224.0/19, 192.12.74.0/24, 192.42.249.0/24, 204.79.190.0/24, 104.16.0.0/12, 108.162.192.0/19, 108.162.224.0/20, 108.162.240.0/21, 108.162.248.0/22, 108.162.252.0/23, 108.162.254.0/24, 162.158.0.0/15, 173.245.48.0/20, 198.41.128.0/17, 204.93.177.0/24, 108.160.160.0/20, 205.189.0.0/24, 37.48.64.0/18, 85.17.0.0/16, 95.211.0.0/16, 31.13.24.0/21, 31.13.64.0/18, 66.220.144.0/20, 69.63.176.0/20, 69.171.224.0/19, 74.119.76.0/22, 173.252.64.0/18, 204.15.20.0/22, 23.235.32.0/20, 104.156.80.0/20, 208.71.104.0/22, 192.30.252.0/22, 8.6.48.0/21, 8.8.4.0/24, 8.8.8.0/24, 8.15.202.0/24, 8.34.208.0/20, 8.35.192.0/20, 23.236.48.0/20, 23.251.128.0/19, 64.9.224.0/19, 64.233.160.0/19, 66.102.0.0/20, 66.249.64.0/19, 70.32.128.0/19, 72.14.192.0/18, 74.125.0.0/16, 104.132.0.0/14, 104.154.0.0/15, 104.196.0.0/14, 107.167.160.0/19, 107.178.192.0/18, 108.59.80.0/20, 108.170.192.0/18, 108.177.0.0/17, 130.211.0.0/16, 142.250.0.0/15, 146.148.0.0/17, 162.216.148.0/22, 162.222.176.0/21, 172.217.0.0/16, 172.253.0.0/16, 172.16.16.1/32, 173.255.112.0/20, 192.158.28.0/22, 192.178.0.0/15, 207.223.160.0/20, 209.85.128.0/17, 216.58.192.0/19, 216.239.32.0/19, 205.196.120.0/22, 8.25.0.0/16, 192.133.76.0/22, 93.184.216.0/24, 59.24.3.0/24, 91.198.174.0/24, 185.15.56.0/22, 198.35.26.0/23, 198.73.209.0/24, 208.80.152.0/22, 66.155.8.0/21, 76.74.248.0/21, 192.0.64.0/18, 198.181.116.0/22
28675 = mil com tv fm za tw org info biz ca net ru au us de hk jp me uk io is it in li gov ly fr nu st asia im my xxx tk eu cc mobi se edu il kr ie ar nl cm ua es ph bz br be mp cz name lu ch su to no co nz sg ma vc am at la sh tl gd sk id pl mo tc hu
}
}
}
sudo ipsec start --nofork,试一下了。--nofork 参数会让 strongswan 在前台运行,调试时加上就可以了,平时就让它在后台运行吧。开机自启
/etc/rc.local 在 exit 0 前加上 ipsec startiOS 端自动配置文件
这里完全参考 Justin 的文章就可以了,他那有截图,我就只说一下步骤吧。
用 Apple Configurator 创建配置描述文件。
通用里的名称和标识符自己填好。
凭证里导入刚才下载好的客户端 .p12 证书。
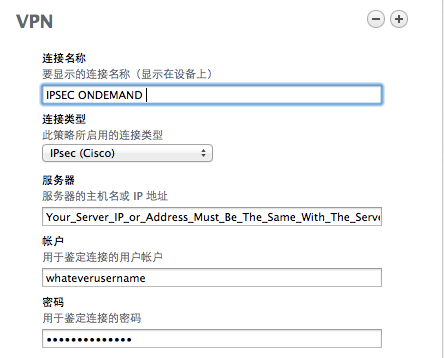
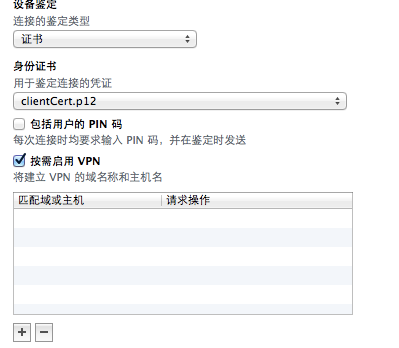
VPN里连接类型选 IPsec(Cisco),机器鉴定选证书,在下面选中刚才导入的证书。
导出这个配置描述文件,别签名。
用文本编辑器编辑。
找到这一段
1<key>OnDemandEnabled</key>2<integer>1</integer>
改成下面这样
1<key>OnDemandEnabled</key>2<integer>1</integer>3<key>OnDemandRules</key>4<array>5 <dict>6 <key>Action</key>7 <string>Connect</string>8 </dict>9</array>
另外,如果配置描述文件里只有 XAuthName,没有 XAuthPassword的话,可以自己加上这个 Key,然后把密码填上。
把这个配置描述文件,连同刚才下载好的服务器CA证书 strongswanCert.pem 一起,用邮件发到自己的 iOS 设备上,然后安装好,试一下吧。
DNS
使用刚才配置的 IPsec VPN 翻墙的话,就总会使用谷歌的 DNS 服务器做域名查询。这样很多明明国内有 CDN 的域名,却会解析到国外的 IP 上,造成访问缓慢。所以我要利用 pdnsd 来创建一个带缓存的域名解析服务。这里主要参考了这篇文章。
安装 pdsnd
1sudo apt-get install pdnsd
配置 pdnsd
编辑 /etc/pdnsd.conf
1global {2 perm_cache = 8192;3 cache_dir = "/var/cache/pdnsd";4 run_as = "pdnsd";5 server_ip = 0.0.0.0;6 status_ctl = on;7 paranoid = on;8 query_method = udp_tcp;9 tcp_server = on;10 min_ttl = 1d;11 max_ttl = 52w;12 timeout = 10;1314 randomize_recs = on;15 debug = off;16 daemon = on;17 verbosity = 1;18 neg_rrs_pol = on;19 neg_domain_pol = on;20 par_queries = 4;21}2223server {24 label = "Unicom Beijing";25 ip = 202.106.196.115, 202.106.46.151, 202.106.0.20, 202.106.195.68;26 timeout = 10;27 proxy_only = on;28 caching = on;29 randomize_servers = off;30 reject_policy = fail;31 reject_recursively = on;32 include =33// Place Domains Below. Remember add a dot(".") at the start of domain, if you also want to redirect all subdomains!34 ".cn",35// Place Domains Above.36 "DOMAIN.PADDING";373839 exclude =40// Place Domains Below. Remember add a dot(".") at the start of domain, if you also want to redirect all subdomains!4142".darpa.mil", ".fxnetworks.com", ".hulu.com", ".huluim.com", ".muzu.tv", ".netflix.com"4344// Place Domains Above.45 "DOMAIN.PADDING";4647reject = 118.5.49.6, 128.121.126.139, 159.106.121.75, 169.132.13.103, 188.5.4.96, 189.163.17.5, 192.67.198.6, 197.4.4.12, 202.106.1.2, 202.181.7.85, 203.161.230.171, 203.98.7.65, 207.12.88.98, 208.56.31.43, 209.145.54.50, 209.220.30.174, 209.36.73.33, 209.85.229.138, 211.94.66.147, 213.169.251.35, 216.221.188.182, 216.234.179.13, 23.89.5.60, 243.185.187.39, 249.129.46.48, 253.157.14.165, 37.61.54.158, 4.36.66.178, 46.82.174.68, 49.2.123.56, 54.76.135.1, 59.24.3.173, 64.33.88.161, 64.33.99.47, 64.66.163.251, 65.104.202.252, 65.160.219.113, 66.45.252.237, 72.14.205.104, 72.14.205.99, 74.125.127.102, 74.125.155.102, 74.125.39.102, 74.125.39.113, 77.4.7.92, 78.16.49.15, 8.7.198.45, 93.46.8.89;4849}5051server {52 label = "Google"; // Primary53 timeout = 3;54 ip = 8.8.8.8, 8.8.4.4, 208.67.222.222, 208.67.220.220;55 proxy_only = on;56 caching = on;57 randomize_servers = on;58}5960rr {61 name=localhost;62 reverse=on;63 a=127.0.0.1;64 owner=localhost;65 soa=localhost,root.localhost,42,86400,900,86400,86400;66}6768/* vim:set ft=c: */
这里默认使用北京联通的域名解析服务器,你也可以换成更适合自己的。当遇到被墙域名或者收到了被污染的 IP 时,再使用谷歌和 OpenDNS 的服务器。
执行 sudo service pdnsd start 来启动 pdnsd。
为使用 pdnsd 配置 Strongswan
我们刚才配置的 iptables 中并没有开启 DNS 服务需要的53端口。这个端口如果完全开放的话,VPS 提供商可能会给我们发安全警告。所以我们要利用 Strongswan 的 updown script 来完成对 iptables 的设置。
创建 leftupdown 脚本
我把这个脚本放在了 ~/ipsec_config/leftupdown,你也可以放在你喜欢的位置。
文件内容如下。
1#!/bin/sh23PATH="/sbin:/bin:/usr/sbin:/usr/bin:/usr/local/sbin"4export PATH56echo "updown executing"78ipsec _updown910case "$PLUTO_VERB:$1" in11up-client:)1213iptables -C INPUT -s $PLUTO_PEER -p tcp -m tcp --dport 53 -j ACCEPT14exist=$?1516if [ $exist -eq 0 ];then17 echo "updown script rule already exists for $PLUTO_PEER"18else19 echo "updown script up client $PLUTO_PEER"20 iptables -I INPUT 4 -s $PLUTO_PEER -p tcp -m tcp --dport 53 -j ACCEPT21 iptables -I INPUT 4 -s $PLUTO_PEER -p udp -m udp --dport 53 -j ACCEPT22 iptables -I INPUT 4 -s $PLUTO_PEER -p tcp -m tcp --sport 53 -j ACCEPT23 iptables -I INPUT 4 -s $PLUTO_PEER -p udp -m udp --sport 53 -j ACCEPT24fi25;;2627down-client:)2829echo "updown script down client $PLUTO_PEER"3031iptables -D INPUT -s $PLUTO_PEER -p tcp -m tcp --dport 53 -j ACCEPT32iptables -D INPUT -s $PLUTO_PEER -p udp -m udp --dport 53 -j ACCEPT33iptables -D INPUT -s $PLUTO_PEER -p tcp -m tcp --sport 53 -j ACCEPT34iptables -D INPUT -s $PLUTO_PEER -p udp -m udp --sport 53 -j ACCEPT35;;3637esac
保存好文件后,修改文件权限 chmod 777 ~/ipsec_config/leftupdown。
修改 /etc/ipsec.conf
把 rightdns 改成 VPS 的 IP。在 %default 里添加一行 leftupdown=/path/to/your/leftupdown,注意这里把路径换成刚才创建的 leftupdown 脚本的绝对路径。
执行 sudo ipsec reload,然后客户端重新连接一下,试试效果吧。
As it has been widely known that a lot of critical internet services had been blocked in China and using internet here is a pain in the butt [i mean ass]. So having a VPN server is very necessary to get whatever information needed. iOS has 3 types of built in VPN clients, they are PPTP, L2TP and IPSec. Any of them will work if you have a corresponding VPN server properly set up. While since the day Apple developed iOS, it has a feature that any network activities will be shutdown once iPhone goes into sleep mode, of course this includes VPN service, what’s worse is that iPhone won’t reconnect VPN automatically on waking up, hence you have to go to Settings to turn it on manually. And when the network switches between Cellular and Wi-Fi, VPN will also fail to reconnect automatically. This is absolutely not what i want. So with a lot of searches and tests been done, I come up with this final fully working guide on how to setup ondemand or always-on VPN on iOS and OS X (actually i don’t need this feature on OS X because i can easily reconnect manually, but yes the following guide also works on OS X)
The only option can be choosen is IPSec, because the other 2 modes are not allowed to get on demand or always on feature. I don’t know why but Apple Configurator said that. I use Strongswan as an IPSec server and Apple Configurator to setup iOS, there are many guides out there but none of them takes care of the very important details which are critical to make it work just as what i imagined.
What Are Needed:
- A VPS Server out side of China, you can choose whatever places but i recommend Japan, Hong Kong, Taiwan and USA.
- An iOS device, iPhone or iPad or iPod Touch, as of I'm writting, i run iOS 8 on my iPhone 5s
- Apple OS X to run Apple Configurator, iMac or Macbook or OS X in a virtual machine.
- Internet connection.
Set Up An IPSec VPN Server With Strongswan
1. Install Linux on VPS server, I use Debian Wheezy, this guide also applies to Unbutu, CentOS, Redhat or whatever, it doesn’t important, but Debian makes it easier.
2. Install the latest Strongswan which is version 5.2.0 as of i’m writting.
3. Create CA, Certs and Keys and put them to the right places. Save the code to ca.sh and make it executable by chmod +x ca.sh and run by ./ca.sh
#!/bin/sh
# CA
ipsec pki --gen --outform pem > caKey.pem
ipsec pki --self --in caKey.pem --dn "C=CH, O=Justinhe, CN=Justinhe CA" --ca --outform pem > caCert.pem
#CA with crt format to pass to iphone,very important
openssl x509 -outform der -in caCert.pem -out caCert.crt
### Server Certificate
ipsec pki --gen --outform pem > serverKey.pem
ipsec pki --pub --in serverKey.pem | ipsec pki --issue --cacert caCert.pem --cakey caKey.pem \
 --dn "C=CH, O=Justinhe, CN=YOUR_SERVER_IP" --san="YOUR_SERVER_IP"" \
 --flag serverAuth --flag ikeIntermediate --outform pem > serverCert.pem
### iPhone Certification
ipsec pki --gen --outform pem > clientKey.pem
ipsec pki --pub --in clientKey.pem | ipsec pki --issue --cacert caCert.pem --cakey caKey.pem \
 --dn "C=CH, O=Justinhe, CN=JustiniPhone" --outform pem > clientCert.pem
### iPhone P12 file to include keys and certs
openssl pkcs12 -export -inkey clientKey.pem -in clientCert.pem -name "client" \
 -certfile caCert.pem -caname "strongSwan CA" -out clientCert.p12
## cp them to /etc/ipsec.d
sudo cp caCert.pem /etc/ipsec.d/cacerts/
sudo cp serverCert.pem /etc/ipsec.d/certs/
sudo cp serverKey.pem /etc/ipsec.d/private/
sudo cp clientCert.pem /etc/ipsec.d/certs/
sudo cp clientKey.pem /etc/ipsec.d/private/
## backup iphoen files to use with Apple Configurator
cp caCert.crt clientCert.p12 ~/
4. Config /etc/ipsec.conf, replace it with the following code:
config setup
 uniqueids = never
 #strictcrlpolicy = no
 #cachecrls = yes
conn ioscert
 keyexchange=ike
 fragmentation=force
 #compress = no
 aggressive = no
 dpdaction = hold
 dpddelay = 600s
 dpdtimeout = 5s ## very important for iOS, without this option, it can have problem to reconnect
 lifetime = 24h
 rightfirewall = yes
 leftfirewall = yes
 leftallowany = yes
 rightallowany = yes
 left=%defaultroute
 ikelifetime = 240h
 leftauth=pubkey
 leftsubnet=0.0.0.0/0
 leftcert=serverCert.pem
 right=%any
 rightauth=pubkey
 rightauth2=xauth
 rightsourceip=10.0.0.0/24
 rightcert=clientCert.pem
 auto=add
5. Set up DNS server to use with iPhone, edit /etc/strongswan.conf
#####
# strongswan.conf - strongSwan configuration file
#
# Refer to the strongswan.conf(5) manpage for details
#
# Configuration changes should be made in the included files
charon {
 load_modular = yes
 plugins {
  include strongswan.d/charon/*.conf
 }
}
charon {
 duplicheck.enable = no
 dns1 = 8.8.4.4
 dns2 = 8.8.8.8
}
include strongswan.d/*.conf
6. Setup username, password and PSK secrets, Edit /etc/ipsec.secrets, change bold part to your favarite.
# This file holds shared secrets or RSA private keys for authentication.
# RSA private key for this host, authenticating it to any other host
# which knows the public part.
# this file is managed with debconf and will contain the automatically created private key
include /var/lib/strongswan/ipsec.secrets.inc
: RSA serverKey.pem
: PSK “whateverPSKsecrets"
whateverusername: XAUTH “whateverpassword"
whateverusedname : EAP “whateverpassword”
7. IPSec on server side setup finished, start it and enable start on boot by running:
sudo /etc/init.d/ipsec start
sudo update-rc.d ipsec enable
8. Config iptables rules to let the server route all your traffic, create a file /etc/iptables.up.rules and put the code there, actually all you need is the bold parts, then run iptables-restore < /etc/iptables.up.rules, put this comamnd to /etc/rc.local so the rules won’t be lost after server reboot, learn more about iptables from Debian Wiki
###########
# Generated by iptables-save v1.4.14 on Mon Sep 22 16:35:43 2014
*security
:INPUT ACCEPT [178390:68486107]
:FORWARD ACCEPT [161380:149040438]
:OUTPUT ACCEPT [200824:181706535]
COMMIT
# Completed on Mon Sep 22 16:35:43 2014
# Generated by iptables-save v1.4.14 on Mon Sep 22 16:35:43 2014
*raw
:PREROUTING ACCEPT [339786:217532637]
:OUTPUT ACCEPT [200824:181706535]
COMMIT
# Completed on Mon Sep 22 16:35:43 2014
# Generated by iptables-save v1.4.14 on Mon Sep 22 16:35:43 2014
*nat
:PREROUTING ACCEPT [2946:217086]
:INPUT ACCEPT [1033:94916]
:OUTPUT ACCEPT [2782:174581]
:POSTROUTING ACCEPT [0:0]
-A POSTROUTING -j MASQUERADE
-A POSTROUTING -s 10.0.0.0/24 -o eth0 -j MASQUERADE
COMMIT
# Completed on Mon Sep 22 16:35:43 2014
# Generated by iptables-save v1.4.14 on Mon Sep 22 16:35:43 2014
*mangle
:PREROUTING ACCEPT [339786:217532637]
:INPUT ACCEPT [178390:68486107]
:FORWARD ACCEPT [161380:149040438]
:OUTPUT ACCEPT [200824:181706535]
:POSTROUTING ACCEPT [362204:330746973]
COMMIT
# Completed on Mon Sep 22 16:35:43 2014
# Generated by iptables-save v1.4.14 on Mon Sep 22 16:35:43 2014
*filter
:INPUT ACCEPT [19:1276]
:FORWARD ACCEPT [0:0]
:OUTPUT ACCEPT [16:2128]
-A INPUT -p udp -m udp --dport 500 -j ACCEPT
-A INPUT -p udp -m udp --dport 443 -j ACCEPT
-A INPUT -p udp -m udp --dport 53 -j ACCEPT
-A INPUT -p udp -m udp --dport 4500 -j ACCEPT
-A FORWARD -s 10.0.0.0/24 -j ACCEPT
-A FORWARD -p tcp -m tcp --tcp-flags SYN,RST SYN -j TCPMSS --clamp-mss-to-pmtu
COMMIT
# Completed on Mon Sep 22 16:35:43 2014
9. Also edit /etc/sysctl.conf and uncomment the 2 lines and enable them by running sudo sysctl -p
net.ipv4.ip_forward=1
net.ipv6.conf.all.forwarding=1
Setup iOS With Apple Configurator
1. Download and install Apple Congfigurator Version 1.6 from OS X App Store
2. Run Apple Configurator and move to Supevised(监督), click the little “+” to create a new profile for iOS. Now there are 3 parts to edit:
2.1 Profile Name, use whatever name:


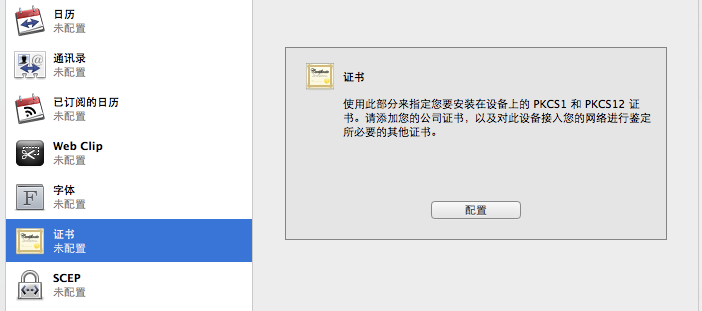
2.2 Install the 2 Certificates that we created on the server:

2.3 Go to VPN and config it as below:


2.4 Save and export the profile but do not check “Sign the profile(给配置文件签名)”, because we need to manually edit this saved file to set up the very important part, if you signed it, after you edit with other tools, you can’t install this profile on iPhone.


2.5 Edit the profile with TextEditor comes with OS X and replace this part:
<key>OnDemandEnabled</key>
<integer>1</integer>
With this part:
<key>OnDemandEnabled</key>
<integer>1</integer>
<key>OnDemandRules</key>
<array>
<dict>
<key>Action</key>
<string>Connect</string>
</dict>
</array>
from Apple official document, Action — Connect means: Unconditionally initiate a VPN connection on the next network attempt.
2.6 So with the above settings, this is actually an Always on IPSec VPN for iOS, no matter what condition, as long as you have network, you can always get VPN on. Save the profile and install on iOS, you can email to your Mail.app or put the profile on a local http server and use MobileSafari to open and install.
Written with the efforts of Justin He @cattyhouse, free to distribute with original link which is this one.
from https://medium.com/@cattyhouse/ios-ondemand-ipsec-vpn-setup-ebfb82b6f7a1
----------------
如何避免mac下cisco ipsec vpn每小时重新认证的方法
- 连cisco VPN;
- ls /var/run/racoon/ 查看该文件夹下有一个配置文件,假设你的文件名为 ip.conf
- sudo cp /var/run/racoon/ip.conf /etc/racoon
- 用vim打开 /etc/racoon/racoon.conf ,将最后一行注释掉 ,然后添加一行 include “/etc/racoon/ip.conf” ; 这个ip.conf就是刚才从 /var/run/racoon/下copy过来的conf文件
- 下面对 /etc/racoon/ip.conf 做一些修改,你可以用你喜欢的文本编辑器打开
dpd_delay 0;
proposal_check claim;
lifetime time 24 hours;
https://zh.opensuse.org/index.php?title=SDB:Setup_Ipsec_VPN_with_Strongswan&variant=zh
不用证书创建简单IKEv2 PSK (pre-shared key) VPN
网上很多strongSwan服务器安装教程都是基于CA证书然后以用户名和密码登录建立IKEv2 VPN连接,但是CA证书挺麻烦的,如果这个VPN服务器只是偶尔应急使用,用Pre-Shared Key方式登录最为简便。
搭建使用PSK的IKEv2 VPN的一键脚本
curl -L https://raw.githubusercontent.com/truemetal/ikev2_vpn/master/ikev2-deploy-psk.sh -o ~/deploy.sh && chmod +x ~/deploy.sh && ~/deploy.sh
(搭建后如果可以连接但不能上网,可以设置防火墙 iptables -t nat -A POSTROUTING -s 10.10.10.0/24 -j SNAT – -to-source 服务器ip)
项目地址:https://github.com/truemetal/ikev2_vpn
连接PSK类型IKEv2 VPN只需要服务器IP和PSK密钥即可。
iOS和Mac系统自带IKEv2 VPN客户端支持PSK类型IKEv2 VPN;部分安卓系统自带IKEv2 VPN功能(比如三星手机)也支持PSK类型IKEv2,不带IKEv2功能的安卓手机可以安装NCP VPN Client连接(strongSwan VPN Client好像不支持PSK类型IKEv2);Windows系统可以用NCP Secure Entry Windows Client连接(Windows系统自带IKEv2好像不支持PSK类型IKEv2)。(不过NCP的VPN客户端是收费的)。
NCP的VPN客户端下载:https://www.ncp-e.com/en/service-resources/download-vpn-client/
另外http://www.thegreenbow.com 这个win和安卓客户端也支持IKEv2 PSK模式不过也是收费的.
-------------------------------
from https://quericy.me/blog/512
IPSec VPN on OpenVZ
Prerequisites
TUN/TAP check
cat /dev/net/tun
cat: /dev/net/tun: File descriptor in bad state
Installation
Get the source code
wget http://download.strongswan.org/strongswan.tar.gz
tar zxvf strongswan*
cd strongswan*
Dependance
apt-get update
apt-get install build-essential libgmp3-dev openssl libssl-dev
Parameters for compiling
./configure --sysconfdir=/etc --disable-sql --disable-mysql --disable-ldap --enable-dhcp --enable-eap-identity --enable-eap-mschapv2 --enable-md4 --enable-xauth-eap --enable-eap-peap --enable-eap-md5 --enable-openssl --enable-shared --enable-unity --enable-eap-tls --enable-eap-ttls --enable-eap-tnc --enable-eap-dynamic --enable-addrblock --enable-eap-radius --enable-radattr --enable-nat-transport --enable-cisco-quirks --enable-kernel-netlink --enable-kernel-libipsec
./configure --sysconfdir=/etc --disable-sql --disable-mysql --disable-ldap --enable-openssl --enable-shared --enable-kernel-libipsec
Compile and install
make && make install
Configuration
ipsec.conf
vi /etc/ipsec.conf
# ipsec.conf - strongSwan IPsec configuration file

config setup
    uniqueids=never

conn %default
    rekey=no
    left=%defaultroute
    leftsubnet=0.0.0.0/0
    right=%any
    dpddelay=300s
    dpdtimeout=1h
    dpdaction=clear
    auto=add

conn ikecommon
    rightsourceip=10.11.0.0/24
    #modeconfig=push
    #esp=aes128-sha1-modp2048
    compress=yes

conn ikev1pskaggressive
    aggressive=yes
    #type=tunnel
    also=ikev1psk

conn ikev1psk
    #authby=xauthpsk
    leftauth=psk
    rightauth=psk
    rightauth2=xauth
    #xauth=server
    also=ikev1

conn ikev1
    keyexchange=ikev1
    #ikelifetime=60m
    #keylife=20m
    #rekeymargin=3m
    #keyingtries=3
    also=ikecommon

conn L2TP-PSK-NAT
    leftfirewall=yes
    rightfirewall=yes
    also=L2TP-PSK-noNAT

conn L2TP-PSK-noNAT
    keyexchange=ikev1
    type=transport
    authby=psk
    keyingtries=3
    rekey=no
    leftprotoport=17/1701
    rightprotoport=17/%any
    ike="aes256-sha1-modp2048!"
    esp="aes-sha1!"
strongswan.conf
vi /etc/strongswan.conf
duplicheck.enable = no
install_virtual_ip = yes
i_dont_care_about_security_and_use_aggressive_mode_psk = yes

dns1 = 8.8.8.8
dns2 = 8.8.4.4
charon {

        # number of worker threads in charon
        threads = 16

        **INSERT HERE**

        # send strongswan vendor ID?
        # send_vendor_id = yes
ipsec.secrets
vi /etc/ipsec.secrets
: PSK "YOURPSKKEY"
YOURUSERNAME : XAUTH "YOURPASSWORD"
iptables
iptables -A INPUT -p esp -j ACCEPT
iptables -A INPUT -p udp --dport 500 -j ACCEPT
iptables -A INPUT -p udp --dport 4500 -j ACCEPT
iptables -t nat -A POSTROUTING -s 10.0.0.0/8 -o venet0 -j MASQUERADE
iptables -A POSTROUTING -t nat -s 10.0.0.0/8 -j SNAT --to-source YOURSERVERIP
iptables -A FORWARD -s 10.0.0.0/8 -j ACCEPT
Startup
/usr/local/sbin/ipsec start
/usr/local/sbin/ipsec start --nofork
from http://wiki.loopop.net/doku.php?id=server:vpn:strongswanonopenvz
--------------------
使用 Strongswan 架设 Ipsec VPN
-------------本教学介绍了如何使用 Strongswan 5.0.x 在 openSUSE 12.3+ 服务器上架设支持 ikev1/ikev2 的 Ipsec VPN。适用于 openSUSE、iOS、Android、Windows 和其它 Linux。注意 Strongswan 5 即现在的主力支持版本和 Strongswan 4 的 ipsec.conf 有很大的不同(作废了很多选项),请保证您的版本为 5.0.4+ 本教学才有参考价值。因此请不要往 Debian 这些软件包版本旧的系统上套,同样 openSUSE 用户也不要拿 Debian 的来套。注意 本文的例子仅以最常见的 VPS/客户机模式为例,假设客户机使用图形客户端,因此并不涉及客户端文本配置的内容。其中的原理和服务器端配置可用于其它用途比如服务器到服务器(Site to Site)的连接,但这种连接的客户端文本配置部分需要领会原理自己写。注意 本文只适用于有 VPS 的爱好者使用,并不提供已建立好的 demo 供测试,但保证文中出现的配置如无意外如上游改选项,实际中都是能够使用的。因此并不可用于「免费 VPN」这样的话题,如何优惠购买 VPS 请到我们的论坛 forum.suse.org.cn。本文也不讨论如何进行后台计费,但提供了计费软件的名称供 VPN 服务商参考,因此只适用于小团体的共用。如果小群体产生流量纠纷而需区分账户,那解散才是治本的方法,其它都只能治标。目录
[隐藏]什么是 IPsec?
IPsec 是 虚拟私密网络(VPN) 的一种,用于在服务器和客户端之间建立加密隧道并传输敏感数据之用。它由两个阶段组成,第一阶段(Phrase 1, ph1),交换金钥建立连接,使用互联网金钥交换(ike)协议; 第二阶段(Phrase 2, ph2),连接建立后对数据进行加密传输,使用封装安全载荷(esp)协议。参考:维基百科 IPsec 词条。其中,第一阶段和第二阶段可以使用不同的加密方法(cipher suites)。甚至,第一阶段 ike 协议的第一版(ikev1)有两种模式,主力模式(main mode)和积极模式(aggressive mode),主力模式进行六次加密握手,而积极模式并不加密,以实现快速建立连接的目的。第一阶段的 ike 协议有两个版本(ikev1/ikev2),不同的开源/闭源软件实现的版本均不同,不同的设备实现的版本也不同。再联系到第一阶段/第二阶段使用的各种不同加密方法,使得 IPsec 的配置有点黑魔法的性质,要么完全懂,通吃; 要么完全不懂,照抄。设备/操作系统规格
这里主要介绍了设备/操作系统使用的 ike 版本及其特殊要求。Linux
命令行客户端就是 strongswan 本身,因此完美兼容,支持 ikev1/ikev2 和所有加密方法的连接。因此如果用户只使用 Linux 命令行客户端,不使用各种移动设备也不使用 Windows,那么完全没有那么多事。但 Linux 的图形界面客户端 NetworkManager-strongswan 目前只支持 ikev2 连接,必须使用证书或 EAP (各种加密方法都支持,包括微软的 MSCHAPv2)进行认证,不支持纯密码(PSK)认证。这并不是 strongswan 的错误,或者技术不行(开源总是走在技术最前沿的,毕竟命令行是支持的),而仅仅是体现一种选择:ikev1 被 strongswan 项目认为是该淘汰的协议,而 PSK 加密被认为是非常不安全的。参考 strongswan 维基 NetworkManager 词条。Android
Android 和 Linux 不一样,只支持 ikev1。其它方面和 Linux 一样,甚至有好多种 IPsec VPN 配置模式可供选择。iOS/Mac OS X
它们声明使用的 IPsec 客户端为 Cisco,实际为自己修改的 racoon。它只支持 ike 协议的第一版即 ikev1,可以使用证书或纯密码(PSK)认证,但必须辅之 xauth 用户名/密码认证。该修改版的 racoon 会优先使用不加密的积极模式,而积极模式是 strongSwan 所不支持的。所以要使用主力模式。iOS 6 还有一个「衔尾」故障:它在第一阶段握手时会把数据包拆分成小块(fragmentation),然后「加密」发送。然而这种加密仅仅是声明的,其实并未加密,这就导致 strongSwan 及其它标准服务器端/Cisco 设备无法解密。另外 ikev1 的 fragmentation 插件是闭源的。开源服务器端无法对这些小块进行重组。参考:Cisco VPN stop working after upgrading to IOS 6所以产生了一种权宜之计,就是使用小证书(小于 1024,默认一般为 2048),来达到不拆包的目的。但是 Mac OS X 10.7 的更新却对这种方式进行了封杀,学习微软加入了证书验证,小证书直接拒绝。所幸 strongswan 5.0.2 已经完成了 fragmentation 的开源实现和对 iOS 那个声明加密其实未加密故障的处理:IKE message fragmentation (cisco) + IOS 6.0 Hack for encrypted flaged ike fragmentation packets,该链接中也能找到 strongswan 4 的补丁。Windows
微软的差劲只比 iOS 好一点。好处在于它支持了 ikev2,但是只在 Windows 7 以后支持,Vista 之前依然使用 ikev1。坏处在于它的 ikev2 支持非常诡异,指定了 Diffie Hellman group(DH,迪菲-赫尔曼密钥交换组)必须是 modp1024。这是非常少见理论上不应该由系统管理员操心的加密选项:在 strongswan 中,定义第一阶段(ike)和第二阶段(esp)加密方法的语法是:ike/esp=encryption-integrity[-dhgroup][-esnmode] 第一阶段/第二阶段=加密方法-健壮性认证方法 (后面两项可选)[-DH 组] [-扩展序列号支持模式(RFC4304)]Windows 定义了一个可选的选项,导致了我们必须去定义整个第一阶段的加密方法。这样被破解的可能性就提高了。其次在于它的 rekey(重连)。IPsec 的认证是有时效的,超过时间会重新认证。这种 CHILD_SA 认证可由服务器发出,也可由客户端发出,一般是由服务器发出。但是 Windows 7 的 ikev2 的表现是,如果你在路由器(NAT)后,收到这种请求会把微软内部的通知代码发出去,代码为 12345, 经过 strongswan 项目侦错后发现这个代码的意思是 ERROR_IPSEC_IKE_INVALID_SITUATION。但是处理不了,它不是 IPsec 标准协议定义过的错误。于是有两种权宜之计:一种是让 Windows 7 来主动 rekey。Windows 7 rekey 的时间大约是 58 分 46 秒,所以要配置服务器 rekey 时间比它长。但是效果非常不好。因为 rekey 是由三个变量控制的,key 的生命周期,key 的边际时间(生命周期前多久进行 rekey),和边际时间误差(rekeyfuzz),误差是不可控的。参考:ExpiryRekey。即使能控制 strongswan 这边,Windows 依然是「大约」; 即使两边都能控制,假设服务器延后一秒 rekey,理论上如果连接持续时间足够长,依然能够撞车:58x60+46 次 rekey 后即 146 天后撞车,连一年都没有,在 Linux 服务器对 Windows 服务器这种使用实例中就明显不符合要求。所以目前只能使用后一种方法即完全禁用服务器端 rekey。最后,它的 EAP 认证也非常糟糕。MSCHAPv2 的 eap 身份不是 ikev2 身份(ikev2 身份一般是 EAP 用户名),所以必须在服务器端显式定义 eap_identity 来使用 Windows 7 的 eap 身份。安装 Srongswan
sudo zypper ar -f http://download.opensuse.org/repositories/network:/vpn/openSUSE_12.3/ network:vpn sudo zypper ref sudo zypper in --no-recommends strongswan-ipsec这里 --no-recommends 是不带推荐软件包,因为推荐的软件包都是针对桌面环境的,服务器用不到。如果你的版本是 openSUSE 12.1/12.2,请相应替换源地址。生成证书(可选)
注意 如果不生成证书,后面配置部分的配置中用 pubkey 认证的 conn 都不能用,甚至不能保留在配置中。每一个完整的 ssl 证书都有一个公钥和一个私钥,它们可以在一起也可以分开放(当然如果你要在网络上传输,肯定只能用公钥)。公钥是在网络上传输的,而私钥是藏好用来和接收到的公钥配对的(因此私钥里也有整个公钥,用来配对)。生成 CA 证书
生成一个私钥:ipsec pki --gen --outform pem > ca.pem没什么好解释的,--outform 一共有三个格式可选,但是另外两个是 der 和 pgp...基于这个私钥自己签一个 CA 证书:ipsec pki --self --in ca.pem --dn "C=CN, O=strongSwan, CN=strongSwan CA" --ca --outform pem > ca.cert.pem这里 --self 表示自签证书,--in 是输入的私钥,--dn 是判别名,--ca 表示生成 CA,其它同上。这里需要解释下判别名:
- C 表示国家名,同样还有 ST 州/省名,L 地区名,STREET(全大写) 街道名。
- O 表示组织名。
- CN 为通用名。
具体见微软的文档:Distinguished Names生成服务器证书
同样生成私钥:ipsec pki --gen --outform pem > server.pem用我们刚才自签的 CA 证书给自己发一个服务器证书:ipsec pki --pub --in server.pem | ipsec pki --issue --cacert ca.cert.pem \ --cakey ca.pem --dn "C=CN, O=strongSwan, CN=forum.suse.org.cn" \ --san="forum.suse.org.cn" --flag serverAuth --flag ikeIntermediate \ --outform pem > server.cert.pem这条命令的意思解释下:ipsec pki --pub --in server.pem是从我们刚生成的私钥里把公钥提取出来,然后用公钥去参与后面的服务器证书签发(这个是 VPN 连接时候要用的,你不想把私钥也给它吧?那样跟没签证书一样...)。--issue, --cacert 和 --cakey 就是表明要用刚才自签的 CA 证书来签这个服务器证书。--dn, --san,--flag 是一些客户端方面的特殊要求:
- iOS 客户端要求 CN 也就是通用名必须是你的服务器的 URL 或 IP 地址;
- Windows 7 不但要求了上面,还要求必须显式说明这个服务器证书的用途(用于与服务器进行认证),--flag serverAuth;
- 非 iOS 的 Mac OS X 要求了「IP 安全网络密钥互换居间(IP Security IKE Intermediate)」这种增强型密钥用法(EKU),--flag ikdeIntermediate;
- Android 和 iOS 都要求服务器别名(serverAltName)就是服务器的 URL 或 IP 地址,--san。
生成客户端证书
依然是生成私钥:ipsec pki --gen --outform pem > client.pem然后用刚才自签的 CA 证书来签客户端证书:ipsec pki --pub --in client.pem | ipsec pki --issue --cacert caCert.pem \ --cakey caKey.pem --dn "C=CN, O=strongSwan, CN=client" \ --outform pem > client.cert.pem这时命令行会提示你输入两遍密码,这个就是你的客户端证书密码。看懂了服务器的,客户端的也就不难理解了。除了没有那一堆特殊要求别的都一样。客户端证书可以每个客户端签一个,也可以让它们公用一个。是否多签看用途,一般用于区分设备(计费是不用这样的,是用账户来区分的)。生成 pkcs12 证书(可选)
你可能还想生成一个可以直接导入的 pkcs12 证书(用于手机,诺基亚没这东西还不行):openssl pkcs12 -export -inkey client.pem -in client.cert.pem -name "client" \ -certfile ca.cert.pem -caname "strongSwan CA" -out client.cert.p12安装证书
cp -r ca.cert.pem /etc/ipsec.d/cacerts/ cp -r server.cert.pem /etc/ipsec.d/certs/ cp -r server.pem /etc/ipsec.d/private/ cp -r client.cert.pem /etc/ipsec.d/certs/ cp -r client.pem /etc/ipsec.d/private/CA 证书、客户证书(两个)和 .p12 证书用 FTP 复制出来给客户端用。有几种 Android 配置还需要服务器证书(server.cert.pem)。配置 Strongswan
ipsec.conf
config setup uniqueids=never conn iOS_cert keyexchange=ikev1 # strongswan version >= 5.0.2, compatible with iOS 6.0,6.0.1 fragmentation=yes left=%defaultroute leftauth=pubkey leftsubnet=0.0.0.0/0 leftcert=server.cert.pem right=%any rightauth=pubkey rightauth2=xauth rightsourceip=10.0.0.0/24 rightcert=client.cert.pem auto=add # also supports iOS PSK and Shrew on Windows conn android_xauth_psk keyexchange=ikev1 left=%defaultroute leftauth=psk leftsubnet=0.0.0.0/0 right=%any rightauth=psk rightauth2=xauth rightsourceip=10.0.0.0/24 auto=add # compatible with "strongSwan VPN Client" for Android 4.0+ # and Windows 7 cert mode. conn networkmanager-strongswan keyexchange=ikev2 left=%defaultroute leftauth=pubkey leftsubnet=0.0.0.0/0 leftcert=server.cert.pem right=%any rightauth=pubkey rightsourceip=10.0.0.0/24 rightcert=client.cert.pem auto=add conn windows7 keyexchange=ikev2 ike=aes256-sha1-modp1024! rekey=no left=%defaultroute leftauth=pubkey leftsubnet=0.0.0.0/0 leftcert=server.cert.pem right=%any rightauth=eap-mschapv2 rightsourceip=10.0.0.0/24 rightsendcert=never eap_identity=%any auto=add其中 config setup 只能出现一次,而 conn <连接名称> 可以有很多个。这里的名称不是预定义的,可以随意写,只要你能识别就行,主要用来定义一种连接,就是为了让你在日志里好找。新版 strongswan 里 config setup 的内容不如旧版的多,许多旧版必须有的选项都被作废了。比如:
- plutostart 新版所有的 ike 协议都由原来 ikev2 的 daemon:charon 接管。根本就没有 pluto 了。
- nat_traversal 新版所有的 ike 协议都是可以穿越路由器(NAT)的。
- virtual_private 定义服务器的局域网 IP 地址。现在被魔术字 0.0.0.0/0 取代了。
- pfs 完美向前保密,用于 rekey 时。意思是你现在的金钥互换过程如果被攻破了,会不会对已经互换过的金钥产生影响。以前一般设置成 no 来适用于 iOS 这种客户端会以积极模式发出非加密的 rekey 请求的情况。现在这个选项完全没作用了。第一阶段永远是完美向前保密的,第二阶段(esp)如果指定了 DH 组那么也是完美向前保密的,但是默认加密方法就已经指定了 DH 组。所以该选项永远为 yes。
而另外旧版和新版都有的选项也都定义了默认值,比如:
- strictpolicy 是否一定需要证书吊销列表(CRL)的 URL。默认就是 no。
- charonstart 是否启动 ikev2 的 daemon。这是旧版加入的,因为那个时候的主力是 pluto。现在默认就是 yes,你改成 no 那你连原先 pluto 的连接都无法连接,因为 ike 协议的实现全被 charon 接管了。
所以 config setup 基本上占位就行了。这里我们修改了 uniqueids 的值来实现多设备同时在线。而 conn 最主要要理解左右的概念。其实左右是可以不分的,它们只是用来表示一个连接的两端。只是在如果你定义的不够全面时,左侧会默认被认为是本机(你的 VPS),右侧默认为他机(你的笔记本),即以左为尊。
- left/right 是左右 id。它们用来识别服务器/客户端,可以是证书的判别名(DN),比如 "C=CN, O=strongSwan, CN=strongSwan CA",也可以是 IP 地址,也可以是 EAP 的用户名,还可以是魔术字 %any,表示什么都行。只是在 5.0.0 之前,为本机这边定义 %any 的话,ikev1 连接即 keyexchange=ikev1 的连接是识别不了,所以要改成 %defaultroute 表示自己从 ifconfig 里取 IP。为了和 right 的 %any 区分开,我们使用这种方法。所以说到最后这两个选项似乎没有什么用。但它们是必须的。
- leftauth/rightauth 这是最重要的改动。新版主要是作废了之前的 authby 和 xauth=server/client 选项而都改用这种方法。因此使得 ikev1 也能够出现混血认证(左右两边认证的方法不同)了。参数主要有 pubkey 表示用证书,psk 表示用密码,eap 表示用扩展验证协议。
- leftauth2/rightauth2 是为了应对旧版很常见的 authby=xauthpsk/xauthrsasig 的。现在 xauth 只能写在这里。而 psk 对应 leftauth/rightauth 里的 PSK 方法,rsasig 则对应 pubkey 方法。
- leftsubnet 最重要的,引入了魔术字 0.0.0.0/0。如果你在右侧为客户端分配虚拟 IP 地址的话,那表示你之后要做 iptables 转发,那么左边就必须是用魔术字。
- leftcert/rightcert 就是指定证书名字。
- rightsourceip 为客户端分配的虚拟 IP 段。
- auto 定义 strongswan 启动时该连接的行为。start 是启动; route 是添加路由表,有数据通过就启动; add 是添加连接类型但不启动; ignore 是当它不存在。默认是 ignore。看起来似乎是 route 比较好,但问题是我们服务器端不能预分配虚拟 IP,所以服务器端一般用的都是 add。而客户端文本配置可以选择 start。
另外说下旧版的 xauth=server/client 的问题。它表示在服务器端还是在客户端执行 xauth 认证。而在新版中主要通过左右方向来体现。比如你在服务器端执行认证,那认证请求是由客户端发出的,所以要写 rightauth2=xauth。如果在客户端执行认证,那认证请求是服务器发出的,所以要写 leftauth2=xauth。另外网上很常见的一个配置选项是 leftfirewall=yes。这是完全错误的。看上去它的唯一作用是定义你的服务器是不是在防火墙后面,但实际上它是作为 ipsec_updown 脚本的参数被开发出来,是表明你的本机 subnet 是不是用 iptables 转发/伪装出来的。如果是的话,就调用 left/rightupdown 定义的路径下的脚本,脚本的作用是对通过 ipsec 连接的数据包进行 iptables 豁免。之所以说它是错到离谱的(虽然没有产生影响),因为这些人完全就不懂,有公网 IP 的服务器的 subnet 很少是伪装的。另外必须写了脚本该选项才有意义,没看过一个定义了这个选项的人写过脚本。还有,leftsubnet=0.0.0.0/0 通过魔术字把 subnet 定义为了 any,你根本没法写脚本啊。所以我们这里完全就不用。至于某类型连接,主要是根据设备规格定义的,一些特殊选项的解释如下:
- fragmentation=yes 开启对 iOS 拆包的重组支持。
- ike=aes256-sha1-modp1024! Windows 指定的第一阶段加密方法。
- rekey=no 服务器对 Windows 发出 rekey 请求会断开连接。
- rightsendcert=never 因为这是一个混血连接。服务器对自己的身份进行认证时使用的是证书,而服务器对客户端的认证使用的只是 eap-mschapv2。如果不设置的话默认是 ifasked,意思是如果服务器向客户端请求证书,客户端就会给它,但客户端给不出,连接就会断。这里设置为客户端永远不给,实际上的意思其实是服务器不要向客户端请求证书。
- eap_identity=%any 使用 Windows 的 eap 身份。不然会出现”no eap key found for host <rightid>“错误。
ipsec.secrets
# # ipsec.secrets # # This file holds the RSA private keys or the PSK preshared secrets for # the IKE/IPsec authentication. See the ipsec.secrets(5) manual page. # : RSA server.pem : PSK "PSK password" marguerite : XAUTH "user password" marguerite : EAP "user password"看上去比较好理解,实际不是。有些人可能会误以为:: PSK "PSK password" marguerite : XAUTH "user password"是成对的,用于比如 android-xauth-psk 这样的连接,于是到了 iOS 的时候又写了一对:: RSA server.pem marguerite : XAUTH "user password"来支持 iOS 的 RSA + XAUTH 认证。这样做是没有必要的,上面定义的是四种认证方法。它们之间是遵循「各找各妈」的原则的,可以任意混搭。即你写了一个 XAUTH 即可支持所有完全使用或部分使用 XAUTH 方法的连接。实际上:: PSK "PSK password"相当于:%any %any : PSK "PSK password"遵循:主机 对等点 : 方法 <本机证书/协议密码> <本机证书密码>的格式。以 :为分界,分别从左到右填充,除了各类密码缺失以 null 补位,其它都用 %any 补位(密码怎么可能是 %any)。于是marguerite : EAP "user password"相当于marguerite %any : EAP "user password" // EAP 方法没有证书,也就没有证书密码这里有些人可能迷惑了,前面不是说过以左为尊、本机(这里是 VPS)默认在左边吗,你刚才定义 eap-mschapv2 的时候可是定义给的 rightauth,这次怎么把 EAP 的用户名写在左边了?请注意,ipsec.conf 使用的是本机/他机的逻辑,本机默认在左; 而 ipsec.secrets 使用的是主机/对等点的逻辑,主机永远在左。ipsec.conf 里面定义的是连接,左侧的本机(对你来说,本机是你的笔记本,而对服务器来说,本机是它自己,你才是它的「他机」,这个配置是在服务器上的,不要混淆)用证书认证,右侧是你的 win7 用 mschapv2 认证; 而 ipsec.secrets 里定义的是认证,认证过程是你的 win7 用这个用户名和后面定义的密码去连接主机,认证是主机上发生的,所以要写在左边。另外一部分人可能会混淆主机/对等点的含义,认为他们和 BT 是一样的,你开启了一个 strongswan 连接,于是你是主机,而其它人都是对等点,于是他们统一了本机/他机和主机/对等点这两种截然不同的逻辑。前面已经说了我们的例子是以 VPS/客户机这种典型案例为主,而你的客户机是图形界面自适配的,你没有改过客户机的配置文件(所以官方维基上提供的例子你要看的是 moon 的配置),这种尴尬的统一的影响几乎没有。而这种案例下,你不能理解主机/对等点的含义的后果是致命的:你有一台国外 VPS,一台国内 VPS,想让国内 VPS 也能科学上网。那你在国内 VPS 上就可能产生这样的配置:<国外 VPS 的 IP> <国内 VPS 的 IP> : RSA <国内 VPS 的私人证书名称> <私人证书密码>国外 VPS:<国外 VPS 的 IP> <国内 VPS 的 IP> : RSA <国外 VPS 的服务器证书名称> // 服务器证书一般没有密码这里国外服务器是主机,国内服务器是对等点。主机永远只有一台,而且是在一开始便确定并固定不变的。如果你把国内 VPS 配置成:<国内 VPS 的 IP> <国外 VPS 的 IP> : RSA <国内 VPS 的私人证书名称> <私人证书密码>是无法连接的。因为主机始终是国外的 VPS。你可以想象为 BT 中心种子服务器和你的计算机的关系。中心种子服务器是固定不变的。另外也间接证明了 ipsec 连接的代理是单向的,只能是主机为对等点做代理。就是说即使两台都是服务器,它们的 ipsec 连接也不是双向的,比如你国内服务器可以科学上网,而国外服务器可以看优酷,这是不可能在一个连接里发生的。strongswan.conf
# strongswan.conf - strongSwan configuration file charon { duplicheck.enable = no dns1 = 208.67.222.222 dns2 = 208.67.220.220 # for Windows only nbns1 = 208.67.222.222 nbns2 = 208.67.220.220 filelog { /var/log/strongswan.charon.log { time_format = %b %e %T default = 2 append = no flush_line = yes } } }从 strongswan 5 起,无论是 ikev1 还是 ikev2 协议都使用 ikev2 的 daemon:charon 来实现。也就是说不必再在 /etc/strongswan.conf 里配置 pluto 了。duplicheck.enable = no 是为了你能同时连接多个设备,所以要把冗余检查关闭。dns 就不说了。nbns 是 Windows 的 NetBIOS 名称服务器实现, wins 服务会请求的。实际上 NBNS 协议是一个标准协议,但问题是 Linux 不强制而 Windows 强制请求,你不定义就无法连接。所以对于 ipsec VPN 来说,这个就是只供 Windows 使用的。下面的 filelog 定义了一个文本日志。ipsec 协议的各种实现似乎都没有显式定义文本日志(比如 racoon,strongswan 都没有),而是写入系统日志 syslog。那样不利于调试,所以显式定义一下。
- default 是默认日志级别:-1,0,1,2,3,4。-1 是完全没有日志; 0 只告诉你连接建立、连接关闭; 1 只输出错误提示; 2 会输出错误、警告和调试信息; 3 会把连接传输的数据也打印; 4 则会把密钥内容这些敏感数据也打印。一般情况下,1 或 2 都可以。
- append 是当你重启 strongswan 后,是接上次日志写,还是新建一个日志(上次的会被删除)。因为 strongswan 的日志太多了,所以用 no。
- flush_line 是每产生一行日志,就写入到磁盘一次。防止突然断电,磁盘缓存数据丢失。
另外你还可以详细定义每个 strongswan 模块的日志级别,但是没什么必要,具体可见 LoggerConfiguration。启动 Strongswan
sudo systemctl enable strongswan.service sudo systemctl start strongswan.service注:如果是 openSUSE12.2 发行版,包中默认没有strongswan.service,需要用户到 /etc/init.d/ 目录下启动服务。cd /etc/init.d/ sudo ipsec start配置 Iptables 转发
使用 SuSEfirewall2
SuSEfirewall2 为系统默认防火墙,配置可以通过 YaST 修改,也可以通过直接编辑 /etc/sysconfig/SuSEfirewall2 来修改。IPsec VPN 所需要的端口为 UDP 500 和 UDP 4500,在 /etc/sysconfig/SuSEfirewall2 里找到FW_SERVICES_EXT_UDP=""修改为FW_SERVICES_EXT_UDP="500 4500"需要启用路由功能,防火墙默认设置为未启用,将 /etc/sysconfig/SuSEfirewall2 中的FW_ROUTE="no"改为FW_ROUTE="yes"启用 NAT,将 /etc/sysconfig/SuSEfirewall2 中的FW_MASQUERADE="no"改为FW_MASQUERADE="yes"添加需要转发的网段 10.0.0.0/24 到配置中,在 /etc/sysconfig/SuSEfirewall2 里找到FW_MASQ_NETS=""修改为FW_MASQ_NETS="10.0.0.0/24"此外 IPsec VPN 可能还需要 启用 esp 或 ah,在 /etc/sysconfig/SuSEfirewall2 里找到FW_SERVICES_EXT_IP=""修改为FW_SERVICES_EXT_IP="esp ah"修改完成后重启防火墙SuSEfirewall2 stop SuSEfirewall2 start使用 iptables
如果禁用了 SuSEfirewall2,也可以使用 iptables 来设置。sudo iptables -A INPUT -p udp --dport 500 -j ACCEPT sudo iptables -A INPUT -p udp --dport 4500 -j ACCEPT sudo iptables -t nat -A POSTROUTING -s 10.0.0.0/24 -o eth0 -j MASQUERADE sudo iptables -A FORWARD -s 10.0.0.0/24 -j ACCEPT sudo echo 1 > /proc/sys/net/ipv4/ip_forward为了每次 VPS 启动不重新输入这些命令,我们做成了一个 Systemd 服务 strongswan-iptables.service。下载扔到 /etc/systemd/system,然后:systemctl enable strongswan-iptables.service systemctl start strongswan-iptables.service即可运行上述命令。以后系统启动时也将自动运行上述命令。openSUSE 客户端配置
strongswan 项目同时开发了 NetworkManager-strongswan,最新版本是 1.3。安装 NetworkManager-strongswansudo zypper in NetworkManager-strongswanGNOME 要安装 NetworkManager-strongswan-gnomesudo zypper in NetworkManager-strongswan-gnomeKDE 要安装 NetworkManager-strongswan-kde4sudo zypper in NetworkManager-strongswan-kde4如果你的 strongswan 是 5.0.0 以上的话,你还要安装 strongswan-nmsudo zypper in strongswan-nm然后编辑 /etc/NetworkManager/VPN/nm-strongswan-service.name,替换program=/usr/lib/ipsec/charon为:program=/usr/lib/ipsec/charon-nm并重载 systemd 的全部系统服务sudo systemctl --system daemon-reload不然会出现 “vpn service 'strongswan' start timed out” 即 “signal of type SIGTERM received. Shutting down” 错误。因为 5 版的 strongswan 引入了一个 strongswan-nm 来避免与系统的 strongswan 冲突,而 openSUSE 的 NetworkManager-strongswan 的 systemd 服务有 bug(待修复),并不会去使用 strongswan-nm。之后一定要重启 NetworkManager.service 服务:sudo systemctl restart NetworkManager.service不然你设置好了会发现无法保存私钥(private key)的密码,也不会弹出窗口,错误信息为:<error> [1370608229.893778] [nm-vpn-connection.c:1355] plugin_need_secrets_cb(): (f4f7fcdb-110b-4f80-8fc8-23934fc29a0c/strongswan) plugin NeedSecrets request #1 failed: dbus-glib-error-quark Rejected send message, 1 matched rules; type="method_call", sender=":1.3" (uid=0 pid=569 comm="/usr/sbin/NetworkManager --no-daemon ") interface="org.freedesktop.NetworkManager.VPN.Plugin" member="NeedSecrets" error name="(unset)" requested_reply="0" destination="org.freedesktop.NetworkManager.strongswan" (uid=0 pid=11246 comm="/usr/lib/ipsec/charon-nm ")这是因为 NetworkManager 的 DBus 服务没有重载,不能识别 strongswan 的缘故。配置要点如下:
- 勾选系统连接,不然启动不了 daemon
- 网关:你的服务器 URL 或 IP,必须和证书里面那个一样(证书里是 URL 这里就不能是 IP)
- 证书:你的 CA 证书
- 认证方式:证书/私钥
- 证书:你的客户证书
- 私钥:客户证书对应的私钥
- 私钥密码:生成客户证书时让你输入的那个密码,没有就选不需要,否则选储存或总是询问
- 勾选请求内部 IP 地址,不然你没有虚拟地址,tun 设备自然也没法为你中转流量
- 勾选强制 UDP 封装,这是因为 strongswan 5 以后即使 ikev1 也是通过 ikev2 的 charon 后端通讯的。而 charon 有一个新的特性叫 MOBIKE,也就是手机端上的自动重连(只适用于使用证书的情况),这个特性是默认开启的。而开启了这个特性所有的流量都会走 4500 端口也就是 UDP。你不勾根本连不上。
其它客户端配置
其它 Linux
Chakra Linux
方法和openSUSE的大同小异,不过关键问题在于Chakra默认所有源中是没有Strongswan,这个时候各位可以借助CCR来实现安装,CCR中有三个包,分别是strongswan, networkmanager-strongswan, networkmanager-dispatcher-strongswan-systemd(目前三者由我自己维护,从AUR照抄,修改了其中一个依赖而已)。其中,第一个是主要的,第二个大家都知道,第三个是systemd服务。推荐客户端用户只需要安装前两个。(我的源中默认启用了所有的源,包括core, platform, desktop, apps, games, lib32, extra以及测试源和不稳定源,个人认为主要要启动extra源,因为需要到一些gtk库)
- 编译安装两个主要包
ccr -S strongswan && ccr -S networkmanager-strongswan(各位可以去喝喝茶,听听歌)
- 下载strongswan源代码编译安装strongswan-nm,下载地址,下载到一个你知道的地方,我放到/home/source/目录下,解压后,开始编译strongswan-nm插件
# build charon with OpenSSL/NM Plugin ./configure --sysconfdir=/etc --prefix=/usr --libexecdir=/usr/lib \ --disable-aes --disable-des --disable-md5 --disable-sha1 --disable-sha2 \ --disable-fips-prf --disable-gmp --enable-openssl --enable-nm --enable-agent \ --enable-eap-gtc --enable-eap-md5 --enable-eap-mschapv2 make make install完成安装后,注意/usr/lib/ipsec/目录下多出了一个charon-nm,这个就是我么需要的东西。下面的设置基本遵循玛丽苏的方式。
- 编辑/etc/NetworkManager/VPN/nm-strongswan-service.name,替换
program=/usr/lib/strongswan/charon为:program=/usr/lib/ipsec/charon-nm
- 后面的步骤依照openSUSE中“并重载 systemd 的全部系统服务”
- NetworkManager 的配置要点同 openSUSE
- 补充:这个时候你的客户端应该能够连接了,如果不能,首先看看防火墙策略,如果还是不行,你可以试试先随便连接一个 VPN ,然后断开再连自己的 strongswan
其他 Linux 发行版参考 openSUSE 配置。iOS
把 CA 证书和之前做好的 pkcs12(.p12)发邮件给自己。在 iOS 上收邮件,导入两者。然后新建 IPSec VPN:
- 服务器,和 openSUSE 的要求一样,都是 IP 或都是 URL
- 账户和密码写 ipsec.secrets 里 XAUTH 前后的那两个
- 如果要使用证书,证书选刚才的那个。否则可以不使用证书,输入 ipsec.secrets 里设置的 PSK 密码。
Android
IPSec Xauth PSK
我的 Jelly Bean 是有这个的,设置 VPN 之前 JB 要求你必须设置锁屏密码或者 PIN 码。主要还是:
- 服务器,同上
- IPSec 预共享密钥:写 ipsec.secrets 里 PSK 后面的那个密码。
然后登入时还是用 XAUTH 前后的那两个做用户名密码。"strongSwan VPN Client" for Android 4.0 (ICS)+
这是官方自己出的客户端,Google Play 里就有。把之前做好的 pkcs12 发邮件给自己。实际上 pkcs12 里就包含了 CA 证书,iOS 是有 bug 才必须明确要求导入 CA 证书(鄙视之)。Android 不用。直接在 GMail 里点击就会提示你导入。然后打开官方客户端,新建方案:
- Gateway 就是服务器,同上
- Type 选 IKEv2 Certificate
- User certificate 选你刚才导入的
- 取消自动选择 CA 证书,然后在用户证书里选你刚才从 pk12 导入的
Windows XP/Vista
注意 XP/Vista 本身不支持纯 IPsec 连接。如果使用 L2TP/IPsec 模式,使用证书会 fallback 到 iOS_cert 这个连接类型,使用预共享密码会 fallback 到 android-xauth-psk 这个连接类型。使用 Shrew Soft VPN Client
安装后打开,选「Add」:
- 「General」选项卡下,把「Host Name or IP address」添好
- 「Authorization」选项卡下:
- 「Authorization Method」选「Mutual PSK + XAuth」
- 「Local Identity」的「Identification Type」选「IP Address」
- 「Credentials」下面「Pre Shared Key」里输入 PSK 密码
- 「Phrase 1」,「Exchange Type」选「Main」
- 「Phrase 2」,「PFS Exchange」选「auto」
保存。连接时用户名密码是你的 XAUTH 用户名密码。服务器端对应的配置是 android-xauth-psk 的连接类型。Windows 7+
使用 Shrew Soft VPN Client 客户端:和上面 XP 的一样。使用自带客户端(Agile):导入证书:
- 开始菜单搜索「cmd」,打开后输入 mmc(Microsoft 管理控制台)。
- 「文件」-「添加/删除管理单元」,添加「证书」单元
- 证书单元的弹出窗口中一定要选「计算机账户」,之后选「本地计算机」,确定。
- 在左边的「控制台根节点」下选择「证书」-「个人」,然后选右边的「更多操作」-「所有任务」-「导入」打开证书导入窗口。
- 选择刚才生成的 client.cert.p12 文件。下一步输入私钥密码。下一步「证书存储」选「个人」。
- 导入成功后,把导入的 CA 证书剪切到「受信任的根证书颁发机构」的证书文件夹里面。
- 打开剩下的那个私人证书,看一下有没有显示「您有一个与该证书对应的私钥」,以及「证书路径」下面是不是显示「该证书没有问题」。
- 然后关闭 mmc,提示「将控制台设置存入控制台1吗」,选「否」即可。
至此,证书导入完成。注意 千万不要双击 .p12 证书导入!因为那样会导入到当前用户而不是本机计算机中,ipsec 守护精灵是访问不了它的。建立连接:
- 「控制面板」-「网络和共享中心」-「设置新的连接或网络」-「连接到工作区」-「使用我的 Internet 连接」
- Internet 地址写服务器地址,注意事项同 openSUSE 的,都是 IP 或都是 URL。
- 描述随便写。
- 用户名密码写之前配置的 EAP 的那个。
- 确定
- 点击右下角网络图标,在新建的 VPN 连接上右键属性然后切换到「安全」选项卡。
- VPN 类型选 IKEv2
- 数据加密是「需要加密」
- 身份认证这里需要说一下,如果想要使用 EAP-MSCHAPV2 的话就选择「使用可扩展的身份认证协议」-「Microsoft 安全密码」,想要使用私人证书认证的话就选择「使用计算机证书」。
调试
如果没有特殊需要,服务器端的日志就足够检测出绝大多数问题的来源。我唯一需要在客户端上侦错的那次是 iOS 客户端。日志阅读技巧
strongswan 的 charon daemon 启动后,会初始化并加载之前你定义好的 conn,这部分 log 是没有必要去读的。当然在你配置有问题时可能就有必要了,但当配置有问题的时候,systemctl start strongswan.service 会失败,systemctl status strongswan.service 就会指出你配置问题所在的行号(=。=)...所以你只要去查找「added configuration 'windows7'」,这里 windows7 是你配置的最后一个 conn 的名称,然后从那里往下看就好了。另外连接失败是会把连接状态从 CONNECTING 变为 DELETEING 的,DELETEING 又会刷一大堆日志,但那些日志都是没用的。服务器端调试
/var/log/strongswan-charon.log 文件Linux 调试
参照 strongswan 配置教学改 /etc/strongswan.conf,之后同服务器端调试。iOS 调试
越狱安装 iFile。编辑 /etc/racoon/racoon.conf 文件,找到 #log debug; 字段,改成:log debug; path logfile "/var/log/racoon.log";保存。Android 调试
- strongSwan 官方客户端提供了日志查看功能。
- android 自带的 VPN 调试方法如下:
打开「终端模拟器」,输入 su,会弹出超级用户,允许。cd /storage/sdcard0 logcat -f ./log.txt然后用 Airdroid 等工具把 SD 卡中的 log.txt 传到电脑上,打开搜索 VPN 即可。Windows 调试
扩展阅读
计费软件
- FreeRadius:账户认证和计费
- daloRadius:用户账单管理
参考:使用 StrongSwan 搭建 IKEv1 IKEv2 VPN服务器|莓玩没了。注:该文的 strongswan 配置仅供参考(有很多冗余配置)。
- MySQL:账户管理后台数据库
参考文献
配置选项:
- http://wiki.strongswan.org/projects/strongswan/wiki/IpsecConf
- http://wiki.strongswan.org/projects/strongswan/wiki/IpsecSecrets
- http://wiki.strongswan.org/projects/strongswan/wiki/NetworkManager
设备/操作系统特殊要求:
- http://wiki.strongswan.org/projects/strongswan/wiki/IOS_(Apple)
- http://wiki.strongswan.org/projects/strongswan/wiki/Win7Config
- http://wiki.strongswan.org/projects/strongswan/wiki/Win7Certs
- http://wiki.strongswan.org/projects/strongswan/wiki/Win7MultipleConfig
- http://wiki.strongswan.org/projects/strongswan/wiki/Win7EapMultipleConfig
作者
- MargueriteSu 2013年6月5日 (三) 23:03 (MDT)
- Houge_Langley 2013年6月12日 (三) 23:03 (MDT)
注意 不提供代架设和答疑服务,请勿私信。from https://zh.opensuse.org/index.php?title=SDB:Setup_Ipsec_VPN_with_Strongswan&variant=zh#.E4.BD.BF.E7.94.A8_iptables
http://kb.hillstonenet.com/cn/wp-content/uploads/2015/09/Linux下使用Strongswan搭建IPSec-VPN(PSK方式).pdf
http://downloadmirror.intel.com/21196/eng/523470_rgy_linknlcydrv_an_v0_5_review.pdf
----------
HowTo: IKEv2 VPN for Windows and Android
- Windows 7, 8.x and 10
- Windows Phone 8.1 and above
- strongSwan Android VPN client
- iOS (iPhone/iPad) and macOS <-- See also
root.- Find the VPN server's public IP, save it to a variable and check.
$ PUBLIC_IP=$(wget -t 3 -T 15 -qO- http://ipv4.icanhazip.com)
$ echo "$PUBLIC_IP"
(Check the displayed public IP)
Note: Alternatively, you may specify the server's DNS name here. e.g.PUBLIC_IP=myvpn.example.com. - Add a new IKEv2 connection to
/etc/ipsec.conf:$ cat >> /etc/ipsec.conf <<EOF conn ikev2-cp left=%defaultroute leftcert=$PUBLIC_IP leftid=@$PUBLIC_IP leftsendcert=always leftsubnet=0.0.0.0/0 leftrsasigkey=%cert right=%any rightaddresspool=192.168.43.10-192.168.43.250 rightca=%same rightrsasigkey=%cert modecfgdns1=8.8.8.8 modecfgdns2=8.8.4.4 narrowing=yes dpddelay=30 dpdtimeout=120 dpdaction=clear auto=add ikev2=insist rekey=no fragmentation=yes ike=3des-sha1,3des-sha2,aes-sha1,aes-sha1;modp1024,aes-sha2,aes-sha2;modp1024,aes256-sha2_512 phase2alg=3des-sha1,3des-sha2,aes-sha1,aes-sha2,aes256-sha2_512 EOF
We need to add one more line to that file. First check your Libreswan version:$ ipsec --version
For Libreswan 3.19 and newer, run command:$ echo " encapsulation=yes" >> /etc/ipsec.conf
For Libreswan 3.18 and older, run command:$ echo " forceencaps=yes" >> /etc/ipsec.conf
- Generate Certificate Authority (CA) and VPN server certificates:Note: Specify the certificate validity period (in months) using "-v". e.g. "-v 36". In addition, if you specified the server's DNS name (instead of its IP address) in step 1 above, replace
--extSAN "ip:$PUBLIC_IP,dns:$PUBLIC_IP"with--extSAN "dns:$PUBLIC_IP"in the command below.$ certutil -S -x -n "Example CA" -s "O=Example,CN=Example CA" -k rsa -g 4096 -v 36 -d sql:/etc/ipsec.d -t "CT,," -2 A random seed must be generated that will be used in the creation of your key. One of the easiest ways to create a random seed is to use the timing of keystrokes on a keyboard. To begin, type keys on the keyboard until this progress meter is full. DO NOT USE THE AUTOREPEAT FUNCTION ON YOUR KEYBOARD! Continue typing until the progress meter is full: |************************************************************| Finished. Press enter to continue: Generating key. This may take a few moments... Is this a CA certificate [y/N]? y Enter the path length constraint, enter to skip [<0 for unlimited path]: > Is this a critical extension [y/N]? N $ certutil -S -c "Example CA" -n "$PUBLIC_IP" -s "O=Example,CN=$PUBLIC_IP" -k rsa -g 4096 -v 36 -d sql:/etc/ipsec.d -t ",," \ --keyUsage digitalSignature,keyEncipherment --extKeyUsage serverAuth --extSAN "ip:$PUBLIC_IP,dns:$PUBLIC_IP" A random seed must be generated that will be used in the creation of your key. One of the easiest ways to create a random seed is to use the timing of keystrokes on a keyboard. To begin, type keys on the keyboard until this progress meter is full. DO NOT USE THE AUTOREPEAT FUNCTION ON YOUR KEYBOARD! Continue typing until the progress meter is full: |************************************************************| Finished. Press enter to continue: Generating key. This may take a few moments...
- Generate client certificate(s), and export the
.p12file that contains the client certificate, private key, and CA certificate:$ certutil -S -c "Example CA" -n "vpnclient" -s "O=Example,CN=vpnclient" -k rsa -g 4096 -v 36 -d sql:/etc/ipsec.d -t ",," \ --keyUsage digitalSignature,keyEncipherment --extKeyUsage serverAuth,clientAuth -8 "vpnclient" A random seed must be generated that will be used in the creation of your key. One of the easiest ways to create a random seed is to use the timing of keystrokes on a keyboard. To begin, type keys on the keyboard until this progress meter is full. DO NOT USE THE AUTOREPEAT FUNCTION ON YOUR KEYBOARD! Continue typing until the progress meter is full: |************************************************************| Finished. Press enter to continue: Generating key. This may take a few moments... $ pk12util -o vpnclient.p12 -n "vpnclient" -d sql:/etc/ipsec.d Enter password for PKCS12 file: Re-enter password: pk12util: PKCS12 EXPORT SUCCESSFUL
Repeat this step for additional VPN clients, but replace everyvpnclientwithvpnclient2, etc.Note: If you wish to connect multiple VPN clients simultaneously, you must generate a unique certificate for each. - The database should now contain:
$ certutil -L -d sql:/etc/ipsec.d

Certificate Nickname                               Trust Attributes
                                                   SSL,S/MIME,JAR/XPI

Example CA                                         CTu,u,u
($PUBLIC_IP)                                       u,u,u
vpnclient                                          u,u,u
Note: To display a certificate, usecertutil -L -d sql:/etc/ipsec.d -n "Nickname". To delete a certificate, replace-Lwith-D. For othercertutilusage, read this page. - Restart IPsec service:
$ service ipsec restart
- The
vpnclient.p12file should then be securely transferred to the VPN client device. Next steps:Windows 7, 8.x and 10
- Import the
.p12file to the "Computer account" certificate store. Make sure that the client cert is placed in "Personal -> Certificates", and the CA cert is placed in "Trusted Root Certification Authorities -> Certificates".Detailed instructions:
https://wiki.strongswan.org/projects/strongswan/wiki/Win7Certs - On the Windows computer, add a new IKEv2 VPN connection:
https://wiki.strongswan.org/projects/strongswan/wiki/Win7Config - Start the new IKEv2 VPN connection, and enjoy your VPN!
https://wiki.strongswan.org/projects/strongswan/wiki/Win7Connect - (Optional) You may enable stronger ciphers by adding this registry key and reboot.
Android 4.x and newer
- Install strongSwan VPN Client from Google Play.
- Launch the VPN client and tap Add VPN Profile.
- Enter
Your VPN Server IPin the Server field. - Select IKEv2 Certificate from the VPN Type drop-down menu.
- Tap to add a User certificate, then tap Install.
- Choose the
.p12file you copied from the VPN server, and follow the prompts. - Save the new VPN connection, then tap to connect.
Windows Phone 8.1 and above
First import the.p12file, then follow these instructions to configure a certificate-based IKEv2 VPN. - Once successfully connected, you can verify that your traffic is being routed properly by looking up your IP address on Google. It should say "Your public IP address is
Your VPN Server IP".
Known Issues
References
- https://libreswan.org/wiki/VPN_server_for_remote_clients_using_IKEv2
- https://libreswan.org/wiki/HOWTO:_Using_NSS_with_libreswan
- https://libreswan.org/man/ipsec.conf.5.html
- https://wiki.strongswan.org/projects/strongswan/wiki/Windows7
- https://wiki.strongswan.org/projects/strongswan/wiki/AndroidVpnClient
-----------
https://caasiu.github.io/ipsec-config/
------------
strongSwan VPN Client for andriod
https://play.google.com/store/apps/details?id=org.strongswan.android&hl=zh_CN
-----------
使用StrongSwan搭建 IKEv1 IKEv2 VPN服务器
环境:Debian 6.0 ( 64bit), StrongSwan 5.0.4, FreeRadius 2.2.10, Mysql , pppd 2.4.5 , pptpd v1.3.4,daloRadius,Apache 。
 目标:
    1 使用 FreeRadius作为用户认证和计费
    2 使用daloRadius来管理用户,包括账单、到期时间、登录状态
    3 StrongSwan 承载IPSec加密,实现 Cisco IPSec, IKEv2综合vpn接入服务
重要说明:
IKEv2是非常优秀的vpn,它与Cisco IPSec 完全不同,而且支持Mobile IP 技术,已经是我日常最多使用的VPN。下面的配置同时实现了两者(cisco ipsec 和 ikev2),如果你不用不到,就在阅读下面的文章时忽略掉。
正题
阶段一 安装所需要的软件
一般的教程,都是安装了一个软件紧接着就将此软件的配置写一下,我就不这么做了,直接将需要的软件都安装完成,最后再写每一样的配置。
1 StrongSwan
尽管你可以用 apt-get install 来安装,但是那已经是旧版本,根本就不能满足我们的目标,请自行下载 http://www.strongswan.org/download.html ,我当前使用的是 5.0.2 ,解压缩,然后开始安装
cd strongswan-5.0.4
Debian Linux下
apt-get install libssl-dev
./configure --enable-eap-identity --enable-eap-mschapv2 --enable-eap-tls --enable-eap-dynamic --enable-eap-radius --enable-xauth-eap --enable-xauth-pam --enable-dhcp --enable-openssl --enable-unity --enable-certexpire --disable-gmp --enable-coupling --enable-ipseckey
注意:
FreeBSD下需要变更为:
 ./configure --enable-kernel-pfkey --enable-kernel-pfroute --disable-kernel-netlink \
 --enable-scripts --with-group=wheel --enable-eap-identity \
 --enable-eap-md5 --enable-eap-mschapv2 --enable-eap-radius --enable-xauth-eap \
 --enable-openssl --enable-radattr --enable-unity --disable-gmp  --enable-pem
 make
 make install
注意的是,以上的配置参数你可以任意增减唯独红色字体务必保留,这决定了我们后面的所有配置能否畅通。
2 安装FreeRadius,pptpd,pppd,mysql-server
这些全部通过apt-get 进行安装就可以了
FreeBSD 下通过 pkg_add -r 也可以安装好
3 daloradius
*daloradius非必选,你也可以使用其他管理器,例如 Freeradius ARA (地址 http://labs.asn.pl/ara/ 其实我更推荐这个玩意,简单好用)
在这里下载 http://sourceforge.net/projects/daloradius/ ,不过这个是网页客户端,因此你需要安装 Apache或者Nginx ,直接apt-get install就可以。
将daloRadius解压缩放在网站根目录下(其实位置你可以自己定义,这个不是难点),比如我的就是放在 https://test.com/radius下面。
OK,第一阶段工作完毕,接下来我们就一步一步来配置我们的服务器
阶段二 配置服务器
1 配置 StrongSwan ,使得服务器使用Radius 认证计费
1.1 下面是我的 strongswan.conf,请务必删除其中的中文注释。
 root@v4:/usr/home/bao3 # cat /usr/local/etc/strongswan.conf
 # strongswan.conf - strongSwan configuration file
 charon {
     i_dont_care_about_security_and_use_aggressive_mode_psk = yes
#上面这一行相当重要,并且只对 strongswan5.0.1以后的版本有效,没有它的话很多系统使用 ike将不支持aggrisive模式
install_virtual_ip = yes
duplicheck.enable = no
#上面这行很重要,否则一个ID只能同时一个在线
#interfaces_use = em0 #如果你的系统无法工作,请取消注释,并且手动指定端口,但一般不必如此
# number of worker threads in charon
threads = 16
dns1=208.67.222.222
dns2=8.8.8.8
# send strongswan vendor ID?
# send_vendor_id = yes
plugins {
sql {
# loglevel to log into sql database
loglevel = -1
# URI to the database
# database = sqlite:///path/to/file.db
# database = mysql://user:password@localhost/database
}
eap-radius {
#eap_start = yes
accounting = yes
servers {
primary {
address = radius.youname.org
#这里用以指定Radius服务器,如果你的FreeRadius跟strongswan在同一台,你可以使用 localhost或者127.0.0.1
#这里使用了 servers {} ,你可以指定多个Radius,例如 primary,2nd,last1,这里我只使用一个,随意起了个名字:primary
secret = testing123
auth_port = 1812
acct_port = 1813
}
}
}
xauth-eap {
#这一行比较重要,未来要用在ike v1 ,也就是目前大多系统使用的cisco ipsec模式
backend = radius
}
}
# Two defined file loggers. Each subsection is either a file
# in the filesystem or one of: stdout, stderr.
filelog {
/var/log/charon.log {
# add a timestamp prefix
time_format = %b %e %T
# loggers to files also accept the append option to open files in
# append mode at startup (default is yes)
append = no
# the default loglevel for all daemon subsystems (defaults to 1).
default = 3
# flush each line to disk
flush_line = yes
}
stderr {
# more detailed loglevel for a specific subsystem, overriding the
# default loglevel.
ike = 3
knl = 3
# prepend connection name, simplifies grepping
ike_name = yes
}
}
# And two loggers using syslog. The subsections define the facility to log
# to, currently one of: daemon, auth.
syslog {
# optional identifier used with openlog(3), prepended to each log message
# by syslog. if not configured, openlog(3) is not called, so the value will
# depend on system defaults (usually the program name)
identifier = charon-custom
# default level to the LOG_DAEMON facility
daemon {
}
# very minimalistic IKE auditing logs to LOG_AUTHPRIV
auth {
default = 0
ike = 0
}
}
# ...
}
pluto {
}
libstrongswan {
# set to no, the DH exponent size is optimized
# dh_exponent_ansi_x9_42 = no
}
1.2 配置ipsec.conf,建立Cisco IPSec和IKEv2
以下是我的ipsec.conf,你可以依据你的需要来更改IP地址池,本例中我的客户端拨VPN后得到的IP地址是 192.168.99.128/25 的范围。同样请务必删除其中的中文注释(抱歉,为了让大多数人能读懂并且操作实践,因此使用了中文)。
 root@v4:/usr/home/bao3 # cat /usr/local/etc/ipsec.conf
 config setup
     uniqueids=never
#上面这行很重要,允许一个ID同时多次登陆

 conn %default
     ikelifetime=60m
     keylife=20m
     rekeymargin=3m
     rekey=no
     keyingtries=1
     keyexchange=ike
     leftsubnet=0.0.0.0/0
     right=%any
     rightsourceip=192.168.99.128/25
     dpdaction=clear
       dpddelay=300s
       dpdtimeout=1h
 conn IPSec-IKEv2
     keyexchange=ikev2
     auto=add
     leftauth=pubkey
     leftcert=serverCert.pem
     rightauth=eap-radius
     rightsendcert=never
     eap_identity=%identity
     compress=yes
 conn CiscoIPSec
     keyexchange=ikev1
     auto=add
     aggressive=yes
     compress=yes
     ike=aes256-sha1-modp1024!
     esp=aes256-sha1!
     dpdaction=clear
     leftid=blackberry
#上面这个leftid对应的就是cisoc ipsec设定里面的group name,也有一些客户端里面叫IPSec ID,都一样
#至于Group Password(也叫IPSE secret)会在另外的文件里配置,这里不着急
type=tunnel
xauth=server
leftauth=psk
rightauth=psk
rightauth2=xauth-eap
leftfirewall=yes
conn android_xauth_psk
    keyexchange=ikev1
    left=%defaultroute
    leftauth=psk
    leftsubnet=0.0.0.0/0
    right=%any
    rightauth=psk
    rightauth2=xauth
    auto=add
以上是IPSec的启动文件,光有这些还不行,上面只是规定了IKE交换阶段的算法和加密,我们需要指定PSK
1.3 IPSec Secret (即PSK)
 root@v4:/usr/home/bao3 # cat /usr/local/etc/ipsec.secrets
  %any %any : PSK "heibang"
1.4 调试StrongSwan
ipsec start --nofork
这时候你可以看到strongswan 在前台运行,并且出现很多字符,你可以根据这些字符找到问题来进行排查。
由于目前还没有配置FreeRadius,所以还不能进行正常的认证,下一步我们就着手解决这个问题
2 配置FreeRadius2和mysql-server
2.1 mysql-server的配置
我不能写太多关于mysql的部分,因此安装以及正常运行需要你参考其他mysql的文章进行,我只写关于FreeRadius的部分
 cd /etc/freeradius/sql/mysql
 #FreeBSD: cd /usr/local/etc/raddb/sql/mysql
 mysqladmin -uroot -p create radius
 mysql -uroot -p
 mysql>GRANT ALL ON radius.* TO 'radius'@'localhost' IDENTIFIED BY 'radpass';
 mysql>FLUSH PRIVILEGES;
 mysql>quit
 #下面创建FreeRadius的数据库表单
 mysql -uroot -p radius <schema.sql
 mysql -uroot -p radius <nas.sql
 mysql -uroot -p radius <cui.sql
 mysql -uroot -p radius <ippool.sql
2.2 更改FreeRadius,使得可以连接Mysql Server
cd /etc/freeradius/
 #FreeBSD: cd /usr/local/etc/raddb/
vi sql.conf
 server = "localhost"
 login = "radius"
 password = "radpass"
 radius_db = "radius"
 readclients = yes
sed -ie 's/^[ \t]#\$INCLUDE sql.conf$/\$INCLUDE sql.conf/' radiusd.conf
sed -ie 's/^#[ \t]sql$/sql/' sites-available/default
sed这两句的意思就是查找radiusd.conf和 default文件,把注释掉的sql行取消注释,也就是启用sql
#FreeBSD用户注意哟,FreeBSD下的sed不是Linux下的GNU Sed,因此有些指令不同,需要自己调整,或者你直接就 vi 编辑吧
2.3 配置freeradius对IKEv2进行认证
IKEv2使用MSCHAPv2进行加密,但是默认FreeRadius使用md5,因此我们要修改一下:
 cat eap.conf
 eap {
         default_eap_type = mschapv2
 .......
 #上面一行省略号代表其他配置不改变,仅更改default
   }
3 调试FreeRadius和Mysql Server
我们手动创建一个用户 vpntest,密码 vpntest
 mysql -uroot -p
 mysql> use radius;
 mysql> INSERT INTO radcheck (UserName, Attribute, Value) VALUES ('vpntest', 'Password', 'vpntest');
 mysql> FLUSH PRIVILEGES;
 mysql> quit
然后停止FreeRadius Demon,并使用debug模式
freeradius -Xx
如果成功了,应该看到如下信息:
 Listening on authentication address * port 1812
 Listening on accounting address * port 1813
 Ready to process requests.
 radtest vpntest vpntest localhost 1812 testing123
 Sending Access-Request of id 226 to 127.0.0.1 port 1812
     User-Name = "vpntest"
     User-Password = "vpntest"
     NAS-IP-Address = 127.0.1.1
     NAS-Port = 1812
 rad_recv: Access-Accept packet from host 127.0.0.1 port 1812, id=226, length=20
至此为止,服务器环境就已经搭建好了,接下来是细微调整。
4 NAT和防火墙设定
这个每个系统都不一样,iptables在不同Linux上也不相同,所以你需要自己去设定一下,我这里就不赘述。
你需要将 192.168.99.128/25加入NAT
你需要放通 UDP 500 和 UDP 4500 端口
你需要指定 ESP 同行
个别系统下,你需要放通 tun0 的通讯
你需要更改 /etc/sysctl.conf : net.inet.ip.forwarding=1
5 联调
请打开两个 ssh 窗口,分别输入
ipsec start --nofork
和
freeradius -Xx
然后使用客户端进行连接,黑莓 os 4/5/6/7上设定如下:
 名称:IPSecVPN
 网关类型: Cisco 安全 PIX VPN (或者 Cisco ASA)
 集中器地址: 你的服务器IP或者域名
 组名: blackberry
 组密码: heibang
 用户名: bao3
 用户密码:bugaosuni
 保存密码短语: 勾选
 启用扩展身份验证:勾选
 动态DNS:勾选
 IKE DH组:第2组
 IKE 密钥:AES(256)
 IKE无用数据:HMAC SHA1(160位)
 完全正向保密:不勾选!!!!!(重要)
 IPSec加密和无用数据组: AES256-SHA1
 使用硬件令牌:不勾选!!!!(重要)
然后设定你的wifi 配置文件,里面的vpn指定为我们刚刚创建的。
在iOS上的配置:
 通用->找到VPN项并进入->添加VPN配置
 iOS有L2TP / PPTP / IPSec,选择 IPSec
 描述: IPSec VPN
 服务器: 你的IP或者域名
 账户:bao3
 密码:你的密码
 RSA / 使用证书 : 不要打开!!!
 群组名称: blackberry
 密钥: heibang
 设定完成
Windows 设置:
可以下载盗版的cisco vpn client,也可以使用免费的shrew vpn client
拨号测试一下,主要观察刚刚让你打开的SSH上面的出错信息,最后一一解决掉。
OK,到目前为止,IPSec VPN就完成了
6 IKEv2 的配置
其实在我的 ipsec.conf 里已经包含了“conn IPSec-IKEv2 ” ,那里面已经规定了通讯方式,分配IP,我们现在要做的是生成IKEv2的证书,导入windows 8/blackberry playbook /bb10 中去使用。
6.1 生成服务器证书----Ca,Server两种证书
提示:
1 我的IKEv2配置是客户端使用根证书+用户名密码的方式上网,如果你在寻找完全使用证书认证上网的方式就无需向下阅读。
2 经twitter朋友指正,你使用startssl 的根证书也是一样的,无需自己生成,所以你可以跳过下面这一段。
ipsec pki --gen --outform pem > caKey.pemipsec pki --self --in caKey.pem --dn "C=CN, O=heibang, CN=vpn.youname.org" --ca --outform pem > caCert.pem ipsec pki --pub --in serverKey.pem | ipsec pki --issue --cacert caCert.pem --cakey caKey.pem \ --dn "C=CN, O=heibang, CN=vpn.youname.org" --flag serverAuth --outform pem > serverCert.pem
重要:上面的高亮字体是提示你,务必要写你的真实域名,也就是客户要连接你的vpn服务器的真实地址。如果你vpn服务器是www.abc.com,但是你这里写成了 www.xyz.com,客户机是不能使用vpn的。
以上两条命令可以生成四个文件:caCert.pem, caKey.pem, serverCert.pem serverKey.pem。
6.2 启用证书
需要将其中三个导入StrongSwan 的配置目录,也就是ipsec.d,默认情况下应该是这样:
 mv -f caCert.pem /usr/local/etc/ipsec.d/cacerts/
 mv -f serverCert.pem /usr/local/etc/ipsec.d/certs
 mv -f serverKey.pem /usr/local/etc/ipsec.d/private/
而后:
ipsec stop && ipsec start --nofork
你应当可以看到:
08[CFG] received stroke: add connection 'IPSec-IKEv2' 08[CFG] left nor right host is our side, assuming left=local 08[CFG] adding virtual IP address pool 192.168.99.128/24 08[CFG]loaded certificate "C=CN, O=heibang, CN=vpn.youname.org" from 'serverCert.pem'08[CFG] id '%any' not confirmed by certificate, defaulting to 'C=CN, O=heibang, CN=vpn.youname.org' 08[CFG] added configuration 'IPSec-IKEv2'
已经起作用了,但是不要着急,这样的话你会无法登陆,会出现"[IKE] no private key found for XXXXXXXX",因为我们少做了一步:
 vi /usr/local/etc/ipsec.secret
 : RSA serverKey.pem
6.3 windows 8 使用IKEv2
6.3.1 电脑中导入证书
经过以上两步,服务器上的IKEv2是已经搭建好了,接下来就是让windows来创建连接了:
1) 使用管理权限运行 mmc,我是直接win+R 然后输入mmc 。
2) 出现控制台,此时空白,点击“文件”、“添加或者删除”
3)在左侧找到“证书”二字,点击中间的“添加”,会弹出新的对话窗,点选“本地计算机账户”点击确定,这一点很重要
4)在左侧鼠标右键点选“受信任的根证书颁发机构”,弹出菜单中选择“所有任务”-〉“导入”
5)将刚刚我们制作好的 caCert.pem 导入
6.3.2 创建连接并拨号
1)创建新连接,选择“连接工作场区(VPN)”,点下一步
2)这个画面因人而异,看本文能看到这里自然知道如何处理
3)直到让你输入internet地址和连接名称,这里一定要输入你在生成证书时写在证书里的域名,或者不填写保留空白(windows会根据你的证书自动补上)
4 直接保存,然后就可以拨号了
阶段三 VPN账户管理
1 搭建服务器运行环境
恭喜你,来到了这个阶段,虽然很痛苦,不过到了这里,也就意味着这篇教程要终止了。只是这个终止的过程同样很曲折。我选用了流行的 DaloRadius + Nginx 作为管理平台,我也有apache的,只是觉得应该为自己以后留点东西。
FreeBSD系统下编译nginx如下:(其他系统跳过这段)
 ./configure --with-poll_module --with-http_ssl_module --with-http_spdy_module \
 --with-http_realip_module --with-http_addition_module \
  --with-http_gunzip_module --with-http_gzip_static_module --with-http_random_index_module \
 --with-http_secure_link_module --with-http_stub_status_module --with-http_perl_module --without-mail_pop3_module \
 --without-mail_imap_module --without-mail_smtp_module \
 --prefix=/usr/local/nginx --sbin-path=/usr/local/sbin/nginx --conf-path=/usr/local/etc/nginx/nginx.conf \
 --error-log-path=/var/log/nginx/error.log --pid-path=/var/run/nginx.pid --http-log-path=/var/log/nginx/access.log
你需要使用fcgi模式来跑php,这里不多说了
2 配置DaloRadius
下载DaloRadius,任意放一个位置,然后使用
ln -s daloradius /usr/local/nginx/html/admin
chown -R www:www /usr/local/nginx/html/admin
这样就可以短网址访问,最重要的是配置daloradius
cd /usr/local/nginx/html/admin
vi library/daloradius.conf.php
 $configValues['CONFIG_DB_HOST'] = 'localhost';
 $configValues['CONFIG_DB_PORT'] = '3306';
 $configValues['CONFIG_DB_USER'] = 'radius';
 $configValues['CONFIG_DB_PASS'] = 'radpass';
 $configValues['CONFIG_DB_NAME'] = 'radius';
 $configValues['CONFIG_PATH_RADIUS_DICT'] = '/usr/local/etc/raddb/dictionary';
 $configValues['CONFIG_PATH_DALO_VARIABLE_DATA'] = '/var/log/daloradius/var';
 $configValues['CONFIG_LOG_FILE'] = '/tmp/daloradius.log';
以上几行是需要注意的,要改成你实际的东西才可以。接下来要倒入daloradius自己的数据库表格:
 cd contrib/db/
 mysql -uroot -p radius < fr2-mysql-daloradius-and-freeradius.sql
3 登录使用daloradius
如果你就这么打开浏览器登录dalradius,可能会得到 error 500,这是因为你的php缺少组件"DB",使用pear 安装就可以。
 PHP Warning: include_once(DB.php): failed to open stream: No such file or directory
  pear install db
登录的用户名密码默认是 administrator和radius。进入后就可以添加用户了。
4 数据同步
也许你不止一台vps,你可能5台、2台,那么我们可能需要对数据库做热备份,万一其中一台有问题还可以切换到另一台,同时freeradius承担认证服务,也需要冗余备份。
4.1 mysql的同步
很简单,修改my.cnf,你需要将一台服务器作为master,其余的都是slave,这样当master的数据有变更就会分发到slave上,完成了同步
master 设定:
 server-id     = 1
 log_bin        = /var/log/mysql/mysql-bin.log
 expire_logs_days   = 10
 max_binlog_size     = 100M
 binlog_do_db     = radius
slave 设定:
 server-id   = 2
 replicate-do-db     = radius
 key_buffer       = 1M
 max_allowed_packet   = 16M
 thread_stack      = 192K
 thread_cache_size    = 8
 myisam-recover     = BACKUP
然后在master上创建一个账户(例如backup),账户需要对radius有权限。并且在slave上进入mysql> ,输入 start slave; 就可以了。
freeradius就只靠dns来达到冗余。
终于写好了.
from http://bao3.blogspot.com/2013/05/racoonstrongswanvpn.html
-------------
Pure IPSec VPN on OpenVZ VPS
Prerequisites
TUN/TAP check
cat /dev/net/tun
cat: /dev/net/tun: File descriptor in bad state
Installation
Get the source code
wget http://download.strongswan.org/strongswan.tar.gz
tar zxvf strongswan*
cd strongswan*
Dependance
Debain
apt-get update
apt-get install build-essential libgmp3-dev openssl libssl-dev
Centos
yum groupinstall "Development Tools"
yum install -y gmp-devel openssl-devel
Parameters for compiling
./configure --sysconfdir=/etc --disable-sql --disable-mysql --disable-ldap --enable-dhcp --enable-eap-identity --enable-eap-mschapv2 --enable-md4 --enable-xauth-eap --enable-eap-peap --enable-eap-md5 --enable-openssl --enable-shared --enable-unity --enable-eap-tls --enable-eap-ttls --enable-eap-tnc --enable-eap-dynamic --enable-addrblock --enable-eap-radius --enable-radattr --enable-nat-transport --enable-cisco-quirks --enable-kernel-netlink --enable-kernel-libipsec
./configure --sysconfdir=/etc --disable-sql --disable-mysql --disable-ldap --enable-openssl --enable-shared --enable-kernel-libipsec
Compile and install
make && make install
Configuration
ipsec.conf
cat > /etc/ipsec.conf <<\EOF
config setup
    strictcrlpolicy=no
    uniqueids = no
    # charondebug = "dmn 2, mgr 2, ike 2, chd 2, job 2, cfg 2, knl 2, net 2, enc 2, lib 2"

conn %default
    ikelifetime=3600
    keylife=3600
    rekeymargin=540
    keyingtries=%forever

conn roadwarrior
    keyexchange=ikev1
    left=%any
    leftid=@vpn.kuleyang.cn
    leftsubnet=0.0.0.0/0
    leftauth=psk
    leftfirewall=yes
    right=%any
    rightauth=psk
    rightauth2=xauth
    rightsourceip=192.168.20.0/24
    ike=aes-sha1-modp1024
    auto=add
EOF
strongswan.conf
cat  > /etc/strongswan.conf <<\EOF
# strongswan.conf - strongSwan configuration file
#
# Refer to the strongswan.conf(5) manpage for details
#
# Configuration changes should be made in the included files

charon {
 load_modular = yes
 install_virtual_ip = yes
 i_dont_care_about_security_and_use_aggressive_mode_psk = yes

 dns1 = 8.8.8.8
 dns2 = 8.8.4.4
 plugins {
  include strongswan.d/charon/*.conf
 }
}

include strongswan.d/*.conf
EOF
cat  > /etc/ipsec.secrets <<\EOF
# ipsec.secrets - strongSwan IPsec secrets file
vpn.kuleyang.cn %any : PSK "yoursharekey"

sonywork : XAUTH "yourpassword"
EOF
ipsec.secrets
iptables
iptables -A INPUT -p esp -j ACCEPT
iptables -A INPUT -p udp --dport 500 -j ACCEPT
iptables -A INPUT -p udp --dport 4500 -j ACCEPT
iptables -t nat -A POSTROUTING -s 192.168.20.0/24 -o venet0 -j MASQUERADE
iptables -A POSTROUTING -t nat -s 192.168.20.0/24 -j SNAT --to-source YOURSERVERIP
iptables -A FORWARD -s 192.168.20.0/24 -j ACCEPT
Startup
/usr/local/sbin/ipsec start
/usr/local/sbin/ipsec start --nofork----------------------IPsec-based VPN software for linux, implemented in user space. IKEv1, IKEv2, Ethernet Over IPsec and DMVPN are supported.Please visit Rockhopper VPN's project site to get more detailed information.
- http://rockhoppervpn.sourceforge.net/
- http://sourceforge.net/projects/rockhoppervpn/
- Getting Started:
- http://rockhoppervpn.sourceforge.net/getstarted.html
- Documents:
- http://rockhoppervpn.sourceforge.net/documents.html
What is Rockhopper VPN software?
--------------------------------
Rockhopper project is developing new VPN software based on modern
design and implementation considerations for Linux.
Traditionally, most Open Source implementations of IPsec have been
designed consisting of two separate components: the ESP/AH protocol
stack in kernel space and the Key Exchange (IKEv1/v2) service in user
space. Although this design approach is advantageous with respect to
performance and affinity for IP layer implementation, from a secure
programming perspective, implementing security functions in kernel
space is not advisable because it tends to be more difficult to use
security functions and resource management and protection functions
coherently as provided by the operating system. Moreover, developing
modules in kernel space, such as device drivers, generally requires
more complicated debugging steps than implementing applications in
user space.
On the contrary, all components of this new software are implemented
in user space only, including the ESP protocol stack. This is
accomplished by adopting the standard TUN/TAP device driver supported
by the most recent UNIX-clone operating systems (Linux and BSD
descendants). Since the TUN/TAP device driver emulates virtual Ether-
-net functionality, similar to the traditional design, the ESP protocol
stack in this software is implemented transparently to the TCP/IP net-
-work stack in kernel space. This means that when a packet reaches a
virtual Ethernet interface instantiated by the TUN/TAP device driver
from an application and is read by the software through the TUN/TAP
device driver's API, network processing by TCP/IP stacks, such as IP
routing and MAC address resolution, is already completed for the packet.
Then, the software dispatches the packet to the appropriate IPsec tunnel
by searching the mapping table storing the destination MAC address and
Security Parameter Index (SPI) related to the IPsec tunnel's peer. The
primary purpose of this design decision is to realize a more secure
implementation and to provide a more useful development platform for
advanced or experimental IPsec functions.
During execution of the proposed software, two independent processes are
forked. One of these is used to process protected services executed with
privileged administrator capabilities, such as the key store service that
manages authentication information like public/private key pairs, digital
certificates, and Pre-shared Keys (PSK), and the configuration service
provisioning network stacks such as network interfaces and routing tables.
The other is used for components that are executed with restricted user
capabilities and to handle communication with external entities, for
example, the IKE protocol stack or a Web-based management interface using
the socket API. Both processes interact with each other to provide the
VPN service as a whole.
In addition, this software contains a large variety of functions that
modern VPN software should support: Virtual Ethernet (Ethernet over IPsec),
Routing-based VPN, Role-based ID management and configuration, AJAX-based
(Comet) Web management interface for configuring and monitoring, and so on.
All of these functions have been implemented from scratch.
This software adopts a design that maximizes the potential of multi-core
processors. For this purpose, to load-balance heavy cryptographic
processing of ESP and IKEv2 packets in each network session, a rule-based
task load-balancing function is implemented. This function dispatches
tasks in each session to the appropriate thread in a pre-established thread
pool according to their traffic properties and also supports other
subfunctions maintaining sticky persistence of dispatched sessions and
prioritizing the tasks. For example, after the IKEv2 cookie function for
IKE_SA_INIT exchange has been activated as a result of detecting the
possibility of a flooding attack, all processing of packets for sessions
not yet authenticated is dispatched to the task queue with the lowest
priority to protect other processing for already authenticated and
established sessions.
Another interesting feature of this software for developers is that it adopts
a flexible pluggable design for many external components: hardware cryptography
and ESP/AH protocol off-load engines, the PKI library, software cryptography
libraries like OpenSSL, Log and Debug Trace library, Extensible Authentication
Protocol (EAP) library, and so on. Thus, it is relatively easy for users or
developers, who need to plug-in their proprietary components, to modify the
configuration of this software.
The IPsec specification is still being enhanced by IETF ipsecme WG and many
vendors and new issues may arise during the transition to IPv6 and with the
adoption of IKEv2. To keep up-to-date with protocol updates and extensions,
the software also introduces a message handler structure in the IKEv2 protocol
service, similar to the Linux netfilter service. Therefore, by developing and
adding a message handler module supporting the new protocol updates or
extensions, users and developers can significantly enhance the software.
Rockhopper VPN service exports AJAX-based(Comet) Web management interface.
Users or developers can easily develop or customize their original management
tools or consoles on Web browsers. For instance, you are able to develop a
light-weight Web console providing end users with only Remote Access Client's
functionality. This software's package includes a sample implementaiton of Web
console powered by The Dojo Toolkit, a sample command-line tool written in
Perl and a sample VPN client GUI implemented in GTK2-perl.
This software is released under the LESSER GPL version 2.1.
Please enjoy,
--- Rockhopper Project fromhttps://github.com/rhpenguin/rockhopper-vpn
---------
在Raspbian上,安装strongswan VPN(使用LetsEncrypt)
安装 strongswan
apt install strongswan strongswan-pki libcharon-extra-plugins
验证安装:
~#ipsec version
Linux strongSwan U5.5.1/K4.14.34-v7+
Institute for Internet Technologies and Applications
University of Applied Sciences Rapperswil, Switzerland
See 'ipsec --copyright' for copyright information.
生成证书
不使用自签名证书了,直接使用letsencrypt
使用dehydrated工具直接获取证书
ln -s /etc/dehydrated/certs/vpn.kuleyang.cn/fullchain.pem /etc/ipsec.d/certs/
ln -s /etc/dehydrated/certs/vpn.kuleyang.cn/privkey.pem /etc/ipsec.d/private/
配置 strongSwan
配置 /etc/ipsec.conf
config setup
    strictcrlpolicy=no
    uniqueids = no
    charondebug = "ike 2, cfg 2"

conn %default
    dpdaction=clear
    dpddelay=35s
    dpdtimeout=2000s

    keyexchange=ikev2
    auto=add
    rekey=no
    reauth=no
    fragmentation=yes
    compress=yes

	eap_identity=%identity


	left=%any
	leftid=vpn.kuleyang.cn
    ### left - local (server) side
    # filename of certificate chain located in /etc/ipsec.d/certs/
    leftcert=fullchain.pem
    leftsendcert=always
    leftsubnet=0.0.0.0/0

    ### right - remote (client) side
    ### ---------------------------------
    ### eap_identity=%identity
    ### rightsourceip=10.79.1.0/24
    ### rightdns=8.8.8.8
    ### ----------------------------------
    right=%any

    rightsourceip=192.168.2.0/24
	# local dns server
    rightdns=192.168.1.128

conn ikev2-mschapv2
    rightauth=eap-mschapv2

conn ikev2-mschapv2-apple
    rightauth=eap-mschapv2
配置 /etc/ipsec.secrets
# filename of private key located in /etc/ipsec.d/private/
: RSA privkey.pem

# syntax is `username : EAP "plaintextpassword"`
john : EAP "iamapassword"
重新加载配置
ipsec rereadsecrets
配置转发
cat >> /etc/sysctl.conf <<EOF
net.ipv4.ip_forward=1
net.ipv4.conf.all.accept_redirects = 0
net.ipv4.conf.all.send_redirects = 0
EOF
sysctl -p
配置 iptables
iptables -t nat -A POSTROUTING -o eth0 ! -p esp -j SNAT --to-source 192.168.1.128

iptables -t nat -A POSTROUTING -o eth0 ! -p esp  -s 192.168.2/24 ! -d 192.168.2/24 -j SNAT --to-source 192.168.1.128

iptables -A INPUT -p udp --dport 500 -j ACCEPT
iptables -A INPUT -p udp --dport 4500 -j ACCEPT
iptables -A INPUT -p esp -j ACCEPT
重启 strongswan
service ipsec restart
//或者
service strongswan restart
配置路由器端口转发
500 4500 udp
如果是airport路由,得先关闭back to my mac功能,因为此功能占用了这两个端口,请参考https://support.apple.com/en-us/HT202002
-----------
一键安装IPsec vpn 及IKEv2 VPN.
IPSecAndIKEv2VPNWithStrongSwan
在使用了很长一段时间的IKEv2后,再次更新下本文件~
这个是一键安装IPsec及IKEv2 VPN的指南,适用于KVM,XEN虚拟化的VPS,以及支持TUN/TAP的openVZ主机
文件说明:建议从源码编译,最后一个文件仅供参考
- IKEv2WithEAP-TLS.sh
配置EAP-MSCHAPv2与EAP-TLS认证的IKEv2服务端,从源码编译
- IPSecAndIKEv2SourceCode.sh
配置EAP-MSCHAPv2认证的IKEv2服务端及IPSec认证的服务端,从源码编译
- IPSecAndIKEv2Binary.sh
配置EAP-MSCHAPv2认证的IKEv2服务端及IPSec认证的服务端,使用apt从源安装程序
前言
这份安装指南适用于哪些用户?
- 在国内VPS上搭建VPN隧道,使用内网穿透功能的用户,面向开发和调试(国内的大局域网)
- 有穿墙需求,对安全性要求相对高,主要使用4G网络或联通3G网络的用户(网络的质量和价格是成正比的)
其他类型的用户,需要穿墙的请使用shadowsocks-libev,需要使用内网穿透的,国外主机可以自己搭建FRP或者ngork,国内可以购买花生壳内网穿透(虽然这玩意不是很稳定,但相对便宜)
大多数VPN都依赖UDP协议构建隧道,对网络质量有较高的要求,国际线路即使是TCP协议都很容易丢包,使用net-speeder之类的加倍发包工具,也无法改善VPN连接的稳定性,此外部分运营商对VPN协议或者国外IP十分不友好
关于shadowsocks-libev,可以参考
搭建shadowsocks服务端:
https://wbuntu.com/p/44
启用BBR的KVM、XEN主机,或者使用lkl来hook程序,开启BBR的openVZ主机,目前使用过Vultr,Linode,DigitalOcean,搬瓦工的主机,不论日本主机还是美国主机,都有很好的表现
下面是IKEv2的安装指南
指南
IP转发
在文件修改/etc/ipsec.secrets部分中可自行定义PSK、账号和密码
在终端下运行
cat /proc/sys/net/ipv4/ip_forward
若输出为1,则已启用IPV4转发,否则需要修改/etc/sysctl.conf文件,搜索net.ipv4.ip_forward=1,去掉它的注释,保存后退出,执行sysctl -p,应用修改
证书
使用IPSec VPN不需要安装根证书,使用IKEv2需要安装根证书,使用自签名的证书需要安装服务端生成的根证书,使用let's encrypt证书的话,除Linux需要安装DST Root CA X3根证书,其他的不需要
- windows(windows 7或以上,使用IKEv2,采用eap-mschapv2认证)
- 安卓(使用strongswan官方安卓客户端配置,采用eap-md5认证)
- iOS(使用IKEv2或IPSec,采用eap-mschapv2认证)
- Linux(使用StrongSwan客户端模式,配置ipsec.conf,支持所有的认证方式)
编译,配置与安装
将脚本下载到VPS上,修改对应的账号密码、IP、域名等内容,然后添加可执行权限后运行即可
由于是在Ubuntu上配置完成的,没有对CentOS进行过测试,但除了一些编译所需的软件名称不同外,其余操作相同.
相关的博客记录如下
配置IPSec VPN,包括一些对StrongSwan配置文件的说明.
折腾搬瓦工–04–配置IPSec VPN:
https://wbuntu.com/p/224
配置IKEv2 VPN,包括对iOS使用IKEv2的一些说明:
折腾搬瓦工–06–配置IKEv2 VPN:
https://wbuntu.com/p/323
配置客户端证书认证的IKEv2 VPN,这篇文章比较长,包含步骤说明,截图,以及终端输出:
折腾搬瓦工–09–为iPhone配置证书认证的VPN:
https://wbuntu.com/p/499
配置内网穿透,建议使用crontab定时重启客户端服务,虽然国内大局域网很稳定,但也有丢包导致无法连接的时候
折腾搬瓦工–10–将内网服务暴露到外网:
https://wbuntu.com/p/820
from https://github.com/mikumaycry/IPSecAndIKEv2VPNWithStrongswan
---
IPSEC vpn

用 Let‘s Encrypt 证书搭建 IKEv2 VPN和Strongswan on Ubuntu 16.04 for iOS 9 Client
使用Let’s Encrypt提供的免费签名证书
关于Let’s Encrypt,这里不多说,详细内容可以参考我之前的博客文章介绍。因为Let’s Encrypt目前不支持给IP地址做签名,所以这种方案的前提是你必须先申请一个域名。如果没有域名,请跳过这种方式,使用自签名证书方式。
登录到你的VPS,从Github签出Let’s Encrypt的源代码
进入本地源代码目录
cd letsencrypt
Let’s Encrypt提供多种认证方式,因为之前在VPS上有了HTTP的网站,所以这里采用了webroot的方式,其他方式请参考官方文档
如果是主域名的认证:
./letsencrypt-auto --debug certonly --webroot --email ${NAME}@${VPN_SERVER_DOMAIN} -d www.${VPN_SERVER_DOMAIN} -d {VPN_SERVER_DOMAIN} -w /var/www/{VPN_SERVER_DOMAIN}
子域名的认证:
./letsencrypt-auto --debug certonly --webroot --email ${NAME}@${VPN_SERVER_DOMAIN} -d ${SUB_DOMAIN}.${VPN_SERVER_DOMAIN} -w /var/www/${VPN_SERVER_DOMAIN}/${SUB_DOMAIN}
然后在弹出的蓝底白字提示框中一路点击”OK”
注意如下问题:
- 请将命令中的${NAME}, ${VPN_SERVER_DOMAIN}, ${SUB_DOMAIN}替换成你自己的名字,域名以及子域名
- 因为Gentoo目前是在试验阶段,所以命令行加上–debug参数
- 参数–email如果没有在命令行加上,会在随后弹出的对话框里提示你填写
- -w指定Web服务器网址内容放置的目录,请指定自己放置的目录
生成的证书放在/etc/letsencrypt/live/[网站域名]下
| 文件名 | 内容 |
|---|---|
| cert.pem | 服务端证书 |
| chain.pem | 浏览器需要的所有证书但不包括服务端证书,比如根证书和中间证书 |
| fullchain.pem | 包括了cert.pem和chain.pem的内容 |
| privkey.pem | 证书的私钥 |
一般情况下fullchain.pem和privkey.pem就够用了,VPN服务器配置也只用到了这两个文件。因为IPSEC读取证书和私钥的路径和用Let’s Encrypt生成的文件的路径不同,所以需要做如下软链接(软链接的优势是当证书自动升级后,软链接可以不变)
sudo ln -s /etc/letsencrypt/live/www.${VPN_SERVER_DOMAIN}/fullchain.pem /etc/ipsec.d/certs/fullchain.pem
sudo ln -s /etc/letsencrypt/live/www.${VPN_SERVER_DOMAIN}/privkey.pem /etc/ipsec.d/private/privkey.pem
还有个坑是权限问题,在strongswan启动的时候,加载privkey.pem和fullchain.pem,fullchain.pem会报没有权限,而privkey.pem则没有这个问题。如何解决?修改访问权限,貌似没用,那么把/etc/letsencrypt/live/www.${VPN_SERVER_DOMAIN}/fullchain.pem拷贝到/etc/ipsec.d/certs/fullchain.pem吧,证书更新麻烦些了.
证书的更新
Let’s Encrypt生成的证书有效期是90天(三个月),所以开启一个定时任务(cron)自动做更新 添加为定时任务, 编辑这个文件
sudo vi /etc/cron.monthly/letsencrypt_renew
添加如下内容:
#!/bin/sh
/path/to/letsencrypt/letsencrypt-auto --debug renew > /var/log/letsencrypt/renew.log 2>&1
注意 /path/to/letsencrypt是你的Let’s Encrypt工具的安装全路径,这个脚本可以做一个更新后证书的拷贝动作,自动将更新的证书拷贝到IPSEC能识别的目录中,在上面那条命令后添加如下内容
sudo cp /etc/letsencrypt/live/www.${VPN_SERVER_DOMAIN}/fullchain.pem /etc/ipsec.d/certs/fullchain.pem
授予/etc/cron.monthly/letsencrypt_renew可执行权限
sudo chmod a+x /etc/cron.monthly/letsencrypt_renew配置IPSEC
编译文件/etc/ipsec.conf,内容为:
conn IPSec_ikev2_rsa
keyexchange=ikev2
leftid=${VPN_SERVER_DOMAIN}
rightauth=eap-mschapv2
eap_identity=%any
conn %default
keyexchange=ikev2
dpdaction=hold
dpddelay=600s
dpdtimeout=5s
lifetime=24h
ikelifetime=240h
rekey=no
left=%any
leftsubnet=0.0.0.0/0
leftcert=fullchain.pem
leftsendcert=always
right=%any
rightdns=8.8.8.8
rightsourceip=10.0.0.0/24
auto=add
注意 ${VPN_SERVER_DOMAIN}一定要和用Let’s Encrypt生成证书的域名一致.
编辑文件/etc/ipsec.secrets,增加
: RSA privkey.pem
用户名 : EAP "密码"
ip转发以及iptables配置
设置iptables地址转发,具体请参考PPTP/L2TP/IPSEC等
客户端配置
如果是iOS,将Let’s Encrypt根证书安装到手机,手机访问https://letsencrypt.org/certificates/,点击PEM格式的Let’s Encrypt Authority X1证书并安装。
打开系统设置,添加VPN,类型选择”IKEv2”,服务器地址和远程ID为${VPN_SERVER_DOMAIN},本地ID可以不填,验证方式选择用户名/密码,具体内容是/etc/ipsec.secrets里的用户名和密码。
自签名证书方式
签名证书需要有域名,如果VPN服务器还没有绑定域名,那么,如果用证书的方式,只有采用自签名证书啦。这篇文章如何在 VPS 上搭建 VPN 来翻墙里提到了用文章iOS8 不越狱翻墙方案的脚本来创建服务端和客户端的证书,这篇提到了参考Setup IKEv2 On Demand VPN on iOS 8 and IKEv2, IKEv1 Cisco IPSec VPN with Strongswan的内容,同时,这篇文章IPSEC VPN on Ubuntu 15.04 with StrongSwan在证书的生成部分参考了strongSwan 5: How to create your own private VPN
生成自签名证书
现在梳理下自签名证书的生成过程。
生成自签名CA根证书
sudo ipsec pki --gen --type rsa --size 4096 --outform pem > /etc/ipsec.d/private/strongswanKey.pem
sudo chmod 600 /etc/ipsec.d/private/strongswanKey.pem
sudo ipsec pki --self --lifetime 3650 \
	--in /etc/ipsec.d/private/strongswanKey.pem --ca --type rsa \
	--dn "C=CH, O=strongSwan, CN=strongSwan Root CA" \
	--flag serverAuth --outform pem \
	> /etc/ipsec.d/cacerts/strongswanCert.pem
注意
- –lifetime 3650表示证书有效期是10年,这里可以自己改,按天计
- -–flag serverAuth 避免Windows Phone 8.1客户端连接失败
打印自签名CA根证书内容
sudo ipsec pki --print --in /etc/ipsec.d/cacerts/strongswanCert.pem
生成服务端证书
sudo ipsec pki --gen --type rsa --size 2048 --outform pem > /etc/ipsec.d/private/vpnHostKey.pem
sudo chmod 600 /etc/ipsec.d/private/vpnHostKey.pem
sudo ipsec pki --pub --in /etc/ipsec.d/private/vpnHostKey.pem --type rsa | \
	sudo ipsec pki --issue --lifetime 730 \
	--cacert /etc/ipsec.d/cacerts/strongswanCert.pem \
	--cakey /etc/ipsec.d/private/strongswanKey.pem \
	--dn "C=CH, O=strongSwan, CN=${VPN_HOST}" \
	--san ${VPN_HOST} \
	--flag serverAuth --flag ikeIntermediate \
	--outform pem > /etc/ipsec.d/certs/vpnHostCert.pem
注意事项
- –lifetime 730表示有效期是2年,这里可以自己指定时间,按天计
- ${VPN_HOST}为你的VPN服务器域名或者IP地址,–dn(subject Distinguished Name)的CN和–san(subject Alternative Name)都需要指定一致,否则客户端会连接不上VPN服务器。
- –flag serverAuth Windows客户端需要
- –flag ikeIntermediate OS X 10.7.3及以下客户端系统需要
打印服务端证书内容
sudo ipsec pki --print --in /etc/ipsec.d/certs/vpnHostCert.pem
生成客户端证书
sudo ipsec pki --gen --type rsa --size 2048 --outform pem > /etc/ipsec.d/private/${USER_NAME}Key.pem
sudo chmod 600 /etc/ipsec.d/private/${USER_NAME}Key.pem
sudo ipsec pki --pub --in /etc/ipsec.d/private/${USER_NAME}Key.pem --type rsa | \
	sudo ipsec pki --issue --lifetime 730 \
	--cacert /etc/ipsec.d/cacerts/strongswanCert.pem \
	--cakey /etc/ipsec.d/private/strongswanKey.pem \
	--dn "C=CH, O=strongSwan, CN=${USER_EMAIL}" \
	--san ${USER_EMAIL} \
	--outform pem > /etc/ipsec.d/certs/${USER_NAME}Cert.pem
注意事项
- –lifetime 730表示有效期是2年,这里可以自己指定时间,按天计
- ${USER_EMAIL}为你的电子邮箱地址,–dn(subject Distinguished Name)的CN和–san(subject Alternative Name)都需要指定一致,否则客户端会连接不上VPN服务器。
- ${USER_NAME}请指定为自己的用户名
打印客户端证书内容
sudo ipsec pki --print --in /etc/ipsec.d/certs/${USER_NAME}Cert.pem
将客户端证书和客户端私钥导出为PKCS#12格式文件
sudo openssl pkcs12 -export -inkey /etc/ipsec.d/private/${USER_NAME}Key.pem \
	-in /etc/ipsec.d/certs/${USER_NAME}Cert.pem -name "${USER_NAME}'s VPN Certificate" \
	-certfile /etc/ipsec.d/cacerts/strongswanCert.pem \
	-caname "strongSwan Root CA" \
	-out /etc/ipsec.d/${USER_NAME}.p12
私钥和它的证书文件通常是两个不同的文件。有时候同时需要私钥和证书会显得不方便,所以就有了PKCS#12文件,它将私钥和证书保存在同一个文件中,并且由一个在产生的时候用户输入的密码来保护。
将/etc/ipsec.d/cacerts/strongswanCert.pem和/etc/ipsec.d/${USER_NAME}.p12这两个文件下载到本地,这两个文件提供给客户端使用(后面会讲如何使用)。下载的方法有很多中,最常见的是scp和rsync(当然也可以用sftp/ftp,web方式等等),scp命令参考如下,请在本地使用
scp username@[VPS_ADDRESS]:/etc/ipsec.d/cacerts/strongswanCert.pem .
scp username@[VPS_ADDRESS]:/etc/ipsec.d/${USER_NAME}.p12 .
username是远程VPS主机分配的用户名
VPS_ADDRESS是远程VPS主机的域名或者IP地址.
生成的文件清单
到目前为止,上述证书的生成过程中产生了如下文件:
| 文件 | 用途 |
|---|---|
| /etc/ipsec.d/private/strongswanKey.pem | 自签名CA私钥 |
| /etc/ipsec.d/cacerts/strongswanCert.pem | 自签名CA证书 |
| /etc/ipsec.d/private/vpnHostKey.pem | 服务端私钥 |
| /etc/ipsec.d/certs/vpnHostCert.pem | 服务端证书 |
| /etc/ipsec.d/private/${USER_NAME}Key.pem | 客户端私钥 |
| /etc/ipsec.d/certs/${USER_NAME}Cert.pem | 客户端证书 |
| /etc/ipsec.d/${USER_NAME}.p12 | 客户端PKCS#12文件 |
题外话,关于客户端证书的撤销(撤回,回收)
如果客户端证书丢失或者被盗(泄漏),为了保证你的VPN服务不会被滥用,所以需要让这个证书失去作用,一个是等着它过期(太笨啦),另一个就是用下面的办法撤销证书。
如果是第一次撤销证书
sudo ipsec pki --signcrl --reason key-compromise \
	--cacert /etc/ipsec.d/cacerts/strongswanCert.pem \
	--cakey /etc/ipsec.d/private/strongswanKey.pem \
	--cert /etc/ipsec.d/certs/${USER_NAME}Cert.pem \
	--outform pem > /etc/ipsec.d/crls/crl.pem
这样被撤销的证书会被加入到一个撤销证书的列表中crl.pem(Certificate Revocation List)
继续增加被撤销的证书
sudo cp /etc/ipsec.d/crls/crl.pem /etc/ipsec.d/crl.pem.tmp
sudo ipsec pki --signcrl --reason key-compromise \
	--cacert /etc/ipsec.d/cacerts/strongswanCert.pem \
	--cakey /etc/ipsec.d/private/strongswanKey.pem \
	--cert /etc/ipsec.d/certs/${AnotherStolen}Cert.pem \
	--lastcrl /etc/ipsec.d/crl.pem.tmp \
	--outform pem > /etc/ipsec.d/crls/crl.pem
sudo rm /etc/ipsec.d/crl.pem.tmp
注意事项
- ${USER_NAME}Cert.pem和${AnotherStolen}Cert.pem请改成相应的证书名。
- 自签名CA证书私钥/etc/ipsec.d/private/strongswanKey.pem请妥善保存到安全的地方,非互联网能触及的地方,防止被盗。
IPSEC配置
因为目前ikev2的证书访问方式还没有搞定,所以先说说ikev1的配置
编辑文件/etc/ipsec.conf,实例配置如下
conn ipsec_rsa
        keyexchange=ikev1
        left=%any
        leftsubnet=0.0.0.0/0
        leftcert=vpnHostCert.pem
        leftsendcert=always
        right=%any
        rightdns=8.8.8.8
        rightsourceip=10.0.0.0/8
        rightauth=pubkey
        rightauth2=xauth
        auto=add
注意leftid的内容${VPN_HOST}和生成服务端证书时CN与–san的内容保持一致
编辑文件/etc/ipsec.secrets,加入证书验证方式
: RSA vpnHostKey.pem
用户名 : EAP "密码"
客户端配置
如果是MAC/iPhone客户端,有两种方式:
- 将自签名CA根证书(/etc/ipsec.d/cacerts/strongswanCert.pem)和客户端PKCS#12文件(/etc/ipsec.d/${USER_NAME}.p12)下载到本地,并安装到设备MAC/iOS中,具体安装方式:对于MAC来说,将文件下载到本地,然后双击启动”钥匙串访问”即可安装;对于iPhone,需要将自签名CA根证书和客户端PKCS#12文件通过邮件发送到iPhone打开安装,或者部署到Web Server,然后手机通过Safari访问URL安装。安装完成后,在系统设置的地方配置VPN。是不是太繁琐了?
- 生成VPN连接的描述文件,安装描述文件到设备中。将自签名CA根证书和客户端PKCS#12文件下载到本地MAC上,然后制作描述文件。关于描述文件如何安装,请查阅前面的叙述。
注意,证书在IPSEC中是用来取代共享密钥的,所以用户名密码的认证(XAUTH或者EAP的方式)仍然需要。
最近笔者购买了DigitalOcean的VPS,所有上述方案,均本人亲测可行!!!
分流与加速
可以参考iOS8 不越狱翻墙方案和如何在 VPS 上搭建 VPN 来翻墙里提到的方案,留坑,待学习实践后再分享。
加速方案
FinalSpeed是高速双边加速软件,可加速所有基于tcp协议的网络服务,在高丢包和高延迟环境下,仍可达到90%的物理带宽利用率,即使高峰时段也能轻松跑满带宽。详见IP4A.com,安装以及注意事项请参考:客户端以及服务端安装教程
参考资料
感谢网路上各位前辈高人大牛老司机的带路指点,排名不分先后,感恩不分轻重
关于IPSEC vpn的
strongSwan 5 based IPSec VPN, Ubuntu 14.04 LTS and PSK/XAUTH
如何在 VPS 上搭建 VPN 来翻墙
关于IKEv2的
用 strongSwan 搭建免证书的 IKEv2 VPN
关于证书的
Setup IKEv2 On Demand VPN on iOS 8 and IKEv2, IKEv1 Cisco IPSec VPN with Strongswan
IPSEC VPN on Ubuntu 15.04 with StrongSwan
strongSwan 5: How to create your own private VPN
iOS8 不越狱翻墙方案
用 Let‘s Encrypt 证书搭建 IKEv2 VPN
Strongswan on Ubuntu 16.04 for iOS 9 Client
关于Strongswan的
Strongswan官方文档
关于客户端配置的
iOS (Apple iPhone, iPad…) and Mac OS X
IKEv2 Configuration Profile for Apple iOS 8 and newer
iOS Ondemand IPSec VPN Setup
网络服务加速
FinalSpeed
-----------------------