Delicately-TUICed high-performance proxy built on top of the QUIC protocol
TUIC's goal is to minimize the handshake latency as much as possible
Features
- 1-RTT TCP relaying
- 0-RTT UDP relaying with Full Cone NAT
- Two UDP relay modes:
native(native UDP mechanisms) andquic(100% delivery rate) - Bidirectional user-space congestion control (BBR, New Reno and CUBIC)
- Multiplexing all tasks into a single QUIC connection (tasks are separately flow controlled)
- Smooth session transfer on network switching
- Paralleled 0-RTT authentication
- Optional QUIC 0-RTT handshake
Design
TUIC was designed on the basis of the QUIC protocol from the very beginning. It can make full use of the advantages brought by QUIC. You can find more information about the TUIC protocol here.
Multiplexing
TUIC multiplexes all tasks into a single QUIC connection using QUIC's multi-streams mechanism. This means that unless the QUIC connection is forcibly interrupted or no task within the maximum idle time, negotiating new relay task does not need to go through the process of QUIC handshake and TUIC authentication.
UDP Relaying
TUIC has 2 UDP relay modes:
-
native- using QUIC's datagram to transmit UDP packets. As with native UDP, packets may be lost, but the overhead of the acknowledgment mechanism is omitted. Relayed packets are still encrypted by QUIC. -
quic- transporting UDP packets as QUIC streams. Because of the acknowledgment and retransmission mechanism, UDP packets can guarantee a 100% delivery rate, but have additional transmission overhead as a result. Note that each UDP data packet is transmitted as a separate stream, and the flow controlled separately, so the loss and retransmission of one packet will not cause other packets to be blocked. This mode can be used to transmit UDP packets larger than the MTU of the underlying network.
Bidirectional User-space Congestion Control
Since QUIC is implemented over UDP, its congestion control implementation is not limited by platform and operating system. For poor quality network, BBR algorithm can be used on both the server and the client to achieve better transmission performance.
Security
As mentioned above, TUIC is based on the QUIC protocol, which uses TLS to encrypt data. TUIC protocol itself does not provide any security, but the QUIC protocol provides a strong security guarantee. TUIC also supports QUIC's 0-RTT handshake, but it came with a cost of weakened security, read more about QUIC 0-RTT handshake.
Usage
TUIC depends on rustls, which uses ring for implementing the cryptography in TLS. As a result, TUIC only runs on platforms supported by ring. At the time of writing this means x86, x86-64, armv7, and aarch64.
You can find pre-compiled binaries in the latest releases.
Server
tuic-server

Options:
    -c, --config CONFIG_FILE
                        Read configuration from a file. Note that command line
                        arguments will override the configuration file
        --port SERVER_PORT
                        Set the server listening port
        --token TOKEN   Set the token for TUIC authentication. This option can
                        be used multiple times to set multiple tokens.
        --certificate CERTIFICATE
                        Set the X.509 certificate. This must be an end-entity
                        certificate
        --private-key PRIVATE_KEY
                        Set the certificate private key
        --ip IP         Set the server listening IP. Default: 0.0.0.0
        --congestion-controller CONGESTION_CONTROLLER
                        Set the congestion control algorithm. Available:
                        "cubic", "new_reno", "bbr". Default: "cubic"
        --max-idle-time MAX_IDLE_TIME
                        Set the maximum idle time for QUIC connections, in
                        milliseconds. Default: 15000
        --authentication-timeout AUTHENTICATION_TIMEOUT
                        Set the maximum time allowed between a QUIC connection
                        established and the TUIC authentication packet
                        received, in milliseconds. Default: 1000
        --alpn ALPN_PROTOCOL
                        Set ALPN protocols that the server accepts. This
                        option can be used multiple times to set multiple ALPN
                        protocols. If not set, the server will not check ALPN
                        at all
        --max-udp-relay-packet-size MAX_UDP_RELAY_PACKET_SIZE
                        UDP relay mode QUIC can transmit UDP packets larger
                        than the MTU. Set this to a higher value allows
                        outbound to receive larger UDP packet. Default: 1500
        --log-level LOG_LEVEL
                        Set the log level. Available: "off", "error", "warn",
                        "info", "debug", "trace". Default: "info"
    -v, --version       Print the version
    -h, --help          Print this help menu
The configuration file is in JSON format:
{
    "port": 443,
    "token": ["TOKEN0", "TOKEN1"],
    "certificate": "/PATH/TO/CERT",
    "private_key": "/PATH/TO/PRIV_KEY",

    "ip": "0.0.0.0",
    "congestion_controller": "cubic",
    "max_idle_time": 15000,
    "authentication_timeout": 1000,
    "alpn": ["h3"],
    "max_udp_relay_packet_size": 1500,
    "log_level": "info"
}
Fields port, token, certificate, private_key are required. Other fields are optional and can be deleted to fall-back the default value.
Note that command line arguments can override the configuration file.
Client
tuic-client

Options:
    -c, --config CONFIG_FILE
                        Read configuration from a file. Note that command line
                        arguments will override the configuration file
        --server SERVER Set the server address. This address must be included
                        in the certificate
        --server-port SERVER_PORT
                        Set the server port
        --token TOKEN   Set the token for TUIC authentication
        --server-ip SERVER_IP
                        Set the server IP, for overwriting the DNS lookup
                        result of the server address set in option 'server'
        --certificate CERTIFICATE
                        Set custom X.509 certificate alongside native CA roots
                        for the QUIC handshake. This option can be used
                        multiple times to set multiple certificates
        --udp-relay-mode UDP_MODE
                        Set the UDP relay mode. Available: "native", "quic".
                        Default: "native"
        --congestion-controller CONGESTION_CONTROLLER
                        Set the congestion control algorithm. Available:
                        "cubic", "new_reno", "bbr". Default: "cubic"
        --heartbeat-interval HEARTBEAT_INTERVAL
                        Set the heartbeat interval to ensures that the QUIC
                        connection is not closed when there are relay tasks
                        but no data transfer, in milliseconds. This value
                        needs to be smaller than the maximum idle time set at
                        the server side. Default: 10000
        --alpn ALPN_PROTOCOL
                        Set ALPN protocols included in the TLS client hello.
                        This option can be used multiple times to set multiple
                        ALPN protocols. If not set, no ALPN extension will be
                        sent
        --disable-sni   Not sending the Server Name Indication (SNI) extension
                        during the client TLS handshake
        --reduce-rtt    Enable 0-RTT QUIC handshake
        --request-timeout REQUEST_TIMEOUT
                        Set the timeout for negotiating tasks between client
                        and the server, in milliseconds. Default: 8000
        --max-udp-relay-packet-size MAX_UDP_RELAY_PACKET_SIZE
                        UDP relay mode QUIC can transmit UDP packets larger
                        than the MTU. Set this to a higher value allows
                        inbound to receive larger UDP packet. Default: 1500
        --local-port LOCAL_PORT
                        Set the listening port for the local socks5 server
        --local-ip LOCAL_IP
                        Set the listening IP for the local socks5 server. Note
                        that the sock5 server socket will be a dual-stack
                        socket if it is IPv6. Default: "127.0.0.1"
        --local-username LOCAL_USERNAME
                        Set the username for the local socks5 server
                        authentication
        --local-password LOCAL_PASSWORD
                        Set the password for the local socks5 server
                        authentication
        --log-level LOG_LEVEL
                        Set the log level. Available: "off", "error", "warn",
                        "info", "debug", "trace". Default: "info"
    -v, --version       Print the version
    -h, --help          Print this help menu
The configuration file is in JSON format:
{
    "relay": {
        "server": "SERVER",
        "port": 443,
        "token": "TOKEN",

        "ip": "SERVER_IP",
        "certificates": ["/PATH/TO/CERT"],
        "udp_relay_mode": "native",
        "congestion_controller": "cubic",
        "heartbeat_interval": 10000,
        "alpn": ["h3"],
        "disable_sni": false,
        "reduce_rtt": false,
        "request_timeout": 8000,
        "max_udp_relay_packet_size": 1500
    },
    "local": {
        "port": 1080,

        "ip": "127.0.0.1",
        "username": "SOCKS5_USERNAME",
        "password": "SOCKS5_PASSWORD"
    },
    "log_level": "info"
}
Fields server, token and port in both sections are required. Other fields are optional and can be deleted to fall-back the default value.
Note that command line arguments can override the configuration file.
GUI Clients
Android
iOS
- Stash *
*Stash re-implemented the TUIC protocol from scratch, so it didn't preserve the GPL License.
Windows
FAQ
What are the advantages of TUIC over other proxy protocols / implementions?
As mentioned before, TUIC's goal is to minimize the handshake latency as much as possible. Thus, the core of the TUIC protocol is to reduce the additional round trip time added by the relay. For TCP relaying, TUIC only adds a single round trip between the TUIC server and the TUIC client - half of a typical TCP-based proxy would require. TUIC also has a unique UDP relaying mechanism. It achieves 0-RTT UDP relaying by syncing UDP relay sessions implicitly between the server and the client.
Low handshake latency means faster connection establishment and UDP packet delay time. TUIC also supports both UDP over streams and UDP over datagrams for UDP relaying. All of these makes TUIC one of the most efficient proxy protocol for UDP relaying.
Why my TUIC is slower than other proxy protocols / implementions?
For an Internet connection, fast / slow is defined by both:
- Handshake latency
- Bandwidth
They are equally important. For the first case, TUIC can be one of the best solution right now. You can directly feel it from things like the speed of opening a web page in your browser. For the second case, TUIC may be a bit slower than other TCP-based proxy protocols due to ISPs' QoS, but TUIC's bandwidth can still be competitive in most scenario.
How can I listen both IPv4 and IPv6 on TUIC server / TUIC client's socks5 server?
TUIC always constructs an IPv6 listener as a dual-stack
socket. If you need to listen on both IPv4 and IPv6, you can set the
bind IP to the unspecified IPv6 address ::.
Why TUIC client doesn't support other inbound / advanced route settings?
Since there are already many great proxy convert / distribute solutions, there really is no need for me to reimplement those again. If you need those functions, the best choice to chain a V2Ray layer in front of the TUIC client. For a typical network program, there is basically no performance cost for local relaying.
Why TUIC client is not able to convert the first connection into 0-RTT
It is totally fine and designed to be like that.
The basic idea behind 0-RTT connection resumption is that if the client and server had previously established a TLS connection between each other, they can use information cached from that session to establish a new one without having to negotiate the connection’s parameters from scratch. Notably this allows the client to compute the private encryption keys required to protect application data before even talking to the server.
--Even faster connection establishment with QUIC 0-RTT resumption - Cloudflare
When the client program starts, trying to convert the very first connection to 0-RTT will always fail because the client has no server-related information yet. This connection handshake will fall-back to the regular 1-RTT one.
Once the client caches server information from the first connection, any subsequent connection will be convert into a 0-RTT one. That is why you only see this warning message once just after starting the client.
Therefore, you can safely ignore this warn.
from https://github.com/EAimTY/tuic/tree/0.8.x
(https://github.com/luckypoem/tuic/tree/0.8.x)
-----------------------------------------------------------
TUIC
Delicately-TUICed 0-RTT proxy protocol
Warning: TUIC's dev branch is under heavy development. For end-user, please check out the latest released tag
Introduction
TUIC is a proxy protocol focusing on minimize the additional handshake latency caused by relaying as much as possible, as well as keeping the protocol itself being simple and easy to implement
TUIC is originally designed to be used on top of the QUIC protocol, but you can use it with any other protocol, e.g. TCP, in theory
When paired with QUIC, TUIC can achieve:
- 0-RTT TCP proxying
- 0-RTT UDP proxying with NAT type Full Cone
- 0-RTT authentication
- Two UDP proxying modes:
native: Having characteristics of native UDP mechanismquic: Transferring UDP packets losslessly using QUIC streams
- Fully multiplexed
- All the advantages of QUIC, including but not limited to:
- Bidirectional user-space congestion control
- Optional 0-RTT connection handshake
- Connection migration
Fully-detailed TUIC protocol specification can be found in SPEC.md
Overview
There are 4 crates provided in this repository:
- tuic - Library. The protocol itself, protocol & model abstraction, synchronous / asynchronous marshalling
- tuic-quinn - Library. A thin layer on top of quinn to provide functions of TUIC
- tuic-server - Binary. Minimalistic TUIC server implementation as a reference
- tuic-client - Binary. Minimalistic TUIC client implementation as a reference
from https://github.com/EkkoG/tuic
-------------------------------------------------------------
TUIC 终究又是一个失败的开源项目,至少现在看来如此。一方面是社区上的失败,另一方面是我个人的失败。
开源项目到底是什么
究其根本,一个没有商业化的开源项目,本质上就是开发者的技术热情。换句话讲,这样的开源项目就是其开发者荷尔蒙在成果上的体现。
人类的本性永远是自私的。为什么我们会将自己辛苦思考并创作的结果,不求任何回报地分享给他人?
- 对技术的热爱
- 分享欲
- 成就感
- “我要让世界变得更好”
- 捐赠收入
可惜,这些都不足以支撑一个开源项目长期发展。
我为什么要开发且开源 TUIC
在我脑中出现这个想法,以及开发的早期,我觉得我的动力主要来源于技术热情。基于这方面的热情,我完成了 TUIC 最初的几个版本,主要是自己使用。后来,由于我的分享欲,这个项目被发布了出去,并且稍微做了一些宣传。开源文化类似一种宗教,我长期被开源文化影响,因此从最开始就没有想过以开源以外的方式发布。没想到这个项目的热度很高,大量 star 与用户反馈让我意识到这个项目可能真的能解决一些人的问题,此时成就感与一些所谓的“责任感”开始出现了,这些是我在发布后一段时间继续维护这个项目的主要动力。
但是,激素的作用永远是短暂的。当荷尔蒙褪去,留给我们的最终会是什么呢?
开源软件的作者也是普通人
我们开源了自己的项目,但并不意味着我们有继续维护它的义务。开源软件并非是一个个独立的实体,其背后的开发者们也是普通人,我们也有自己的工作与生活。我们不依靠这些软件获取经济利益,维护这些软件还给我们增加了很多负担。拿 TUIC 来说,维护这样一个软件甚至会给我带来了人身安全的威胁。
令人沮丧的社区
社区存在的意义
我们将源码贡献给社区,并非是想要让社区“监督”我们继续开发,而是希望有更多人参与进来,共同改进项目。
这一点其实 TUIC 的社区之前已经在一定程度上做到了这点。不少开发者参与到了这个项目的开发中,提出了一些很好的建议,贡献了一些很有用的修改,虽然其中一些由于我对这个项目的定位看法,以及由于后期不再有维护的动力,而没有被接纳。这里特别要感谢 Clash.Meta 与 sing-box 的维护者们,他们重新实现了 TUIC 的协议,使得社区有了更多的选择与竞争,这些不论对用户还是对项目本身都有好处,也符合我一直以来的定位:我深知自己能力不足,因此我只做最基本的协议设计与最小化的实现,希望将剩下的留给更加有经验并且有完善基础设施的人。
社区气氛
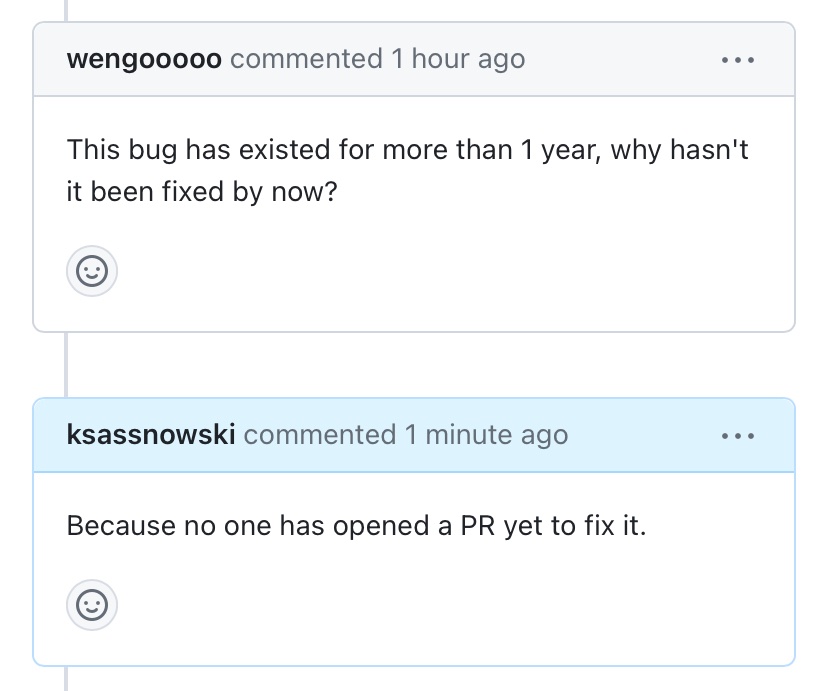
- 你不看文档不看 issue,留下一句“怎么不能用,什么垃圾软件”
- 你扫了一眼不知从哪里找来的所谓项目介绍,留下一句“就这?这不就是 XXX 吗?”
- 你提了一大堆功能需求,过了一段时间没看到你提的需求被实现,留下一句“怎么还没实现?这个软件太垃圾了”
- 你不知怎么遇到的 bug,不附带 log、config、复现步骤就提了一个 issue,过了一段时间没有被解决,留下一句“这作者脾气大还没有责任心,根本不管项目”
- 你提了一个 issue,过了一段时间没看到回复,留下一句“这个软件太垃圾了,根本没人维护”
在你们眼里,留下一句话只需要动动手指敲敲键盘,不论发些什么,对你们都不会有什么损失。但是,开源项目的开发者们凭什么要帮你们解决这些问题?任何软件都会存在问题,更何况一个不靠利益运作、纯粹靠兴趣驱动的项目?
我们靠着热情开始并维护着这些项目,而热情是有限的,你们却在无时无刻消耗着这些热情。
现在的互联网,特别是简体中文网络上,人们连最基本的心平气和、温文尔雅的交流都做不到,更不要说换位思考的能力了。我不建立所谓的“用户群租”就是因为我深知,由庞大的、层次参差不齐的用户群组成的社区,一定是硝烟弥漫的。我所接触到的所谓的“代理娱乐圈”,就连开发者之间也无法做到相互尊重,心平气和地交流,更何况是用户呢?不明原理就把某些东西捧上天或骂到一文不值,这种行为太常见了。
我并不是说其它“圈子”就没有这种情况,也不是只有简体中文用户会做这种事,只是目前简体中文互联网的风气如此,并且很遗憾这个项目的主要受众就是简体中文用户,所以我才会有这样的感受。
这点我在很久之前就考虑到过。我希望以“提高门槛”的方式来减少这些问题的发生。项目文档用英文书写,配置尽可能暴露底层技术细节,这些都是为了避免让那些层次不足的人接触到这个项目。我最早的想法是这个项目的使用仅限于懂技术的人之间,所以除了发布时发过一篇文章,我再没有自己宣传过这个项目。然而没过多久各种一键脚本就开始满天飞,不只是 issue 中,连我的个人社交平台私信了都充斥着各种莫名其妙的问题:

也有些人开始用 TUIC 来盈利,直接方式与间接方式都有。当然,我完全不反感我的开源项目被用于盈利,毕竟是开源。但问题是,某些人在根本不懂技术原理的情况下就开始误导他人,这是我不能接受的。
或许这也是我自己的问题吧,我对大众的期望太高了。
我原本的期待与计划
在这两年的时间里,我看着这个项目慢慢变大,社区慢慢成熟。关于这个项目未来如何发展我想过很多。这个项目过多地被关联在中国网民的特殊需求上。我最初就意识到这个项目的开发是有很大风险的,因此我希望慢慢将重心从“实现”转移到“理论”上来,让协议更加泛化,而不是只被中国或伊朗网民拿去用。
我一直都认为精简就是美。我从项目初期就提到过很多次,我知道我的能力不足,就算我实现一个大而全、包含所有功能的程序,大概率也会烂到无法使用,况且我的时间与精力也难以支撑我开发这样庞大的工程。市面上有那么多实现良好的替代,为什么一定要我来做,而不是让更有经验的人来做呢?然而自始至终,不论我在 README 中写得多清楚,在 issue 中提过多少次,永远有源源不断的人来要求增加与协议核心无关的内容。
我本打算按照原本的计划继续改进这个项目,可惜我现在既没有动力,也没有能力了。
是我自身的问题导致了项目的失败
- 我对大众的期望过高,没有做好心理准备迎接各种各样的奇怪理论
- 我的能力不足,无法做到既有良好的设计,又有良好的实现
- 我“精简就是美”的理念与大众不符
- 我的时间与精力不足,没法做到某些大佬不吃不喝做开发的水平
- 我人在国内,无法承担继续开发的风险
- 我不需要你们的捐赠,也没有胆量去商业化这个项目,也就没有更多动力维护
可能很多人认为开源项目和项目作者可以划等号?
我也有自己的生活与工作,我也在各种破事中挣扎,我为什么要为了一个个素不相识的人牺牲自己?
从这个项目的最开始,我就没有建立过任何用户群组,没有同意任何人与我的合作邀请,也没有接受过任何捐赠。我不需要你们的钱,我早就能将自己养活得很好了。这个项目完全是我兴趣与热情的体现,换句话讲就是荷尔蒙的作用。一直以来我都尽量保持最大程度的低调,就是为了不让这个项目影响我的生活。
因此,这个项目的失败大概是必然的吧。
可笑的网民,可悲的开发者
最近几天,clash for windows 停止了更新,clash core 的仓库也被作者删除了。这种事之前也发生过,但这次的后续真得既可笑又可悲。
Clash 倒下后,不知网民们出于何种想法,将这件事的热度扩散到了微博上,甚至达到了微博热搜。你们真的有考虑过开发者吗?这件事的影响已远远超过了可控范围,有多少双眼睛在盯着微博热搜?其中又有多少不怀好意呢?
大多数网名大概都是以吃瓜的角度在看这件事。没有人真的在为开发者着想,这真的非常可悲。你们如何证明 clash 作者以外的开源代理开发者们没有因为此次事件被特殊关注,人身安全受到威胁呢?
我还是将大众想得太善良了。中国人的本性就是喜欢看别人的悲剧,除非火烧到自己,否则根本不会有觉悟。我觉得我不值得将自己的任何精力贡献给这样的群体,更何况我的人身安全也受到威胁。
我特别反感人们将开源开发者停止开发叫做“跑路”。我觉得这是一个偏贬义的词,本来有责任的人突然消失了才是“跑路”,而不是不求回报的开源开发者们。我不知道现在简体中文互联网用户的中文水平为何如此可笑。
就在刚刚,我又看到了一张非常可笑的图片:
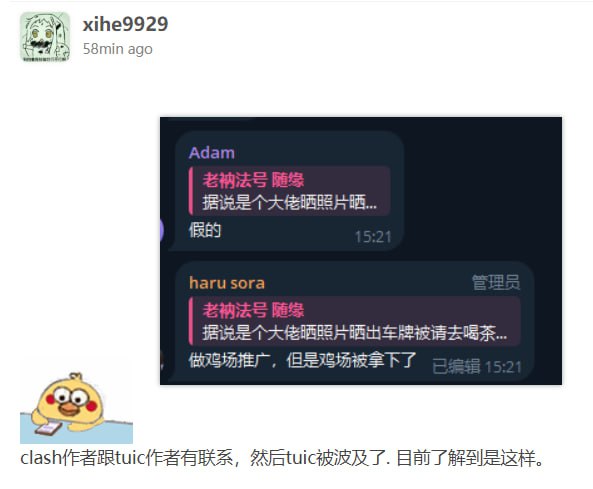
这里是知乎吗?与世界分享你刚编的故事?
这也又一次印证了我的观点:就算你抱着再善良的心为大家不求回报地贡献,现在的环境只会让你失望透顶。
有缘再见
我的想法大致就是这样了。TUIC 停止更新是因为,这个项目在无时无刻为我带来压力、内耗与安全隐患,并且我现在觉得这个项目的受众群体不值得我为之付出。
希望某天我能在什么地方无忧无虑地写任何我想写的代码,而不是为了应付各种各样的问题而烦恼。或许当我再次燃起热情时还会回来。但是现在,我们有缘再见吧。
from https://www.eaimty.com/2023/opensource-project-based-on-hormone/
-----------------------------------------------------------------------------------------------
QUIC 协议汲取了大量人们给 TCP 糊墙的经验教训,把连接结构优化到(目前来看)极致。但是现在市面上的代理工具还没有能完全利用 QUIC 特性的存在,所以我自己动手写了一个基于 QUIC 协议的新代理工具:TUIC
https://github.com/EAimTY/tuic
- 1-RTT TCP 中继
- 0-RTT UDP 中继,且 NAT 类型为 FullCone
- 在用户空间的拥塞控制,也就是说可以在任何系统平台实现双向的 BBR
- 两种 UDP 中继模式: native (原生 UDP 特性,数据仍被 TLS 加密)和 quic (100% 送达率,每个包单独单独作为一个 QUIC “流”,一个包的确认重传不会阻塞其它包)
- 完全多路复用,服务器和客户端之间始终只需要一条 QUIC 连接,所有任务作为这个连接中的 “流” 进行传输(一个流的暂时阻塞不会影响其它流),所以除连接第一个中继任务外的其它任务都不需要经过 QUIC 握手和 TUIC 的鉴权
- 网络切换时的会话平滑转移,例如在从 Wi-Fi 切换到移动数据时连接不会像 TCP 一样直接断开
- 0-RTT 、与中继任务并行的鉴权
- 支持 QUIC 的 0-RTT 握手(开启之后能达到 真・1-RTT TCP 和 0-RTT UDP ,但是就算不开启,多路复用的特性也能保证在绝大多数情况下 1-RTT 和 0-RTT )
TUIC 的设计介绍在仓库中 Design 一节有说明。TUIC 协议的详细内容在这里。简单来说,TUIC 的设计核心就是减少握手造成的网络往返时延( rtt ),毕竟对于网络程序这是最大的瓶颈。
对比其它使用 TCP 的代理工具( ss 、v2ray 、trojan ),TCP 握手慢,且不支持自定义拥塞控制,各工具对 UDP 的支持也各有问题。对比 Hysteria ,Hysteria 的 UDP 中继需要 1 rtt 的握手,且只支持一种 UDP 模式。
最后说说安全性和协议特征。TUIC 现在基于原生 QUIC ,不支持 obfs ,但 QUIC 连接本身就是 TLS 加密的,每个 QUIC 连接从外面看都是一样的。国内的各大厂也慢慢开始使用 QUIC 了,所以我觉得 QUIC 特征应该不是什么大问题。
(现在client还是不能长时间挂着连接,会掉线,需要即用即连,不太方便。)
----------------------------------------------------------
TUIC 安装指南
服务端
安装
- 下载程序(linux-amd64)
curl -Lo tuic-server https://github.com/EAimTY/tuic/releases/latest/download/tuic-server-1.0.0-x86_64-unknown-linux-gnu && chmod +x tuic-server && mv -f tuic-server /usr/local/bin/
- 下载配置
curl -Lo /root/tuic-server_config.json https://raw.githubusercontent.com/chika0801/tuic-install/main/config_server.json
- 下载systemctl配置
curl -Lo /etc/systemd/system/tuic-server.service https://raw.githubusercontent.com/chika0801/tuic-install/main/tuic-server.service && systemctl daemon-reload
- 上传证书和私钥
- 将证书文件改名为 fullchain.cer,将私钥文件改名为 private.key,将它们上传到 /root 目录
- 启动程序
systemctl enable --now tuic-server
| 项目 | |
|---|---|
| 程序 | /usr/local/bin/tuic-server |
| 配置 | /root/tuic-server_config.json |
| 重启 | systemctl restart tuic-server |
| 状态 | systemctl status tuic-server |
| 查看日志 | journalctl -u tuic-server -o cat -e |
| 实时日志 | journalctl -u tuic-server -o cat -f |
卸载
systemctl disable --now tuic-server && rm -f /usr/local/bin/tuic-server /root/tuic-server_config.json /etc/systemd/system/tuic-server.service
客户端
由 v2rayN 提供 HTTP SOCKS5 代理,由 v2rayN 提供路由规则
-
下载Windows客户端程序tuic-client-1.0.0-x86_64-pc-windows-gnu.exe,重命名为tuic-client.exe,复制到v2rayN\bin\tuic文件夹。
-
下载客户端配置config_client.json,修改chika.example.com为证书中包含的域名,修改10.0.0.1为VPS的IP。
-
v2rayN:服务器 ——> 添加自定义配置服务器 ——> 浏览 ——> 选择客户端配置 ——> Core类型 tuic ——> Socks端口 50000
由 sing-box 提供 Tun 模式(透明代理),由 sing-box 提供路由规则
- sing-box:参考Windows 使用方法,将客户端配置进行如下修改。
原内容
        {
            "tag": "proxy",
            // 粘贴你的客户端配置,需要保留 "tag": "proxy",
        },
替换为
        {
            "type": "socks",
            "tag": "proxy",
            "server": "127.0.0.1",
            "server_port": 50000
        },
检查此处有 tuic.exe 或 tuic-client.exe
            {
                "process_name": [ // 直连的 Windows 可执行程序
                    "xray.exe",
                    "hysteria.exe",
                    "tuic.exe",
                    "tuic-client.exe",
                    "juicity.exe",
                    "juicity-client.exe"
                ],
                "outbound": "direct"
},- v2rayN:服务器 ——> 添加自定义配置服务器 ——> 浏览 ——> 选择客户端配置 ——> Core类型 tuic ——> Socks端口 0。
from https://github.com/chika0801/tuic-install
----------------------------------------------------------
Xray、Tuic、hy2、sing-box 八合一一键脚本
www.v2ray-agent.com一、项目介绍
核心
- Xray-core
- v2ray-core[暂停维护]
- sing-box
协议
以下均使用TLS,支持多种协议组合
- VLESS(Reality、Vision、TCP、WS、gRPC)
- VMess(TCP、WS)
- Trojan(TCP、gRPC)
- Hysteria2
- Tuic
功能
- 支持无域名版本的VLESS Reality搭建
- 支持多种分流用于解锁(wireguard、IPv6、任意门、DNS、VMess(ws)、SNI反向代理)
- 支持批量添加CDN节点并配合ClashMeta自动优选
- 支持证书自动申请及更新
- 支持订阅以及多VPS组合订阅
- 支持批量新增端口
- 支持核心的升级以及回退
- 支持自主更换伪装站点
- 支持BT下载管理以及域名黑名单管理
二、使用指南
三、线路推荐
再好的协议也比不上一个高品质的VPS。推荐以下线路
四、安装使用
1.下载脚本
-
支持快捷方式启动,安装完毕后,shell输入【vasma】即可打开脚本,脚本执行路径[/etc/v2ray-agent/install.sh]
-
Github
wget -P /root -N --no-check-certificate "https://raw.githubusercontent.com/mack-a/v2ray-agent/master/install.sh" && chmod 700 /root/install.sh && /root/install.sh
- 官方网站【备用】
wget -P /root -N --no-check-certificate "https://www.v2ray-agent.com/v2ray-agent/install.sh" && chmod 700 /root/install.sh && /root/install.sh
2.脚本快速搭建教程
四、反馈和建议
from https://github.com/mack-a/v2ray-agent
--------------------------------------------------------
A script to install tuic v5 according to iSegaro's tutorial.
-
Run this command to download and run the script
curl -o tuic-setup.sh https://raw.githubusercontent.com/hrostami/tuic-setup/master/setup.sh && sudo bash tuic-setup.sh -
Follow the prompts to enter a port number, password and congestion_control
-
The script will install dependencies, generate certs, create a config, and start the TUIC service
-
Your TUIC credentials and server info will be printed at the end
from https://github.com/hrostami/tuic-setup
--------------------------------------------------------
Tuic
- Install the Tuic program
TUIC Auto Setup
This script automates setting up a TUIC server on Linux according to iSegaro's tutorial
Usage
To use the script:
apt -y update && apt -y install wget socat uuid-runtime && wget -O /usr/local/bin/tuic https://github.com/EAimTY/tuic/releases/download/tuic-server-1.0.0-rc0/tuic-server-1.0.0-rc0-x86_64-unknown-linux-gnu && chmod +x /usr/local/bin/tuic
- Download configuration file
wget -O /usr/local/etc/config.json https://raw.githubusercontent.com/TinrLin/Tuic-build-tutorial/main/server.json && wget -P /etc/systemd/system https://raw.githubusercontent.com/TinrLin/Tuic-build-tutorial/main/tuic.service
- Configure certificate
1.install acme
curl https://get.acme.sh | sh
2.set acme alias
alias acme.sh=~/.acme.sh/acme.sh
3.auto update acme
acme.sh --upgrade --auto-upgrade
4.Set acme's default CA
acme.sh --set-default-ca --server letsencrypt
5.generate certificate(Replace www.example.com with your domain name)
acme.sh --issue -d www.example.com --standalone -k ec-256 --webroot /home/wwwroot/html
6.install certificate(Replace www.example.com with your domain name)
acme.sh --install-cert -d www.example.com --ecc --key-file /etc/ssl/private/private.key --fullchain-file /etc/ssl/private/cert.crt
- Modify the configuration file
Generate UUID
uuidgen
Generate password
openssl rand -base64 32
- View Tuic running status
systemctl daemon-reload && systemctl enable --now tuic.service && systemctl status tuic.service
- Download the Tuic kernel
from https://github.com/symbol0917/Tuic-build-tutorial
---------------------------------------------------------------------
juicity is a quic-based proxy protocol implementation.
Juicity
![]()
Juicity is a quic-based proxy protocol and implementation, inspired by tuic (with many thanks).
Juicity is implemented with the following goals:
- More stable.
- More actively maintained.
- Better UDP implementation.
- Better compatibility and consistency with clients in Golang.
juicity-server
Client
- juicity/juicity-client
(CLI)
- daeuniverse/dae
(CLI)
- daeuniverse/daed
- v2rayA/v2rayA


Link Format
Full parameters:
juicity://uuid:password@122.12.31.66:port?congestion_control=bbr&sni=www.example.com&allow_insecure=0&pinned_certchain_sha256=CERT_HASHMini parameters:
juicity://uuid:password@example.com:port?congestion_control=bbrJuicity Specification
About the specification of the protocol, you can find it here.
from https://github.com/juicity/juicity
----------------------------------------------
配置Juicity代理
Juicity是一个基于quic的代理协议,更多介绍可移步项目地址查看:https://github.com/juicity/juicity
系统我使用的Debian12,安装需要用到的软件包:
apt -y update
apt -y install wget unzip uuid-runtime nginx python3-certbot-nginx
下载对应架构的压缩包,这里我是arm64:
wget https://github.com/juicity/juicity/releases/download/v0.3.0/juicity-linux-arm64.zip
unzip juicity-linux-arm64.zip -d juicity
cd juicity
把juicity-server复制到/usr/local/bin:
cp juicity-server /usr/local/bin
新建一个目录用于存放juicity的配置文件:
mkdir /etc/juicity
新建juicity的配置文件:
nano /etc/juicity/server.json
写入如下配置:
{
    "listen": ":23182",
    "users": {
        "5075556a-13df-4d6a-aa14-4747040bb7e5": "password"
    },
    "certificate": "/etc/letsencrypt/live/juicity.example.com/fullchain.pem",
    "private_key": "/etc/letsencrypt/live/juicity.example.com/privkey.pem",
    "congestion_control": "bbr",
    "disable_outbound_udp443": true,
    "log_level": "info"
}
其中UUID可使用如下命令生成:
uuidgen新建systemd服务:
nano /etc/systemd/system/juicity-server.service
写入如下配置:
[Unit]
Description=juicity-server Service
Documentation=https://github.com/juicity/juicity
After=network.target nss-lookup.target

[Service]
Type=simple
ExecStart=/usr/local/bin/juicity-server run -c /etc/juicity/server.json --disable-timestamp
Restart=on-failure
LimitNPROC=512
LimitNOFILE=infinity

[Install]
WantedBy=multi-user.target
设置开机自启:
systemctl enable juicity-server.service
接下来需要申请一个SSL证书,这里我用Certbot和NGINX来完成。
新建一个NGINX站点配置文件:
nano /etc/nginx/sites-available/juicity
写入如下配置:
server {
    listen 80;
    server_name juicity.example.com; // 修改成你的域名
}
启用站点:
ln -s /etc/nginx/sites-available/juicity /etc/nginx/sites-enabled/juicity
签发SSL证书:
certbot --nginx
再次编辑juicity的配置文件:
nano /etc/juicity/server.json
将证书和私钥路径修改成刚申请的:
{
...
    "certificate": "/etc/letsencrypt/live/juicity.example.com/fullchain.pem",
    "private_key": "/etc/letsencrypt/live/juicity.example.com/privkey.pem",
...
}
启动juicity服务:
systemctl start juicity-server.service
确保juicity服务正常运行-
systemctl status juicity-server.service
至此,juicity服务端配置完成。接下来是客户端的配置。
在这里下载对应系统的压缩包:
https://github.com/juicity/juicity/releases
例如我使用Windows X64则下载:
https://github.com/juicity/juicity/releases/download/v0.3.0/juicity-windows-x86_64.zip
解压压缩包里面的文件到一个文件夹内。
在同一个文件夹内新建一个客户端配置文件,例如client.json,写入如下配置:
{
    "listen": ":1080",
    "server": "server ip:23182", // server ip修改为你的服务器IP
    "uuid": "5075556a-13df-4d6a-aa14-4747040bb7e5", // 对应服务端的UUID
    "password": "password", // 对应服务端的密码
    "sni": "juicity.example.com", // 申请证书时使用的域名
    "allow_insecure": false,
    "congestion_control": "bbr",
    "log_level": "info"
}
打开PowerShell运行juicity客户端:
./juicity-client.exe run -c client.json
现在已经可用了,juicity在1080端口起了一个HTTP/Socks5服务,将需要使用代理的程序配置使用这个服务即可。
[可选]配置sing-box使用juicity,实现分流、TUN透明代理等高级功能。下面是一个sing-box的示例配置:
{
  "log": {
    "level": "info",
    "timestamp": true
  },
  "dns": {
    "servers": [
      {
        "tag": "cloudflare",
        "address": "https://1.1.1.1/dns-query"
      },
      {
        "tag": "dnspod",
        "address": "https://1.12.12.12/dns-query",
        "detour": "direct"
      },
      {
        "tag": "block",
        "address": "rcode://success"
      }
    ],
    "rules": [
      {
        "geosite": "cn",
        "server": "dnspod"
      },
      {
        "geosite": "category-ads-all",
        "server": "block",
        "disable_cache": true
      }
    ]
  },
  "inbounds": [
    {
      "type": "tun",
      "tag": "tun-in",
      "interface_name": "singbox-tun",
      "inet4_address": "172.20.0.1/30",
      "auto_route": true,
      "strict_route": true,
      "stack": "system",
      "sniff": true
    }
  ],
  "outbounds": [
    {
      "type": "socks",
      "tag": "socks-out",
      "server": "127.0.0.1",
      "server_port": 1080,
      "version": "5"
    },
    {
      "type": "direct",
      "tag": "direct"
    },
    {
      "type": "block",
      "tag": "block"
    },
    {
      "type": "dns",
      "tag": "dns"
    }
  ],
  "route": {
    "rules": [
      {
        "protocol": "dns",
        "outbound": "dns"
      },
      {
        "geosite": "cn",
        "geoip": [
          "cn",
          "private"
        ],
        "outbound": "direct"
      },
      {
      	"process_name": "juicity-client.exe",
      	"outbound": "direct"
      },
      {
        "geosite": "category-ads-all",
        "outbound": "block"
      }
    ],
    "auto_detect_interface": true
  }
}
用管理员权限打开PowerShell运行sing-box:
./sing-box.exe run -c juicity-tun.json
---------------------------------------
tuic script
Tuic 协议一键部署脚本
tuic V4 + V5
wget -N --no-check-certificate https://gitlab.com/Misaka-blog/tuic-script/-/raw/main/tuic.sh && bash tuic.sh from https://github.com/Misaka-blog/tuic-scriptt
谢谢博主! 已经用上啦!但是quic会遇到一些qos的问题。 请问大佬有兴趣看一下这个项目嘛: https://github.com/Qv2ray/v2ray-rust 希望共同努力!祝安好!
from https://www.eaimty.com/2022/tuic/