A fully featured open source mail delivery platform for incoming & outgoing e-mail,
Postal is a complete and fully featured mail server for use by websites & web servers. Think Sendgrid, Mailgun or Postmark but open source and ready for you to run on your own servers.
- Documentation
- Installation Instructions
- FAQs & Features
- Discussions - ask for help or request a feature
- Join us on Discord
from https://github.com/postalserver/postal
-------------
The minimum specification for Postal is as follows:
- At least 4GB of RAM
- At least 2 CPU cores
- An appropriate amount of disk space (at least 25GB) for your use case。
Postal runs entirely using containers which means to run Postal you'll need some software to run these containers. We recommend using Docker for this purpose but you can use whatever software you wish.
You'll need to install Docker Engine on your server to begin with. Follow the instructions on the Docker website to install Docker.
You'll also need to ensure you have the Docker Compose plugin installed.
Before continuing, ensure that you can run both docker and docker compose from your prompt.
There are a few system utilities that you need to have installed before you'll be able to run some of the Postal commands.
On Ubuntu/Debian:
apt install git curl jq
On CentOS/RHEL:
yum install git curl jq
Git & installation helper repository
You'll need to make sure you have git
installed on your server. You'll then need to clone the Postal
installation helper repository. This contains some bootstrapping config
and other useful things which will speed along your installation.
git clone https://github.com/postalserver/install /opt/postal/install
sudo ln -s /opt/postal/install/bin/postal /usr/bin/postal
MariaDB (10.6 or higher)
Postal requires a database engine to store all email and other essential configuration data. You will need to provide credentials that allow full access to create and delete databases as well as having full access to any databases created. Postal will provision a database automatically for each mail server that you create.
We do not support using MySQL in place of MariaDB.
You can run MariaDB in a container, assuming you have Docker, using this command:
docker run -d \
   --name postal-mariadb \
   -p 127.0.0.1:3306:3306 \
   --restart always \
   -e MARIADB_DATABASE=postal \
   -e MARIADB_ROOT_PASSWORD=postal \
   mariadb
- This will run a MariaDB instance and have it listen on port 3306.
- Be sure to choose a secure password. You'll need to put this in your Postal configuration when you install it so be sure to make a (secure) note of it.
- If you are unable or unwilling to grant root access,
the database user you create separately needs all permissions on
databases called
postalandpostal-*(this prefix can be configured in themessage_dbpart of your configuration).
innodb_log_file_size to at least 10 times the biggest message you wish to send (150MB for 15MB email, 250MB for 25MB email, etc).If you have a legacy v1 database you might also want to check that raw tables in the database have the type
LONGBLOB.Installation
Once you've completed all the prerequisites, you can go ahead and start to install Postal.
Configuration
Before you can start Postal, you'll need some configuration. The repository you cloned includes a tool to automatically generate some initial configuration files.
Run the command below and replace postal.yourdomain.com
with the actual hostname you want to access your Postal web interface
at. Make sure you have set up this domain with your DNS provider before
continuing.
postal bootstrap postal.yourdomain.com
This will generate three files in /opt/postal/config.
postal.ymlis the main postal configuration filesigning.keyis the private key used to sign various things in PostalCaddyfileis the configuration for the Caddy webserver
Once generated, you should open up /opt/postal/config/postal.yml and add all the appropriate values for your installation (database passwords etc...).
/opt/postal/config as /config so any full directory paths mentioned in postal.yml will likely need to start with /config and not /opt/postal/configInitializing the database
Once you've added your configuration, you need to initialize your database by adding all the appropriate tables. Run the following commands to create the schema and then create your first admin user.
postal initialize
postal make-user
Running postal
You're now ready to actually run Postal itself. You can go ahead and do this by running:
postal start
This will run a number of containers on your machine. You can use postal status to see details of these components.
Caddy
To handle SSL termination and all web traffic, you'll need to configure a web proxy. You can use anything that takes your fancy here - nginx, Apache, HAProxy, anything - but in this example, we're going to use Caddy. It's a great little server that requires very little configuration and is very easy to set up.
docker run -d \
   --name postal-caddy \
   --restart always \
   --network host \
   -v /opt/postal/config/Caddyfile:/etc/caddy/Caddyfile \
   -v /opt/postal/caddy-data:/data \
   caddy
Once this has started, Caddy will issue an SSL
certificate for your domain and you'll be able to immediately access the
Postal web interface and login with the user you created in one of the
previous steps.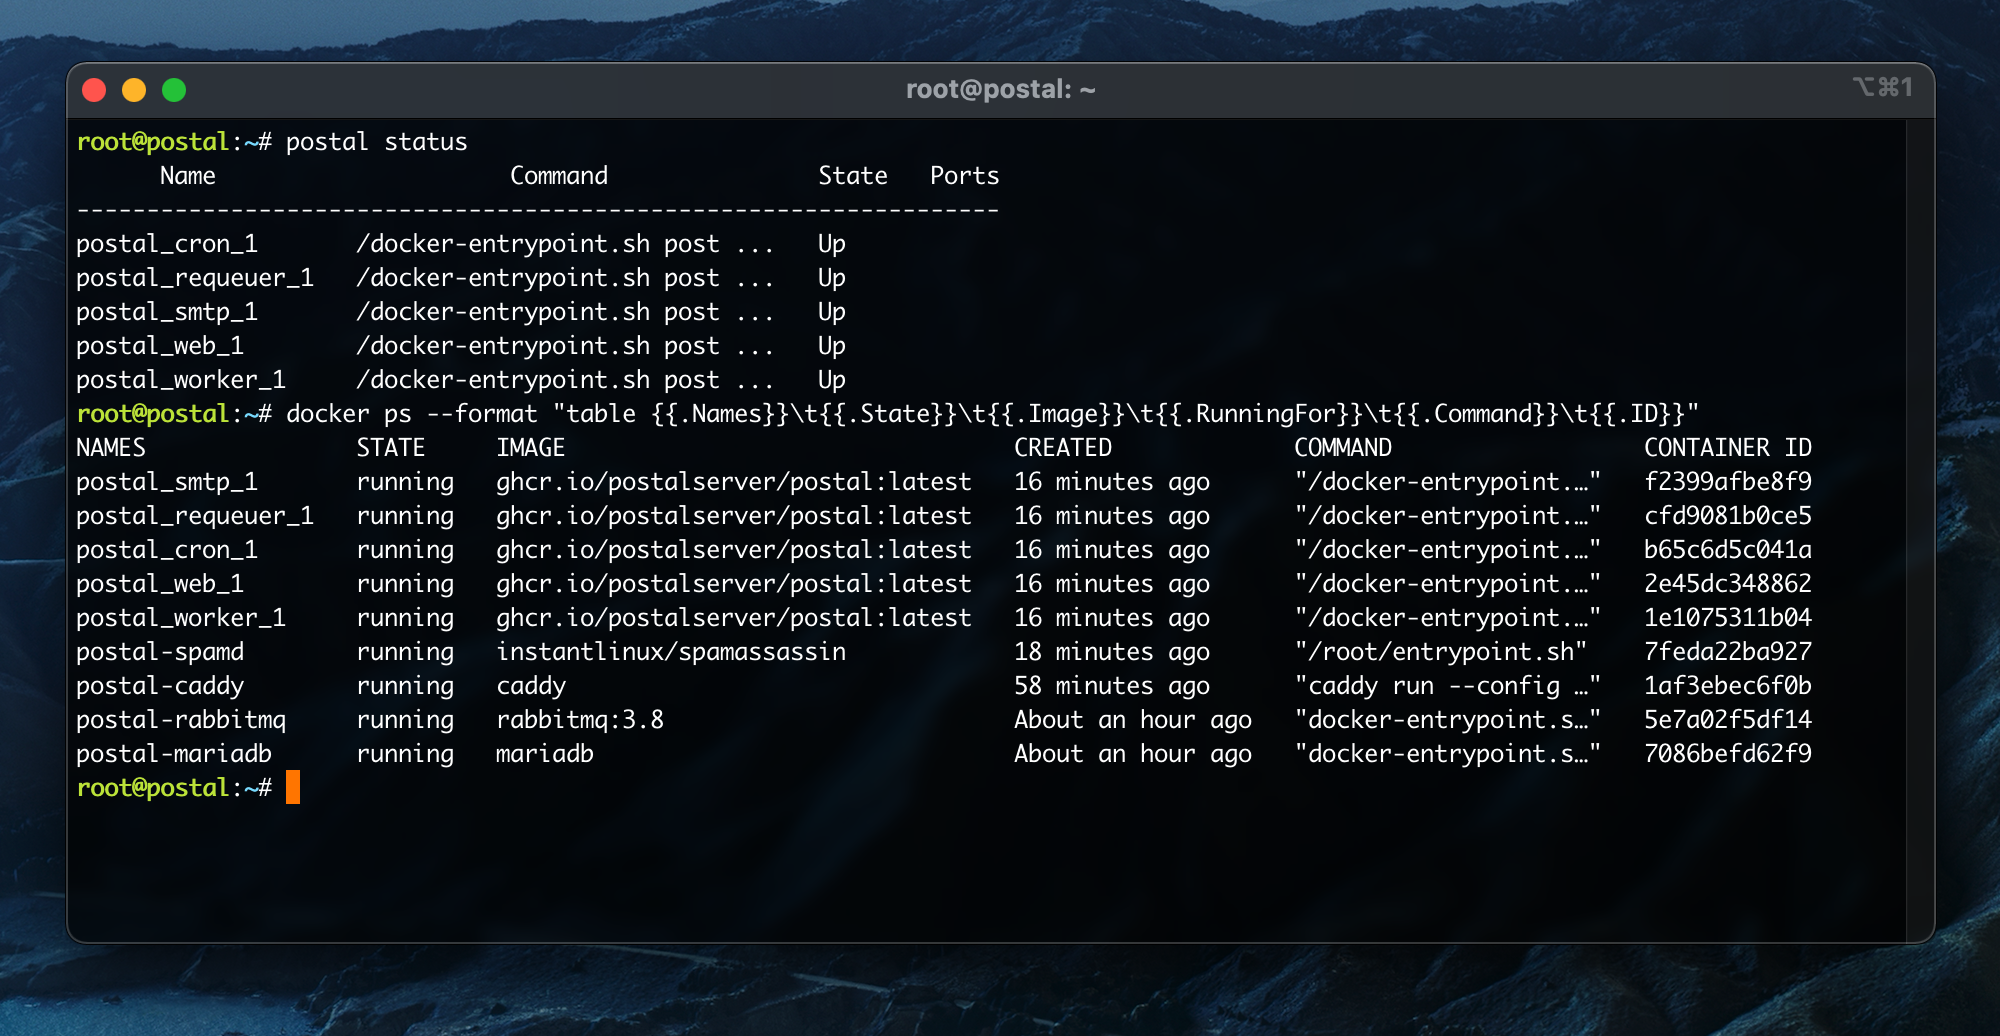
from https://docs.postalserver.io/getting-started/installation
https://github.com/postalserver/install/blob/main/prerequisites/install-ubuntu.v3.sh
因为install-ubuntu.v2.sh(https://github.com/postalserver/install/blob/main/prerequisites/install-ubuntu.v2.sh)还要额外运行RabbitMQ。)
No comments:
Post a Comment