首先fork此项目https://github.com/notzhan/blog,我fork后的项目地址是https://github.com/briteming/nb ,然后访问https://github.com/briteming/nb/settings ,勾选 issues. 然后新建一些issues. 然后访问https://github.com/briteming/nb的左上角的main处,创建gh-pages branch. 稍等2分钟,即可访问 https://briteming.github.io/nb/
然后,
使用步骤
-
Fork 本仓库,并且在 action 中启用 workflows,github 默认会禁用 fork 的仓库中的 workflows.
-
在 这里 申请 API token,设置 token 的有效期、权限等,只需要配置针对博客仓库的 issue 读权限、commit、push 权限即可,建议使用 Fine-grained token,可以细粒度的控制token的权限。
-
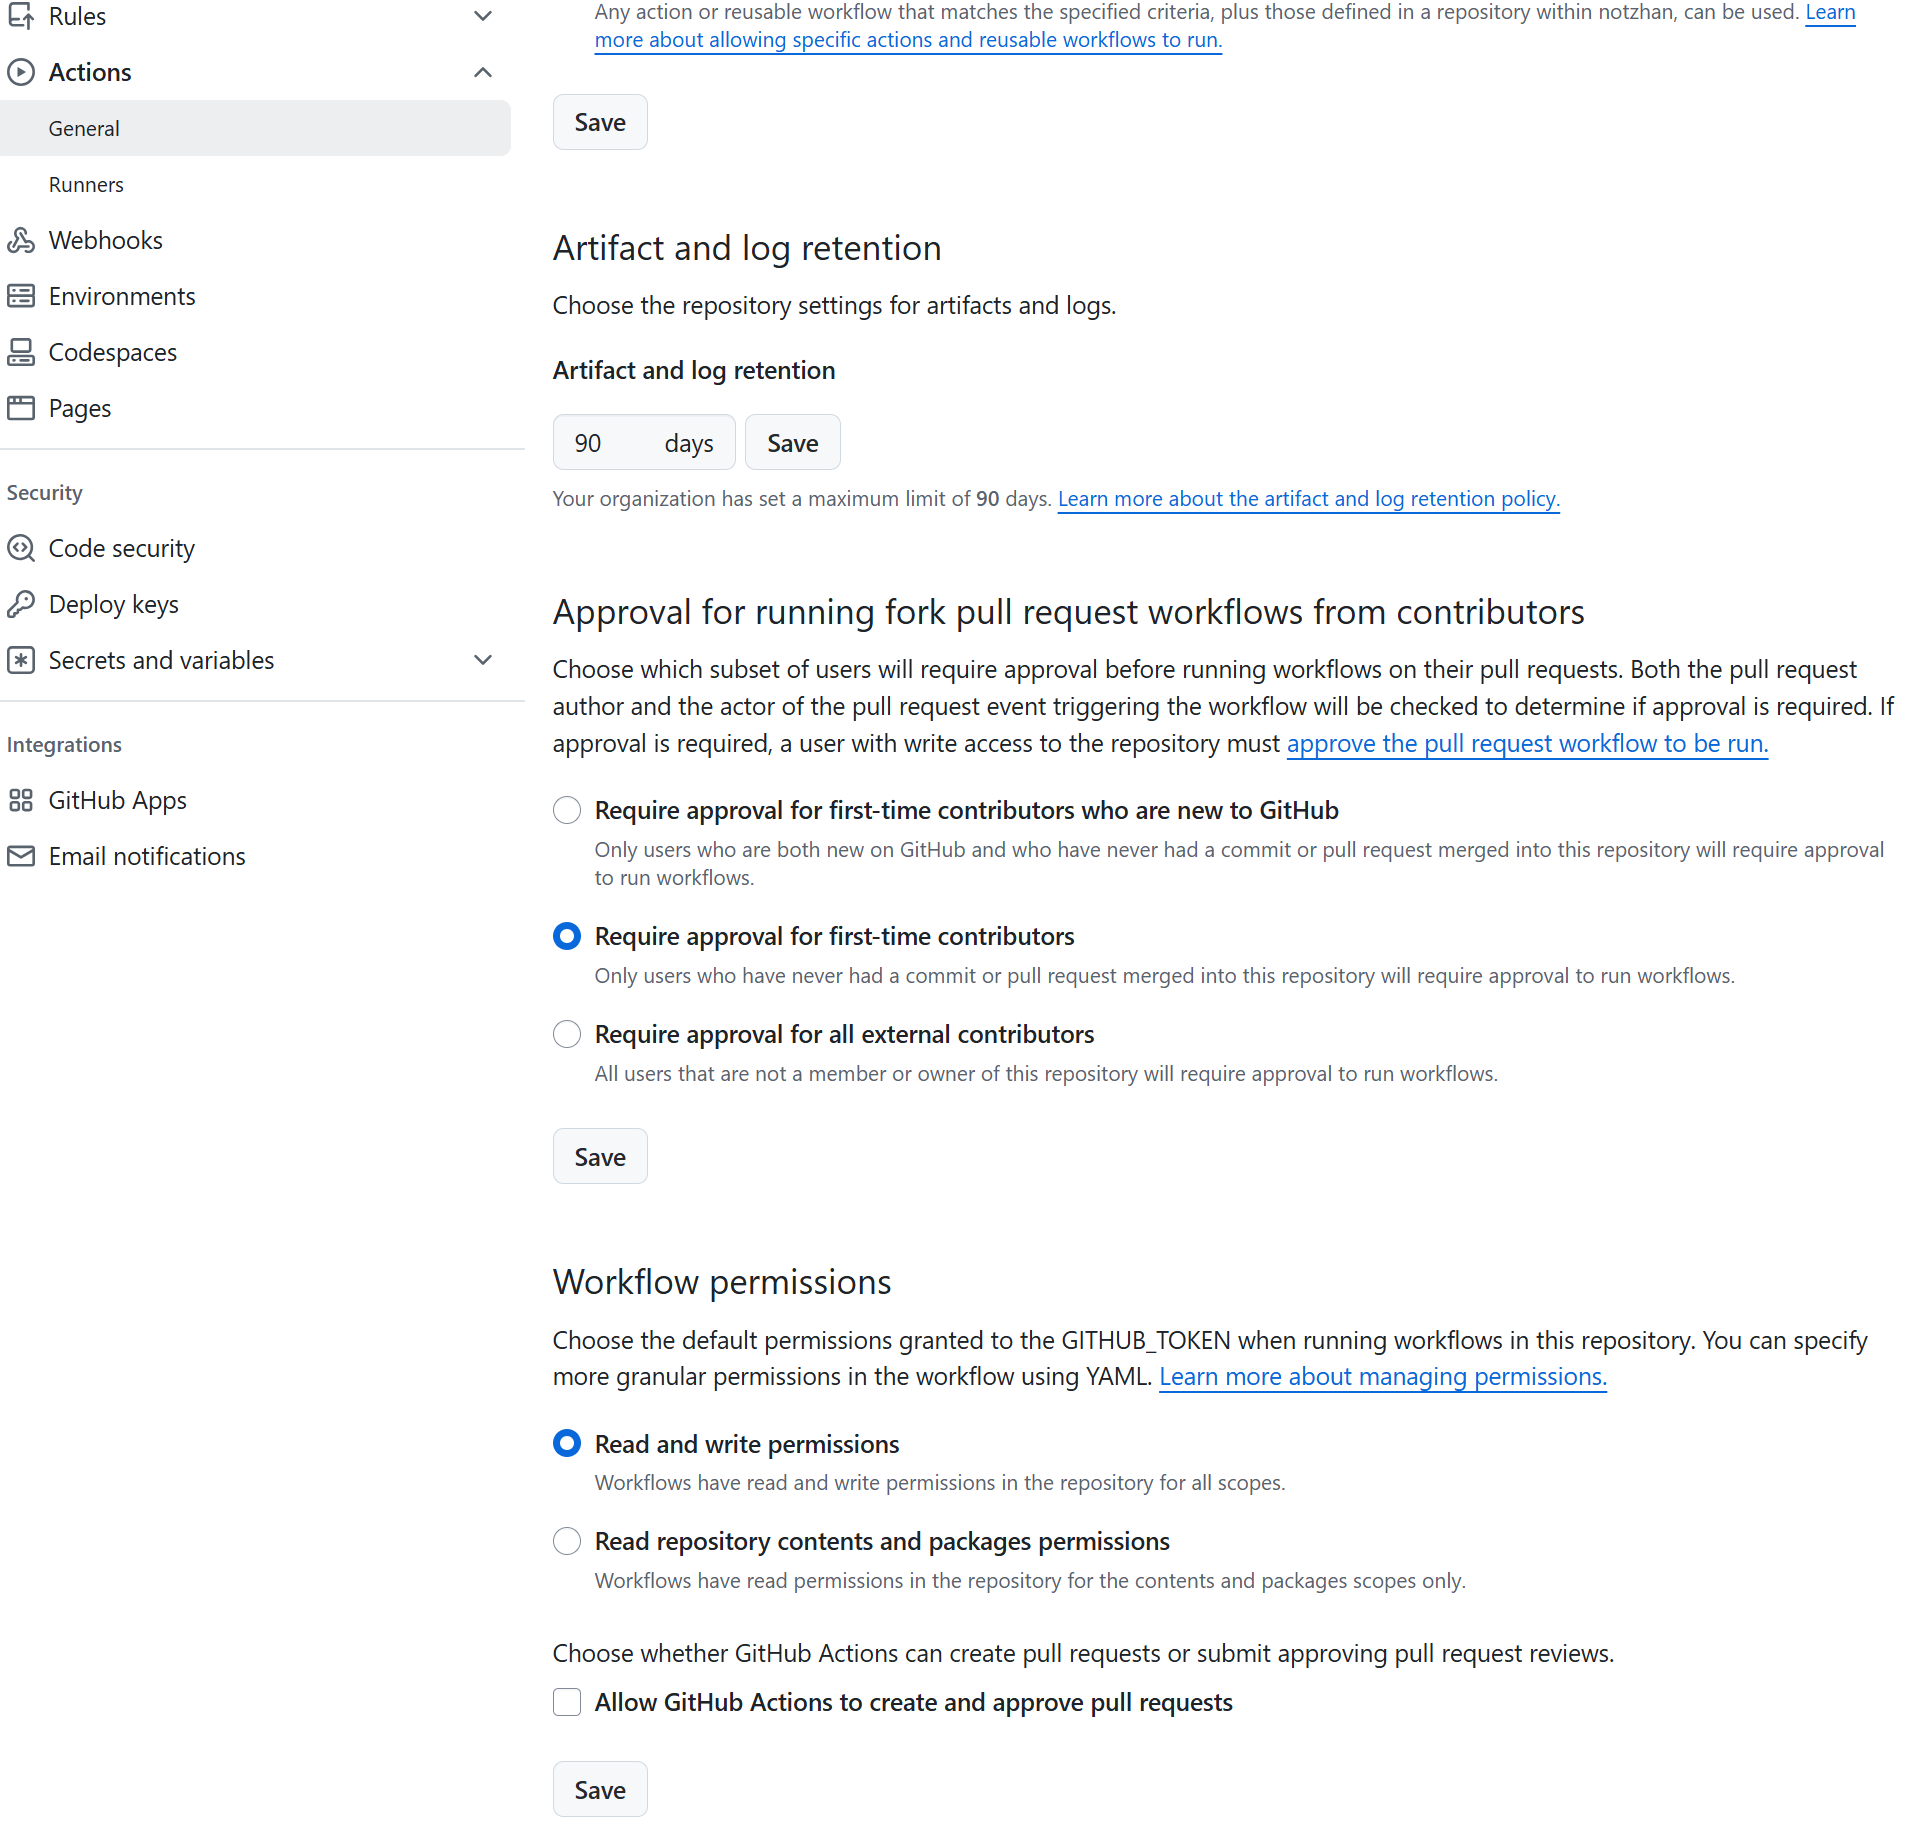
Setting - Code and automation - Action - General - Workflow permissions - Read and write permissions。
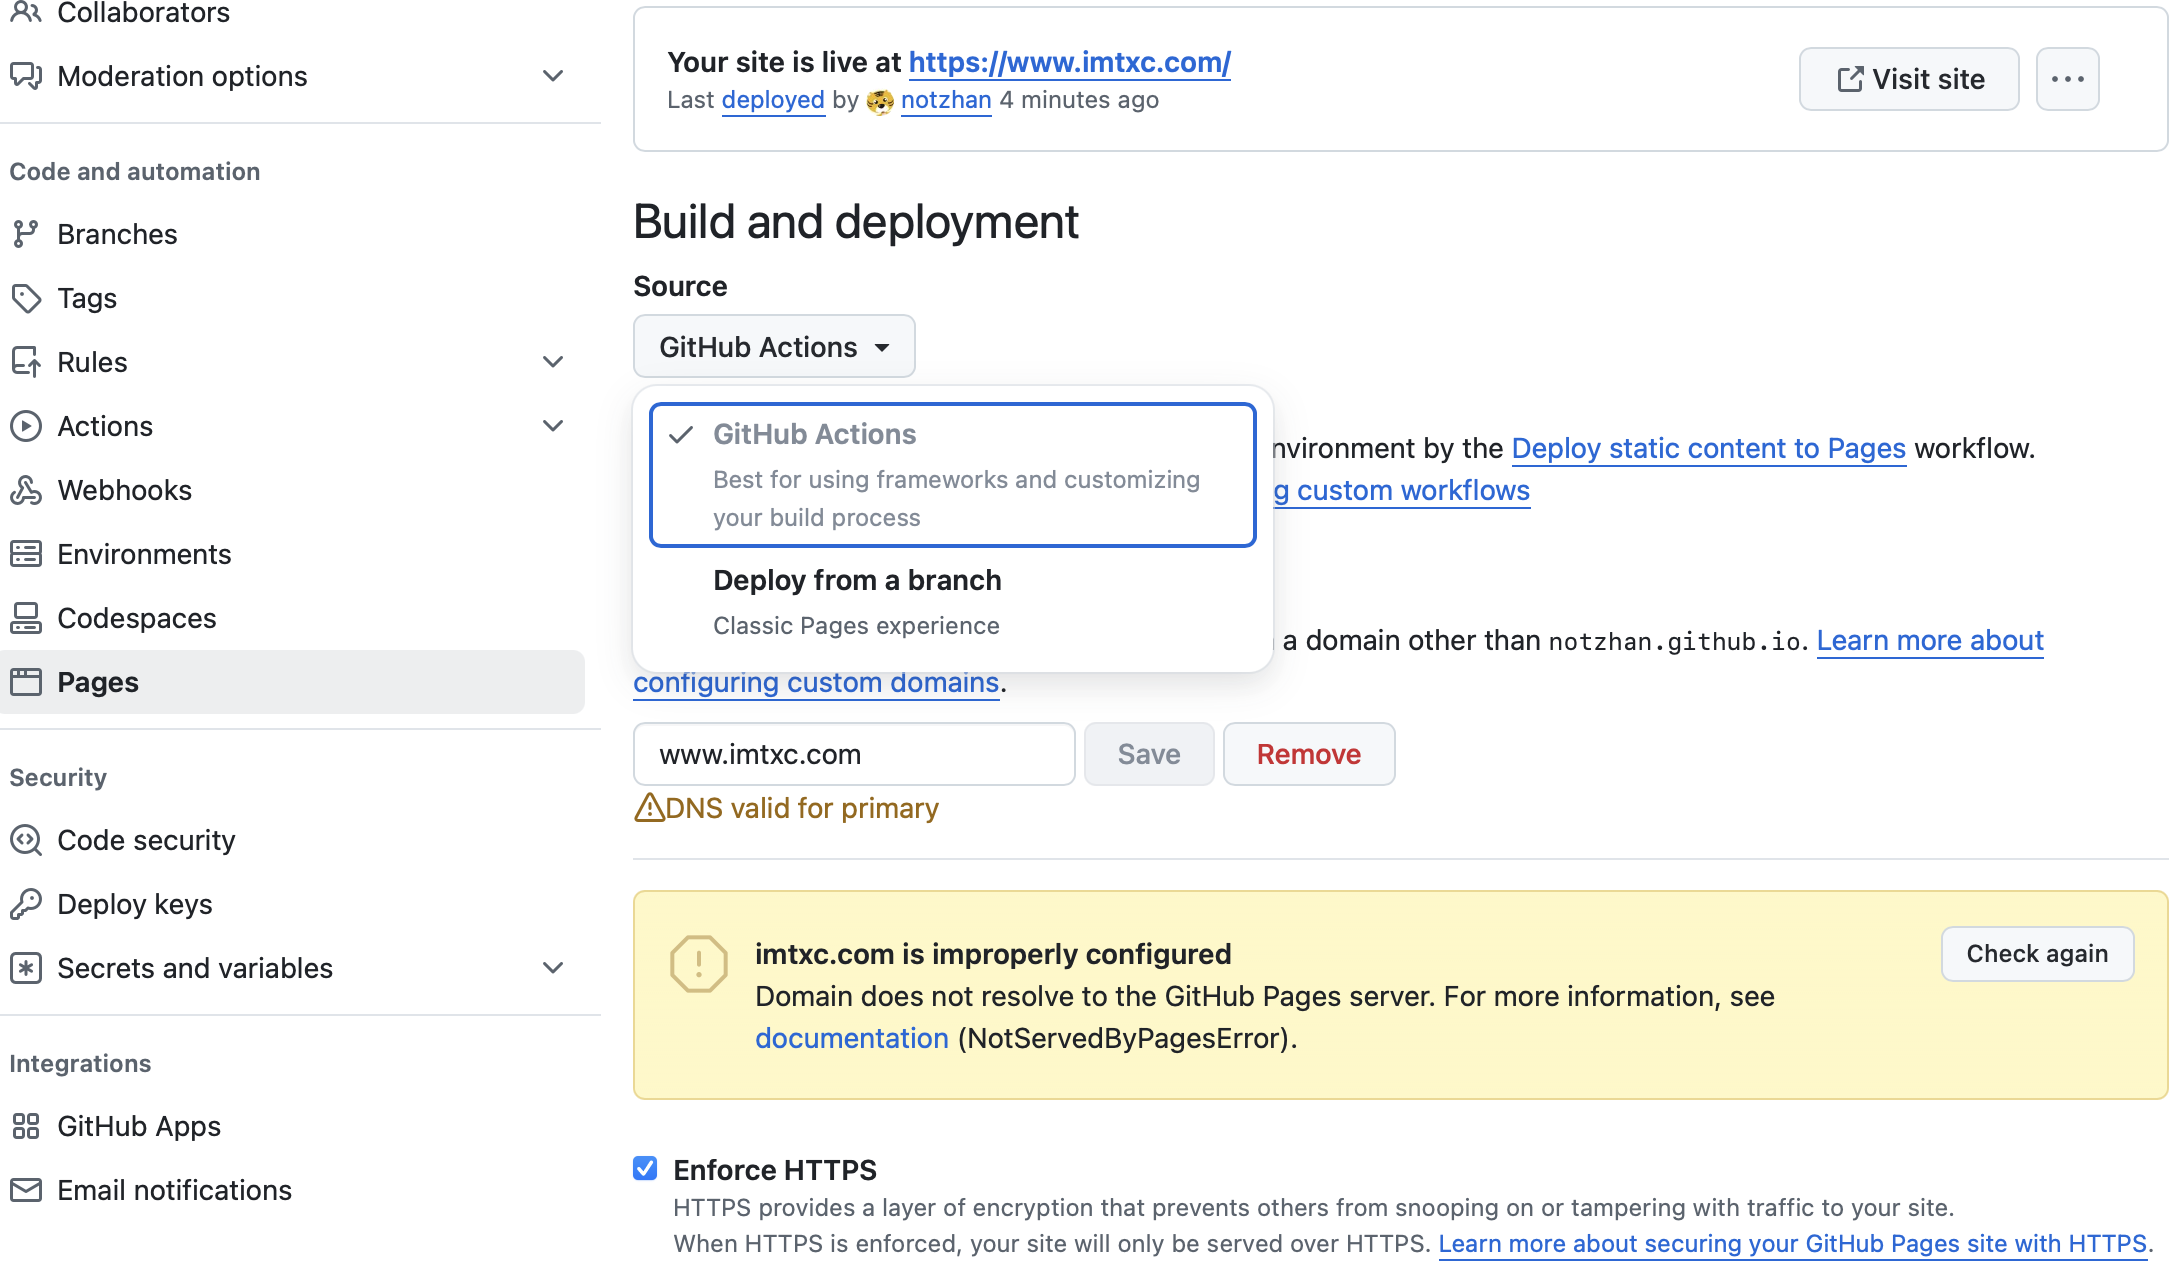
- Setting - Code and automation - Pages - Build and deployment - Source - Github Actions,如图
-
在博客仓库的
settings - secrets - actions中,创建一个名为 G_T 的 secret,值为上一步申请的 token -
在第四步同样的位置,创建两个 variables, 名称分别为
BASE_URL和BLOG_TITLE, 值为需要生成的 README.md 中的 H1 内容,
比如 "XXX BLOG" -
完成,在你的博客仓库中,创建一个 issue,issue 标题为博客文章标题,内容为文章正文,创建 issue 之后,会自动生成
post_issues下的 markdown 文件,同时更新仓库的README.md文件作为博客索引。自定义域名
-
在博客仓库的
Setting-Page-Custom domain中,填入你的域名,如www.yourblogdomain.com -
在你的 DNS 服务商配置中,增加一个 CNAME记录,名称为
www.yourblogdomain.com, 值为yourgithubusername.github.io, 切记,
这里唯一需要修改的是你的 github 用户名和域名。每新建一个issue, 然后在此https://github.com/briteming/nb/actions,github actions
Deploy static content to Pages。项目地址:https://github.com/notzhan/blog/
https://github.com/notzhan/blog/issues/2
https://github.com/briteming/nb
演示网站: https://briteming.github.io/nb/
此静态博客程序跟静态博客程序 Issue_Blog (静态博客程序 Issue_Blog)一样,发表的帖子并未按提交issue的时间顺序排列。 这是这种使用github actions的静态博客程序的通病。
No comments:
Post a Comment