Just make a new project directory and install Jigsaw using Composer
composer require tightenco/jigsaw
from https://jigsaw.tighten.com/
-----------------------------------
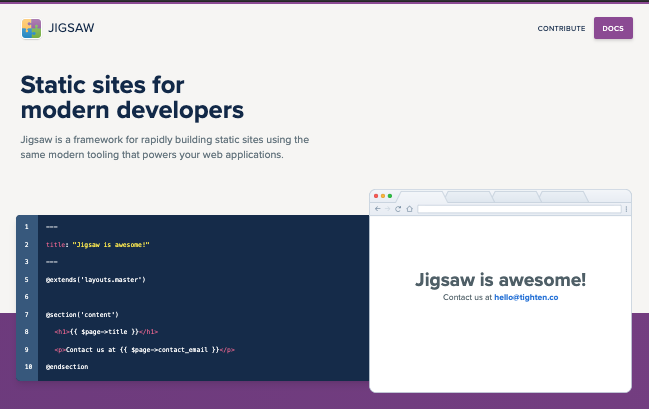
Simple static site generator with Laravel’s Blade.
jigsaw.tighten.comSimple static sites with Laravel's Blade.
For documentation, visit https://jigsaw.tighten.com/docs/installation/
from https://github.com/tighten/jigsaw
---------------------------------------------
Starter template for a blog, using Jigsaw by Tighten .
This is a starter template for creating a beautiful, customizable blog in Jigsaw with minimal effort. You’ll only have to change a few settings and you’re ready to go.
View a preview of the blog template.
After installing Jigsaw, run the following command from your project directory:
./vendor/bin/jigsaw init blogThis starter template includes samples of common page types, and comes pre-configured with:
- A fully responsive navigation bar
- Tailwind CSS, a utility CSS framework that allows you to customize your design without touching a line of CSS
- Purgecss to remove unused selectors from your CSS, resulting in smaller CSS files
- Syntax highlighting using highlight.js
- A script that automatically generates a
sitemap.xmlfile - A custom 404 page
- A component for accepting signups for a Mailchimp newsletter
- A sample contact form
- A search bar powered by Fuse.js and Alpine.js, which indexes your content automatically and requires zero configuration
As with all Jigsaw sites, configuration settings can be found in config.php;
you can update the variables in that file with settings specific to
your site. You can also add new configuration variables there to use
across your site; take a look at the Jigsaw documentation to learn more.
// config.php
return [
    'baseUrl' => 'https://my-awesome-jigsaw-site.com/',
    'production' => false,
    'siteName' => 'My Site',
    'siteDescription' => 'Give your blog a boost with Jigsaw.',
    ...
];Adding ContentTip: This configuration file is also where you’ll define any "collections" (for example, a collection of the contributors to your site, or a collection of blog posts organized by topic). Check out the official Jigsaw documentation to learn more.
You can write your content using a variety of file types. By default, this starter template expects your content to be located in the source/_posts/ folder.
The top of each content page contains a YAML header that specifies how it should be rendered. The title attribute is used to dynamically generate HTML title and OpenGraph tags for each page. The extends attribute defines which parent Blade layout this content file will render with (e.g. _layouts.post will render with source/_layouts/post.blade.php), and the section attribute defines the Blade "section" that expects this content to be placed into it.
---
extends: _layouts.post
section: content
title: Getting Started
date: 2022-08-02
description: Getting started with the Jigsaw blog starter template
cover_image: /assets/img/post-cover-image-2.png
featured: true
---Any assets that need to be compiled (such as JavaScript, Less, or Sass files) can be added to the source/_assets/ directory, and Laravel Mix will process them when running npm run dev or npm run prod. The processed assets will be stored in /source/assets/build/ (note there is no underscore on this second assets directory).
Then, when Jigsaw builds your site, the entire /source/assets/
directory containing your built files (and any other directories
containing static assets, such as images or fonts, that you choose to
store there) will be copied to the destination build folders (build_local, on your local machine).
Files that don't require processing (such as images and fonts) can be added directly to /source/assets/.
Read more about compiling assets in Jigsaw using Laravel Mix.
Building Your SiteNow that you’ve edited your configuration variables and know how to customize your styles and content, let’s build the site.
# build static files with Jigsaw
./vendor/bin/jigsaw build

# compile assets with Laravel Mix
# options: dev, prod
npm run dev
from https://github.com/tighten/jigsaw-blog-template
(https://github.com/tighten/jigsaw-docs-template)
(https://github.com/tighten/jigsaw-site)
(https://github.com/tighten/builtwithjigsaw,https://pdx.su/)
-------------------------------------------
Deploy your Jigsaw site with GitHub Actions
GoStatic can be used to host the output from your Jigsaw build process. The whole process only takes around a minute, with just 10 seconds needed to deploy and get a live URL via GoStatic!
What is Jigsaw?
 Jigsaw
is a simple static site generator, built in PHP and using Laravel's
blade templating system. You can write your content using standard HTML
templates or raw markdown, then run a build command to render your
content into HTML.
What are GitHub Actions?
GitHub Actions allow you to run your build commands in a containerized environment. You can trigger them on common github events such as push, pull_request or as a scheduled task using cron. Everything runs on GitHub's infrastructure, so there's nothing to pay unless you have very heavy usage.
How can I deploy my Jigsaw site using GitHub Actions?
Step 1 - Build
First we need to specify the environment, checkout our code, and then run our installation and build commands.
We are using the default ubuntu-latest environment, as this supports both PHP and NPM commands. The actions/checkout@v2 action moves our code into the container. We can then issue the composer install and npm install commands to get everything installed, just like you would on your machine. Finally, we issue the npm run production command which will build our Jigsaw site.
on: [push, pull_request]

jobs:
  example_job:
    runs-on: ubuntu-latest
    name: Deploy Jigsaw using GoStatic
    steps:
      - uses: actions/checkout@v2
      - name: Install Composer PHP dependencies
        run: composer install --no-ansi --no-interaction --no-scripts --no-suggest --no-progress --prefer-dist
      - name: Install NPM dependencies
        run: npm install
      - name: Build the site
        run: npm run production
Step 2 - Deploy
Using the GoStatic GitHub Action, we can easily deploy using just a few lines of code.
Set the source-dir parameter to match the output directory from your Jigsaw build. By default this will be ./build_production
You will also need to add your free GoStatic API token to the secrets tab on your GitHub repo. (GitHub Repo » Settings » Secrets)
      - name: Deploy
        id: deploy
        uses: DigitalSVN/GoStatic@v1.0
        with:
          api-token: ${{ secrets.GOSTATIC_API_TOKEN }}
          source-dir: './build_production'
Step 3 - Return the URL
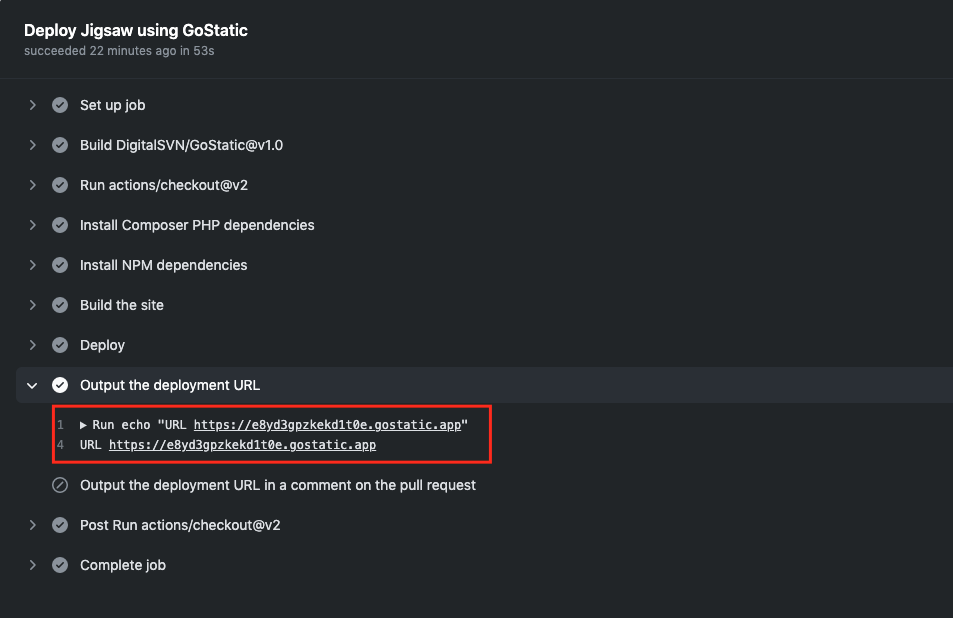
Below we return the URL so that it is visible on the GitHub action execution screen. You could do various things with the returned steps.deploy.outputs.url such as posting it to slack.
You can also automatically post the URL as a comment on a Pull Request.

      - name: Output the deployment URL
        run: echo "URL ${{ steps.deploy.outputs.url }}"

      - name: Output the deployment URL in a comment on the pull request
        uses: actions/github-script@0.3.0
        if: github.event_name == 'pull_request'
        with:
          github-token: ${{ secrets.GITHUB_TOKEN }}
          script: |
            const { issue: { number: issue_number }, repo: { owner, repo }  } = context;
            github.issues.createComment({ issue_number, owner, repo, body: 'URL ready:  ${{ steps.deploy.outputs.url }}' });
Full GitHub Action output
As you can see below, the entire process, build, deploy and returning the URL takes less than a minute, with the deployment step via GoStatic taking less than 10 seconds!

Full example code
You should be able to copy and paste the code below into a file called .git/workflows/deploy.yml, add your GoStatic API token to the secrets tab, and then push your code to trigger the GitHub Action
on: [push, pull_request]

jobs:
  example_job:
    runs-on: ubuntu-latest
    name: Deploy Jigsaw using GoStatic
    steps:
      - uses: actions/checkout@v2
      - name: Install Composer PHP dependencies
        run: composer install --no-ansi --no-interaction --no-scripts --no-suggest --no-progress --prefer-dist
      - name: Install NPM dependencies
        run: npm install
      - name: Build the site
        run: npm run production
      - name: Deploy
        id: deploy
        uses: DigitalSVN/GoStatic@v1.0
        with:
          api-token: ${{ secrets.GOSTATIC_API_TOKEN }}
          source-dir: './build_production'

      - name: Output the deployment URL
        run: echo "URL ${{ steps.deploy.outputs.url }}"

      - name: Output the deployment URL in a comment on the pull request
        uses: actions/github-script@0.3.0
        if: github.event_name == 'pull_request'
        with:
          github-token: ${{ secrets.GITHUB_TOKEN }}
          script: |
            const { issue: { number: issue_number }, repo: { owner, repo }  } = context;
            github.issues.createComment({ issue_number, owner, repo, body: 'URL ready:  ${{ steps.deploy.outputs.url }}' });
from https://www.gostaticapp.com/jigsaw-github-action


No comments:
Post a Comment