在linux vps上。
git clone https://github.com/jedisct1/dsvpn dsvpn-by-jedisct1
cd dsvpn-by-jedisct1
make
(会在当前目录下,生成可执行文件dsvpn)
systemctl enable dsvpn
服务器端搭建完成。
在客户机器mac上。
git clone https://github.com/jedisct1/dsvpn dsvpn-by-jedisct1
cd dsvpn-by-jedisct1
make
(会在当前目录下,生成可执行文件dsvpn)
从服务器上,下载vpn.key文件到当前目录。
WireGuard doesn't work over TCP.
GloryTun is excellent, but requires post-configuration and the maintained branch uses UDP.
I forgot about VTUN-libsodium. But it would have been too much complexity and attack surface for a simple use case.
OpenVPN is horribly difficult to set up.
Sshuttle is very nice and I've been using it a lot in the past, but it's not a VPN. It doesn't tunnel non-TCP traffic. It also requires a full Python install, which I'd rather avoid on my router.
Everything else I looked at was either too difficult to use, slow, bloated, didn't work on MacOS, didn't work on small devices, was complicated to cross-compile due to dependencies, wasn't maintained, or didn't feel secure.
TCP-over-TCP is not as bad as some documents describe. It works surprisingly well in practice, especially with modern congestion control algorithms (BBR). For traditional algorithms that rely on packet loss, DSVPN couples the inner and outer congestion controllers by lowering
from https://github.com/jedisct1/dsvpn
last updated: 20190810
Copy the key to both machines using a secure media, like ssh.
eg.
Using 10.8.0.254 as the VPN Server IP.
or you can copy it from here:
and then:
eg.
so it will apply routing rules to pass all the network traffic through the VPN.
Using 10.8.0.2 as the VPN Client IP.
or you can copy it from here:
and then:
git clone https://github.com/jedisct1/dsvpn dsvpn-by-jedisct1
cd dsvpn-by-jedisct1
make
(会在当前目录下,生成可执行文件dsvpn)
运行head -c 32 /dev/random | base64 会vpn.key文件。生成一个字符串。记住这个生成的字符串.然后把这个字符串保存为
./dsvpn server vpn.key auto 443
(此命令的意思是以server模式运行dsvpn并监听443端口.注意:根据https://github.com/jedisct1/dsvpn/issues/59,一定要监听443端口,这样得到的vpn才是加密连接。否则所得到的vpn连接不是加密连接,容易导致你的vps的IP被封)
不过此命令是运行在前台的,容易退出,我们可以利用systemd来把它运行为service.
nano /etc/systemd/system/dsvpn.service
其内容为:
[Unit]
After=network.target

[Service]
ExecStart=/root/dsvpn-by-jedisct1/dsvpn server /root/dsvpn-by-jedisct1/vpn.key auto 443
Restart=always

[Install]
WantedBy=multi-user.target
然后,运行:systemctl start dsvpn
systemctl enable dsvpn
服务器端搭建完成。
在客户机器mac上。
git clone https://github.com/jedisct1/dsvpn dsvpn-by-jedisct1
cd dsvpn-by-jedisct1
make
(会在当前目录下,生成可执行文件dsvpn)
从服务器上,下载vpn.key文件到当前目录。
sudo ./dsvpn client vpn.key vps-public-ip 443
会显示:
Interface: [utun1]
Trying to reconnect
Connecting to vps-public-ip:443...
add host vps-public-ip: gateway 192.168.1.1
add net 0: gateway 192.168.192.254
add net 128: gateway 192.168.192.254
add net 0000::/1: gateway 64:ff9b::192.168.192.254
add net 8000::/1: gateway 64:ff9b::192.168.192.254
Connected
至此,你的整台mac机器就连上了vpn.
上述客户端命令已集成运行了路由命令,所以无需再另外运行路由命令。
sudo networksetup -setdnsservers "Wi-Fi" 127.0.0.1
sudo dns-over-tls-forwarder -a 127.0.0.1:53 -s urdomain.com:853@vps-public-ip

(dns-over-tls-forwarder的用法见https://briteming.blogspot.com/2020/01/unbounddns-over-tls.html)
这样,就解决了dns污染问题。于是,就可以用此vpn程序访问任何网站了。
要断开vpn,按Ctrl + C 项目地址:https://github.com/jedisct1/dsvpn
https://github.com/jedisct1/dsvpn/issues/59
使用openvz vps时,客户端可能连不上服务器。建议使用kvm vps.
----------------------------------------------------------
Advanced configuration
dsvpn   "server"

        |"auto"
        |"auto"
        |"auto"
        |"auto"
        "auto"
        |"auto"

dsvpn   "client"


        |"auto"
        |"auto"
        |"auto"
        |"auto"
        |"auto"
server|client: useserveron the server, andclienton clients.vpn.key).auto.autowill use443.autohere.192.168.192.254for the server, and192.168.192.1for the client. These values will be used if you putautofor the local and remote tunnel IPs."auto".netstat -rnwill tell you (gateway).
auto, they don't have to be specified.Related projects
- Robert Debock maintains an Ansible role for DSVPN
- OpenMPTCProuter is an OpenWRT-based router OS that supports DSVPN
Why
I needed a VPN that works in an environment where only TCP/80 and TCP/443 are open.WireGuard doesn't work over TCP.
GloryTun is excellent, but requires post-configuration and the maintained branch uses UDP.
I forgot about VTUN-libsodium. But it would have been too much complexity and attack surface for a simple use case.
OpenVPN is horribly difficult to set up.
Sshuttle is very nice and I've been using it a lot in the past, but it's not a VPN. It doesn't tunnel non-TCP traffic. It also requires a full Python install, which I'd rather avoid on my router.
Everything else I looked at was either too difficult to use, slow, bloated, didn't work on MacOS, didn't work on small devices, was complicated to cross-compile due to dependencies, wasn't maintained, or didn't feel secure.
TCP-over-TCP is not as bad as some documents describe. It works surprisingly well in practice, especially with modern congestion control algorithms (BBR). For traditional algorithms that rely on packet loss, DSVPN couples the inner and outer congestion controllers by lowering
TCP_NOTSENT_LOWAT and dropping packets when congestion is detected at the outer layer.Cryptography
The cryptographic primitives used in DSVPN are available as a standalone project: Charm.from https://github.com/jedisct1/dsvpn
----------------------------
DSVPN is designed to address the most common usecase for using a VPN。Works with TCP, blocks IPv6 leaks, redirect-gateway out-of-the-box!
last updated: 20190810
- iptables rules example added
- change vpn.key to dsvpn.key
- add base64 example for easy copy/transfer across machines
dsvpn binary
I keep a personal gitlab CI for dsvpn here: DSVPNCompile
Notes on the latestubuntu:18.04 docker image:# git clone https://github.com/jedisct1/dsvpn.git
Cloning into 'dsvpn'...
remote: Enumerating objects: 88, done.
remote: Counting objects: 100% (88/88), done.
remote: Compressing objects: 100% (59/59), done.
remote: Total 478 (delta 47), reused 65 (delta 29), pack-reused 390
Receiving objects: 100% (478/478), 93.24 KiB | 593.00 KiB/s, done.
Resolving deltas: 100% (311/311), done.
# cd dsvpn
# ls
LICENSE Makefile README.md include logo.png src
# make
cc -march=native -Ofast -Wall -W -Wshadow -Wmissing-prototypes -Iinclude -o dsvpn src/dsvpn.c src/charm.c src/os.c
strip dsvpn
# ldd dsvpn
linux-vdso.so.1 (0x00007ffd409ba000)
libc.so.6 => /lib/x86_64-linux-gnu/libc.so.6 (0x00007fd78480b000)
/lib64/ld-linux-x86-64.so.2 (0x00007fd784e03000)
# ls -l dsvpn
-rwxr-xr-x 1 root root 26840 Jul 20 15:51 dsvpn
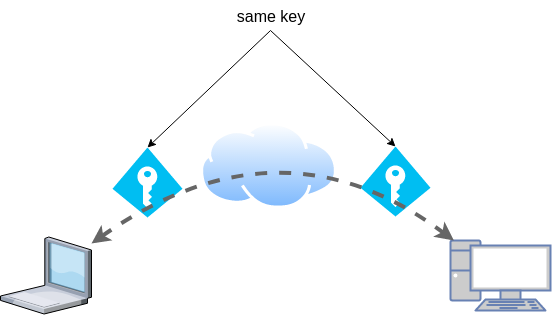
Just copy the dsvpn binary to your machines.Symmetric Key
dsvpn uses symmetric-key cryptography, that means both machines uses the same encyrpted key.dd if=/dev/urandom of=dsvpn.key count=1 bs=32Copy the key to both machines using a secure media, like ssh.
base64
An easy way is to convert key to base64cat dsvpn.key | base64ZqMa31qBLrfjjNUfhGj8ADgzmo8+FqlyTNJPBzk/x4k=
on the other machine:echo ZqMa31qBLrfjjNUfhGj8ADgzmo8+FqlyTNJPBzk/x4k= | base64 -d > dsvpn.keyServer
It is very easy to run dsvpn in server mode:eg.
dsvpn server dsvpn.key autoInterface: [tun0]
net.ipv4.ip_forward = 1
Listening to *:443
ip addr show tun04: tun0: mtu 9000 qdisc fq_codel state UNKNOWN group default qlen 500
link/none
inet 192.168.192.254 peer 192.168.192.1/32 scope global tun0
valid_lft forever preferred_lft forever
I prefer to use 10.8.0.0/24 CIDR in my VPNs, so in my VPN setup:dsvpn server /root/dsvpn.key auto 443 auto 10.8.0.254 10.8.0.2Using 10.8.0.254 as the VPN Server IP.
systemd service unit - server
I’ve created a simple systemd script dsvpn_server.serviceor you can copy it from here:
/etc/systemd/system/dsvpn.service[Unit] Description=Dead Simple VPN - Server [Service] ExecStart=/usr/local/bin/dsvpn server /root/dsvpn.key auto 443 auto 10.8.0.254 10.8.0.2 Restart=always RestartSec=20 [Install] WantedBy=network.target
and then:
systemctl enable dsvpn.service systemctl start dsvpn.service
Client
It is also easy to run dsvpn in client mode:eg.
dsvpn client dsvpn.key 93.184.216.34# dsvpn client dsvpn.key 93.184.216.34
Interface: [tun0]
Trying to reconnect
Connecting to 93.184.216.34:443...
net.ipv4.tcp_congestion_control = bbr
Connected
ip addr show tun04: tun0: mtu 9000 qdisc fq_codel state UNKNOWN group default qlen 500
link/none
inet 192.168.192.1 peer 192.168.192.254/32 scope global tun0
valid_lft forever preferred_lft forever
dsvpn works in redict-gateway mode,so it will apply routing rules to pass all the network traffic through the VPN.
ip route list0.0.0.0/1 via 192.168.192.254 dev tun0
default via 192.168.122.1 dev eth0 proto static
93.184.216.34 via 192.168.122.1 dev eth0
128.0.0.0/1 via 192.168.192.254 dev tun0
192.168.122.0/24 dev eth0 proto kernel scope link src 192.168.122.69
192.168.192.254 dev tun0 proto kernel scope link src 192.168.192.1
As I mentioned above, I prefer to use 10.8.0.0/24 CIDR in my VPNs, so in my VPN client:dsvpn client /root/dsvpn.key 93.184.216.34 443 auto 10.8.0.2 10.8.0.254Using 10.8.0.2 as the VPN Client IP.
ip addr show tun011: tun0: mtu 9000 qdisc fq_codel state UNKNOWN group default qlen 500
link/none
inet 10.8.0.2 peer 10.8.0.254/32 scope global tun0
valid_lft forever preferred_lft forever
systemd service unit - client
I’ve also created a simple systemd script for the client dsvpn_client.serviceor you can copy it from here:
/etc/systemd/system/dsvpn.service[Unit] Description=Dead Simple VPN - Client [Service] ExecStart=/usr/local/bin/dsvpn client /root/dsvpn.key 93.184.216.34 443 auto 10.8.0.2 10.8.0.254 Restart=always RestartSec=20 [Install] WantedBy=network.target
and then:
systemctl enable dsvpn.service systemctl start dsvpn.servicefirewall
It is important to protect your traffic from network leaks. That mean, sometimes, we do not want our network traffic to pass through our provider if the vpn server/client went down. To prevent any network leak, here is an example of iptables rules for a virtual machine:# Empty iptables rule file
*filter
:INPUT ACCEPT [0:0]
:FORWARD ACCEPT [0:0]
:OUTPUT ACCEPT [0:0]
-A INPUT -i lo -j ACCEPT
-A INPUT -m conntrack --ctstate RELATED,ESTABLISHED -j ACCEPT
-A INPUT -m conntrack --ctstate INVALID -j DROP
-A INPUT -p icmp --icmp-type 8 -m conntrack --ctstate NEW -j ACCEPT
# LibVirt
-A INPUT -i eth0 -s 192.168.122.0/24 -j ACCEPT
# Reject incoming traffic
-A INPUT -j REJECT
# DSVPN
-A OUTPUT -p tcp -m tcp -o eth0 -d 93.184.216.34 --dport 443 -j ACCEPT
# LibVirt
-A OUTPUT -o eth0 -d 192.168.122.0/24 -j ACCEPT
# Allow tun
-A OUTPUT -o tun+ -j ACCEPT
# Reject outgoing traffic
-A OUTPUT -p tcp -j REJECT --reject-with tcp-reset
-A OUTPUT -p udp -j REJECT --reject-with icmp-port-unreachable
COMMITfrom https://balaskas.gr/blog/2019/07/20/a-dead-simple-vpn/ -----DSVPN- 简单的 VPN 服务
详细介绍
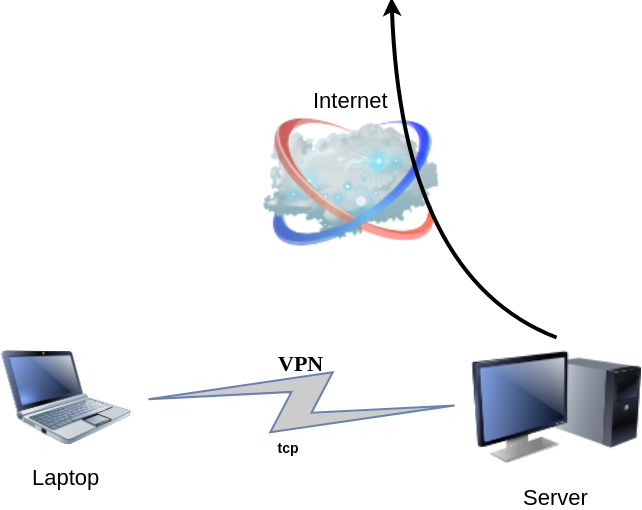
DSVPN 是一个超级简单的 VPN 服务,旨在解决使用VPN的最常见用例:
[客户端设备] ----(不受信任/受限制的网络)---- [vpn服务器] ---- [互联网]
特征:
- 在TCP上运行。 几乎无处不在,包括只有TCP / 443开放或可靠的公共WiFi。
- 仅使用现代加密技术,并通过正式验证的实现。
- 低而恒定的内存占用。 不执行任何堆内存分配。
- 小(~25 KB),具有同样小巧且可读的代码库。 没有外部依赖。
- 开箱即用。 没有糟糕的文档可读。 没有配置文件。 没有后期配置。 在服务器上运行单行命令,客户端上的类似命令就完成了。 没有防火墙和路由规则手动搞乱。
- 适用于Linux,MacOS和OpenBSD。 添加对其他操作系统的支持是微不足道的。
- 如果网络没有改变,重新连接之间不会泄漏。 阻止客户端上的IPv6以防止IPv6泄漏。
No comments:
Post a Comment