Open and cheap DIY IP-KVM based on Raspberry Pi.
https://pikvm.org/
Open and cheap DIY IP-KVM based on Raspberry Pi

A very simple and fully functional Raspberry Pi-based KVM (Keyboard-Video-Mouse) over IP that you can make with your own hands. This device helps to manage servers or workstations remotely, regardless of the health of the operating system or whether one is installed. You can fix any problem, configure the BIOS, and even reinstall the OS using the virtual CD-ROM or Flash Drive.
The website: pikvm.org. Also check out the documentation and join to the Discord Community Chat for news, questions and support!
| Web UI |
|---|
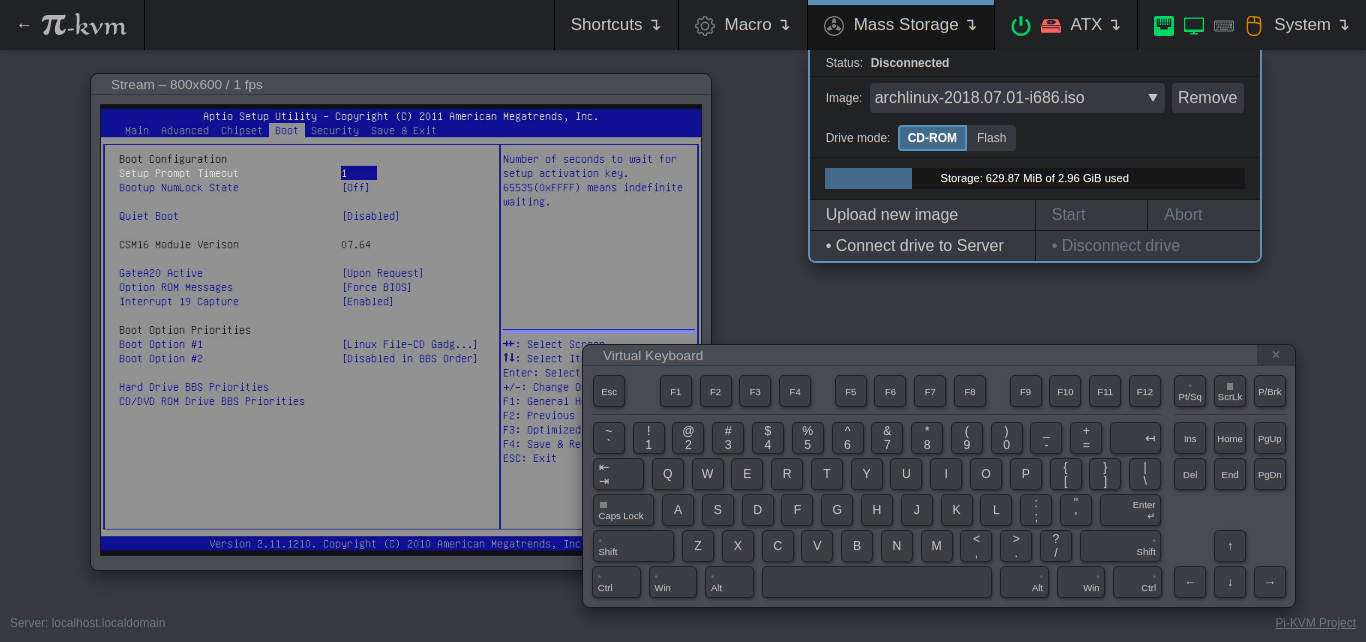 |
Features
- Supported Raspberry Pi 2, 3, 4, Zero2W, ZeroW has reached EOL and will no longer recieve updates;
- FullHD video using advanced HDMI-to-CSI bridge or USB dongle;
- Extra low video latency with MJPEG or H.264 / WebRTC (for CSI bridge);
- Bootable Virtual CD-ROM and Flash Drive;
- USB Keyboard and mouse (with leds and the wheel), PS/2 keyboard, Bluetooth HID;
- Control the server power using ATX functions;
- Access via Web UI or VNC;
- Ability to use IPMI BMC, IPMI SoL, Redfish and Wake-on-LAN to control the server;
- The ready-made OS with read-only filesystem;
- Extensible authorization and HTTPS out of the box;
- Health monitoring of the Pi;
- Control GPIO ports and USB relays;
- It only costs between $30 and $100 for parts!
- 100% Open Source!
More indepth details about the PiKVM features
DIY Getting Started
Required hardware
PiKVM supports several different hardware configurations, referred to as platforms. Now available: v2 and v0.
- Recommended: v2 is the most modern implementation for Raspberry Pi 4, ZeroW and Zero2W supporting all of the features of PiKVM including the Mass Storage Drive. For Raspberry Pi 4 and Zero2W (not for ZeroW), there is support for H.264 video.. It's also the easiest to make.
- v0 was designed to work with Raspberry Pi 2 and 3 that do not have OTG and requires a few more components for a basic implementation. It also does not support the Mass Storage Drive feature.
Hardware for v2
Raspberry Pi board:
- Recommended: Raspberry Pi 4 (2 GB model is enough) for the best performance. However, the 1Gb models will also work.
- ... or Raspberry Pi Zero2W (no ethernet).
- ... or Raspberry Pi ZeroW (slower alternative, no ethernet).
MicroSD card (min 16 GB recommended).
USB-A 3A charger (female socket) or official rpi recommended power supply.
Video capture device:
- Recommended: HDMI to CSI-2 bridge based on TC358743 - low latency, more reliable, H.264 video.
- ... or HDMI to USB dongle (not available for ZeroW and Zero2W) - high latency >200ms, not very reliable), H.264 is not supported.
Only for Raspberry Pi 4: parts for Y-splitter cable (one variant at your choice):
❗ Variant #1❗ : (No mod solution - Amazon) Y cable with power blocker ends.❗ Variant #2❗ : DIY for soldering or twist.❗ Variant #3❗ : Ready-made using USB-micro splitter.❗ Variant #4❗ : Ready-made using USB-C splitter.
Only for Raspberry Pi ZeroW and Zero2W:
- 2x USB A-to-micro cables (male-male, for power and keyboard & mouse emulator). A power splitter OR a modded cable is required for this 2x usb configuration. 1x USB A-to-Micro is ONLY needed for direct connection to the target.
- 1x Raspberry Pi Zero Camera Cable (if using HDMI to CSI-2 Bridge, but not compatible with Auvidea B101, check pinout).
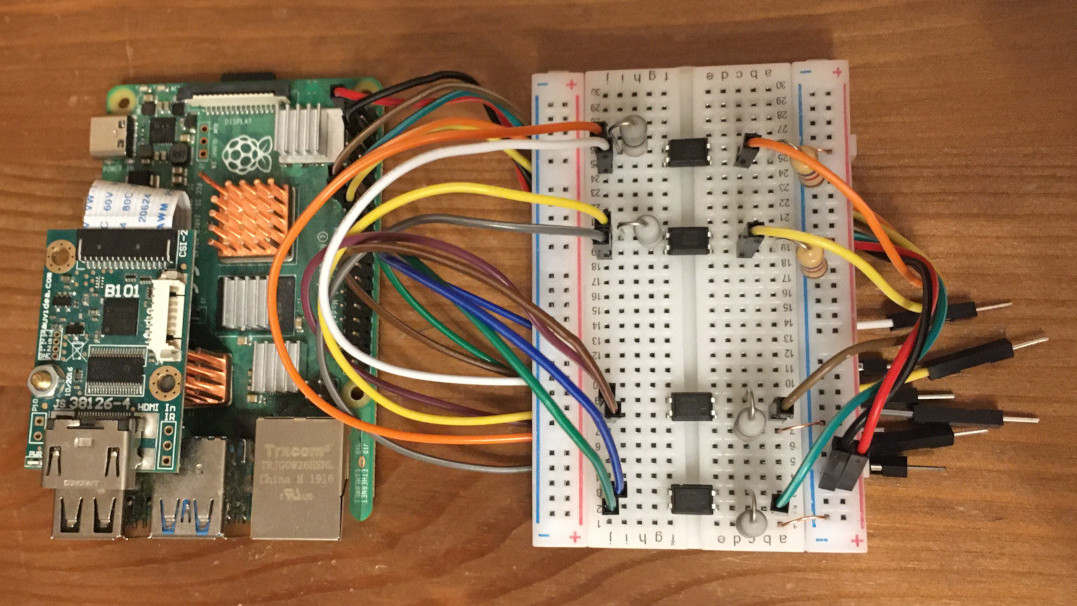
For ATX control (optional):
- 4x MOSFET relays OMRON G3VM-61A1.
- 4x 390 Ohm resistors.
- 2x 4.7k Ohm resistors.
- A breadboard and wires.
A few words about HDMI-USB dongle (H.264 is NOT officially supported at this time)
The dongle is completely supported and PiKVM works great with it. But it has some disadvantages compared with recommended HDMI-CSI bridge: USB gives a lot of latency (200ms vs 100ms for MJPEG) and it doesn't support stream compression control (you won't be able to use PiKVM in a place with a poor internet connection). There is no H.264 support at the moment. It also cannot automatically detect screen resolution. All this is caused by the hardware limitations of the dongle itself. In addition, some users report hardware problems: the dongle may not work in the BIOS or simply stop working after a while. It's a black box, and no one knows what's inside it. If you have problems with it, it will not be possible to fix them.
Hardware for v0
- Raspberry Pi 2 or 3.
- MicroSD card (8 GB is enough).
- USB-A 3A charger (female socket) or power supply.
- For keyboard & mouse emulator (HID):
- Arduino Pro Micro (based on an ATMega32u4).
- Logic level shifter.
- 1x NPN transistor (almost any NPN transistor: 2n2222 or similar).
- 1x 390 Ohm resistor.
- A breadboard and wires.
- 2x USB A-to-micro cables (male-male, for power and HID).
- HDMI capture device: see v2 description.
- ATX control (optional): see v2 description.
Addition
- If you want to capture VGA from your server instead of HDMI, buy the VGA-to-HDMI converter.
- PiKVM can be powered using PoE, but it is not recommend to use the official PoE HAT: it is unreliable and not compatible with the HDMI bridge. Use any other PoE hat without an I2C fan controller.
- Don't use random relay modules or random optocouplers! Some relays or optocouplers may not be sensitive enough for the Raspberry Pi, some others may be low-level controlled. Either use relays that are activated by a high logic level, or follow the design provided and buy an OMRON. See details here.
How to set up the device can be seen from here
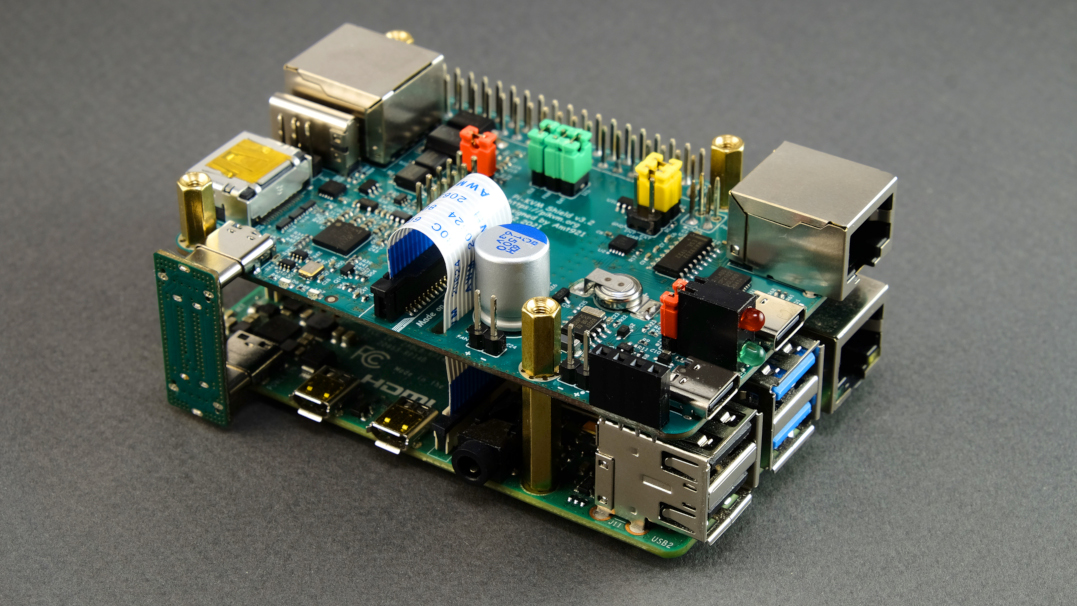
PiKVM v3 HAT
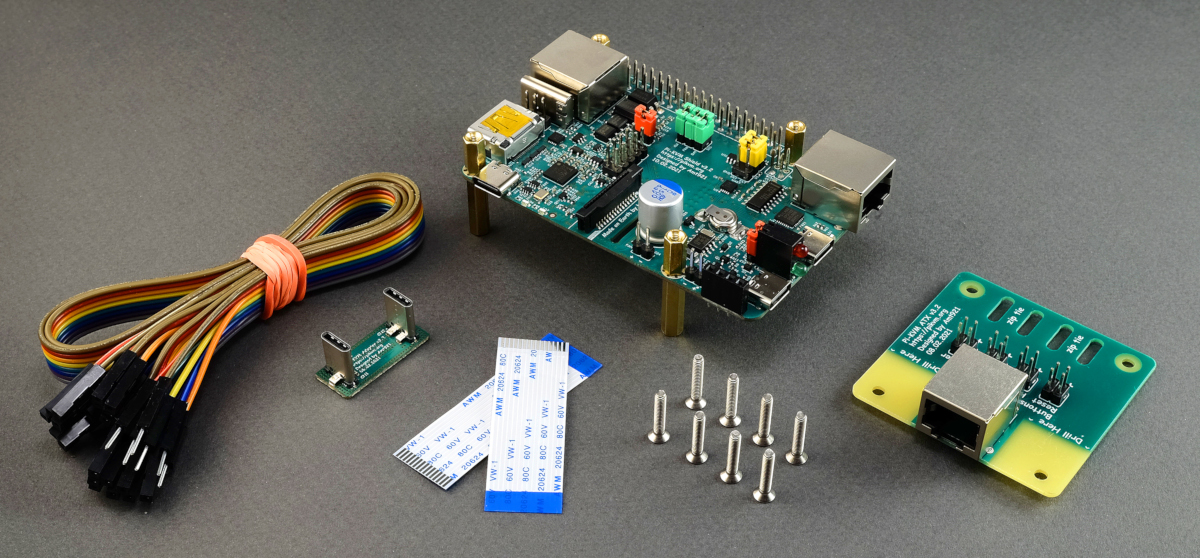
We have developed our own HAT for the Raspberry Pi 4.
>>> Buy PiKVM v3 HAT right now! <<<
>>> PiKVM v3 HAT User Guide <<<
- HDMI video capture for extra low latency with MJPEG or H.264/WebRTC (1080p 50Hz max).
- HDMI audio capture (supported by hardware, software work in progress).
- USB keyboard & mouse, bootable Virtual CD-ROM & Flash Drive;
- Ability to simulate "removal and insertion" for USB.
- Onboard ATX controller to manage the server's power.
- PWM fan controller.
- A real-time clock for accurate logging.
- CISCO-style and USB serial console port (to manage PiKVM OS or to connect the server).
- Optional OLED screen to display network status or other desired information.
- No need for soldering or breadboarding. It's a ready-made, reliable board which you can use yourself or provide to your clients.
Watch the video:
History:
Setting up the hardware
Connecting the video capture
For the HDMI-CSI bridge
❗ Click to show the instructions❗
For the HDMI-USB dongle
❗ Click to show the instructions❗
Setting up the v2
❗ Click to show the instructions❗
Setting up the v0
❗ Click to show the instructions❗
The final steps
Carefully read the "First steps" guide - how to find a device on the network, how to log in there, change passwords, and so on. Follow the steps described there and come back here.
V0 only: flash the Arduino HID.
Learn about the basics of working with PiKVM and CHANGE THE PASSWORDS
Note for the HDMI-USB dongle:
❗ Click to show❗ If you are a happy PiKVM v3 HAT user then we have a special guide for you.
Explore the features of PiKVM using the documentation's table of contents.
Configure access to PiKVM from the Internet using port forwarding or Tailscale VPN.
If you encounter a problem, take a look at the FAQ, but if nothing helped, contact our Discord chat - experienced users and the PiKVM team will definitely help you.
Happy using of PiKVM :)
Donate
This project is developed by Open Source enthusiasts. If you find PiKVM useful or it has saved you a long trip to check on an unresponsive server, you can support the lead developer by donating a few dollars via Patreon or PayPal. With this money, he will be able to buy new hardware (Raspberry Pi boards and other components) to test and maintain various configurations of PiKVM, and generally devote significantly more time to the project. At the bottom of this page are the names of all the people who have helped this project develop with their donations. Our gratitude knows no bounds!
If you wish to use PiKVM in production, we accept orders to modify it for your needs or implement custom features you require. Contact us via live chat or email the lead developer at: mdevaev@gmail.com
from https://github.com/pikvm/pikvm
No comments:
Post a Comment